Page 2 of 3
Re: Restoration of Boycey!
Posted: 13 Apr 2014, 20:56
by Funbus
I've bought some metal and had my first attempt welding
Doesn't look to shabby for first try. Atleast you can't see it!
Re: Restoration of Boycey!
Posted: 13 Apr 2014, 21:25
by Plasticman
you can see it if you took a bliddy pick before

only joking. steady and methodical , just replace the way it was built and it will be easier
mm

Re: Restoration of Boycey!
Posted: 14 Apr 2014, 13:38
by maslan
How did it go? I need to do mine. DO you recommend just doing a colour all over rather than just touch ups? I'm having a couple of new panels fitted but the paint job is really bad already on my van.
What steps did you take in the prep?
I'M A NOVICE. sorry for all the questions

just don't want to balls anything up.
Re: Restoration of Boycey!
Posted: 19 Apr 2014, 21:16
by Funbus
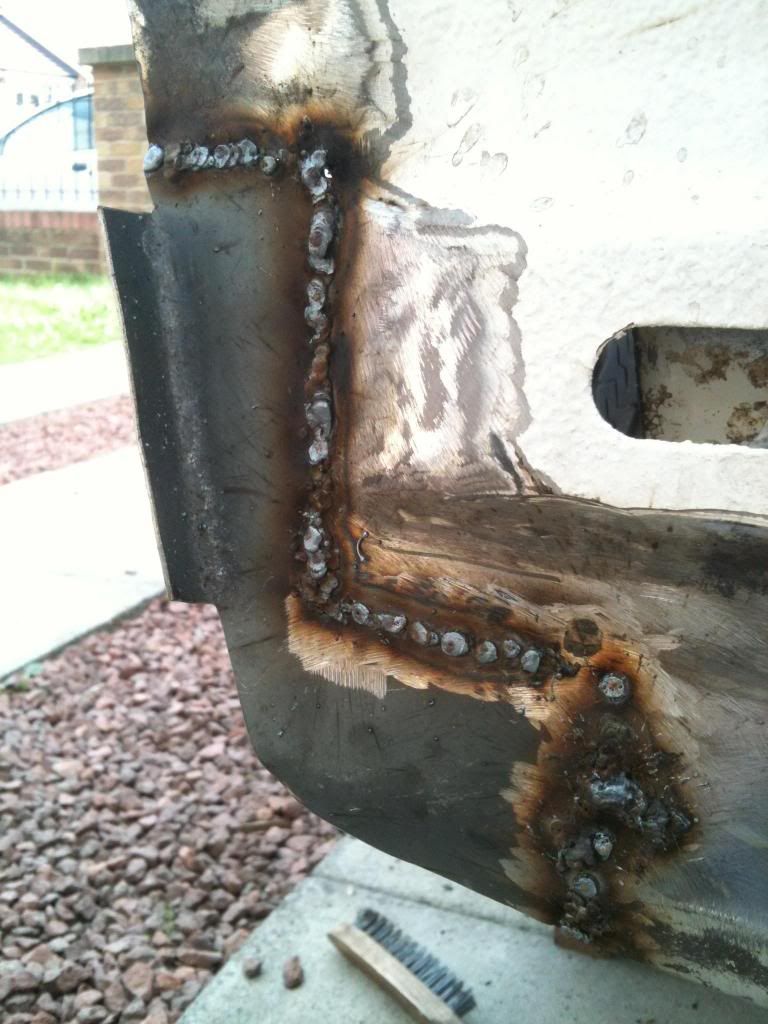
Bit more done with some help from my brother.
This is the first attempt at welding before grinding back
Re: Restoration of Boycey!
Posted: 19 Apr 2014, 21:21
by Funbus
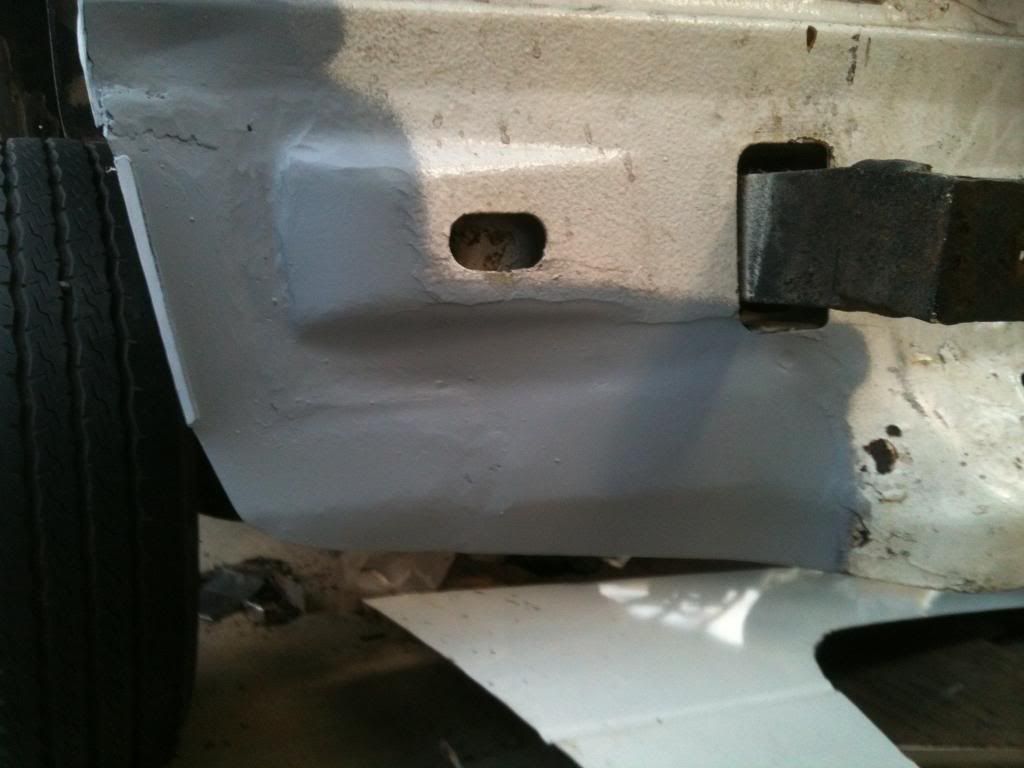
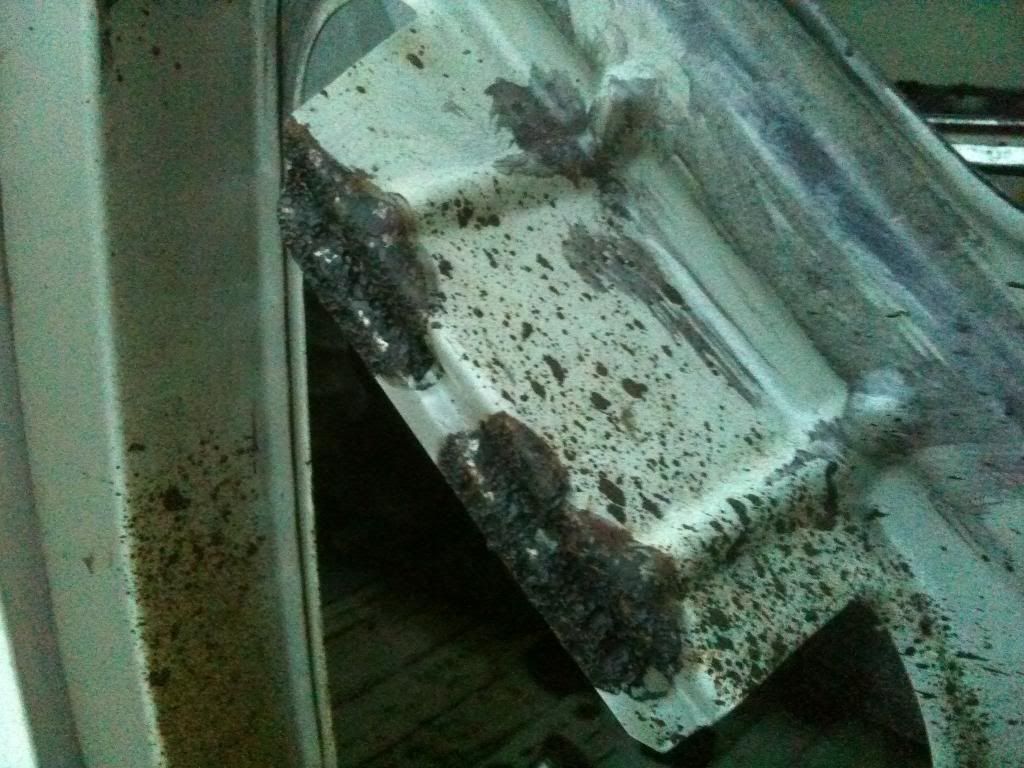
And the rear corner is sorted. New bottom panel. Bottom 4 inch of rear panel removed, cleaned, and new edges put on before being refitted.
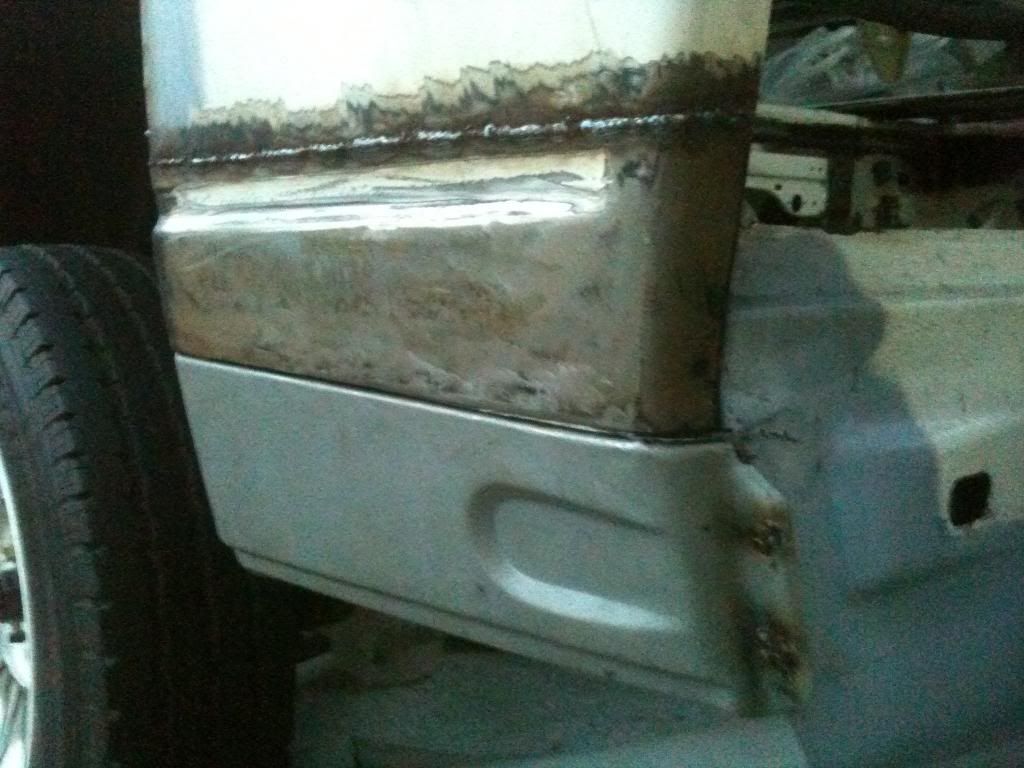
The battery tray has had a new 3 inch of metal across the horizontal and vertical parts, just inside the rear panel
Re: Restoration of Boycey!
Posted: 19 Apr 2014, 21:26
by Funbus
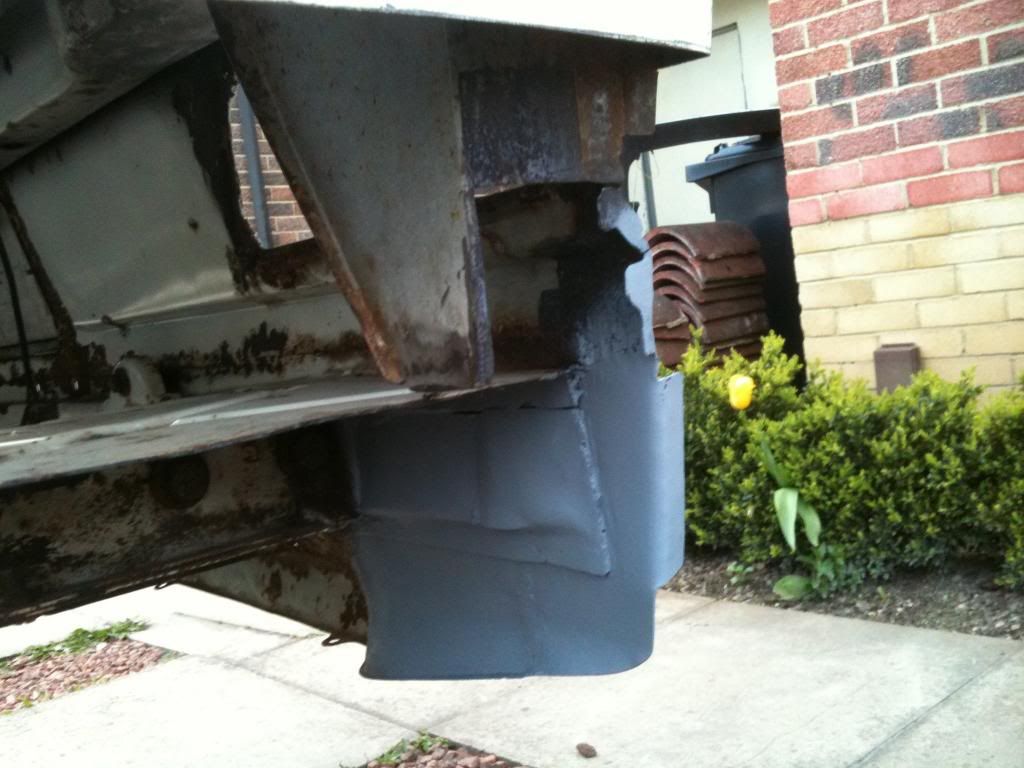
Bottom 8 inch of c pillar has been replaced

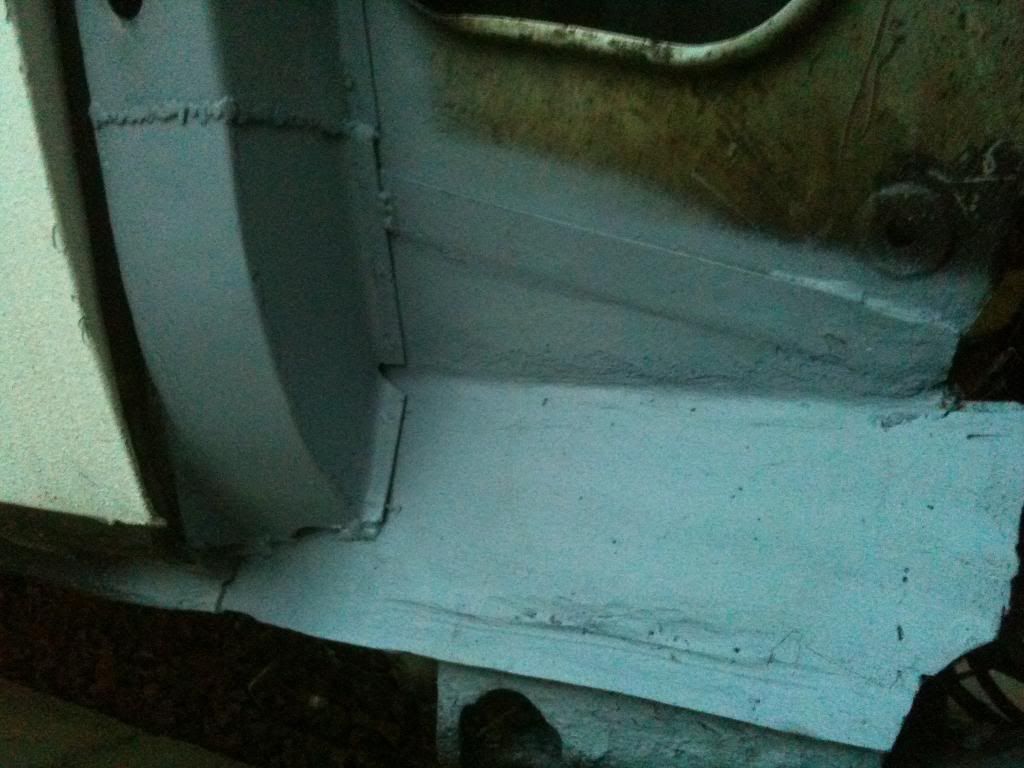
My brother made this from scratch after a look at the picture of yours mm, cheers
On the 2nd picture you can see the exploration panel I cut to look inside the sills. All was solid so just welded panel back in place.
Re: Restoration of Boycey!
Posted: 20 Apr 2014, 07:12
by boboro
Certainly looks like my handy work, shame I can't manage to get pics of my bus up, that would have been an interesting thread.
Re: Restoration of Boycey!
Posted: 20 Apr 2014, 09:01
by Plasticman
Re: Restoration of Boycey!
Posted: 20 Apr 2014, 09:36
by lloydy
That looks pretty damn good, especially if it's your first go at welding
Re: Restoration of Boycey!
Posted: 21 Apr 2014, 11:25
by Funbus
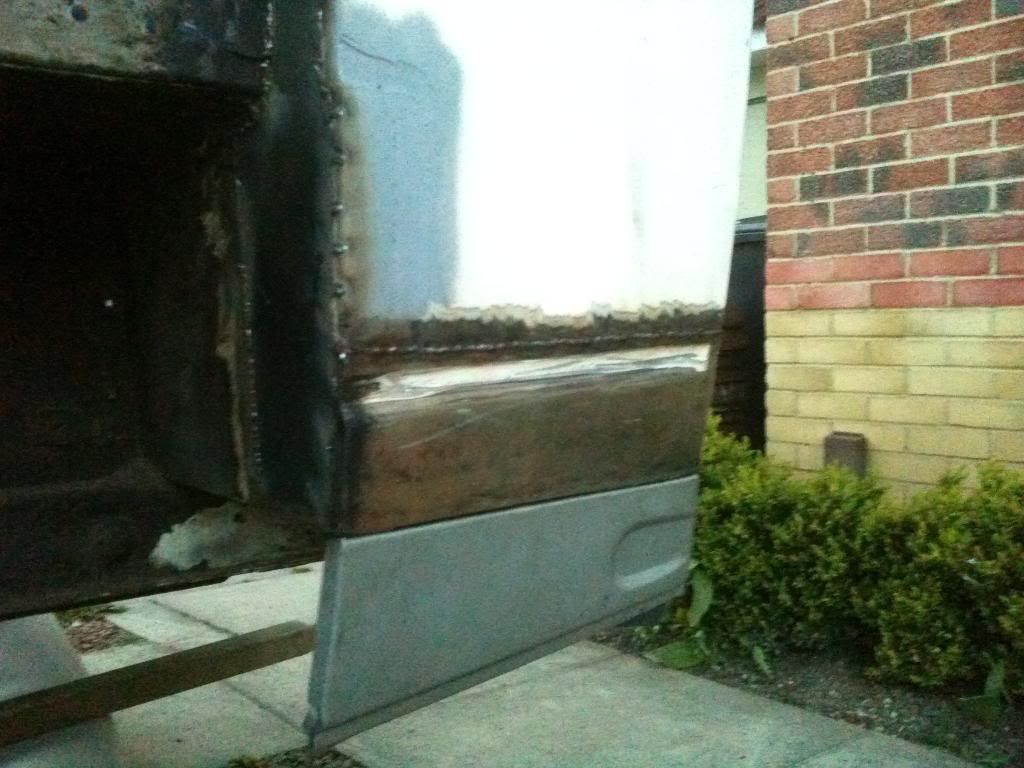
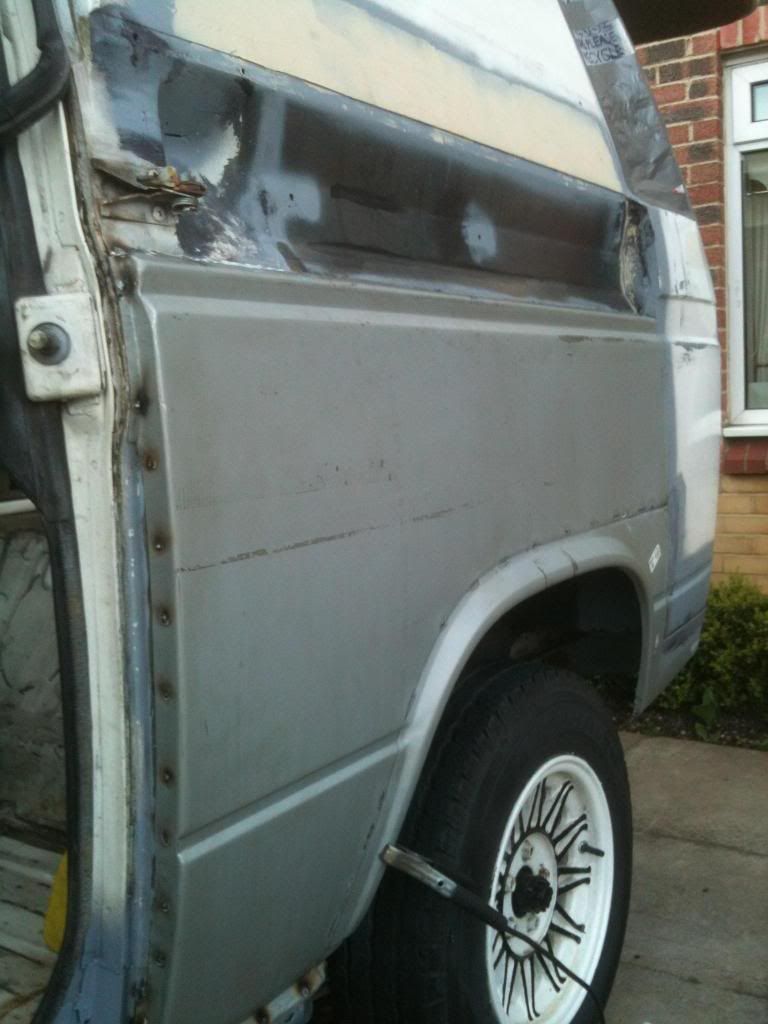
Sliding door panel is back in place
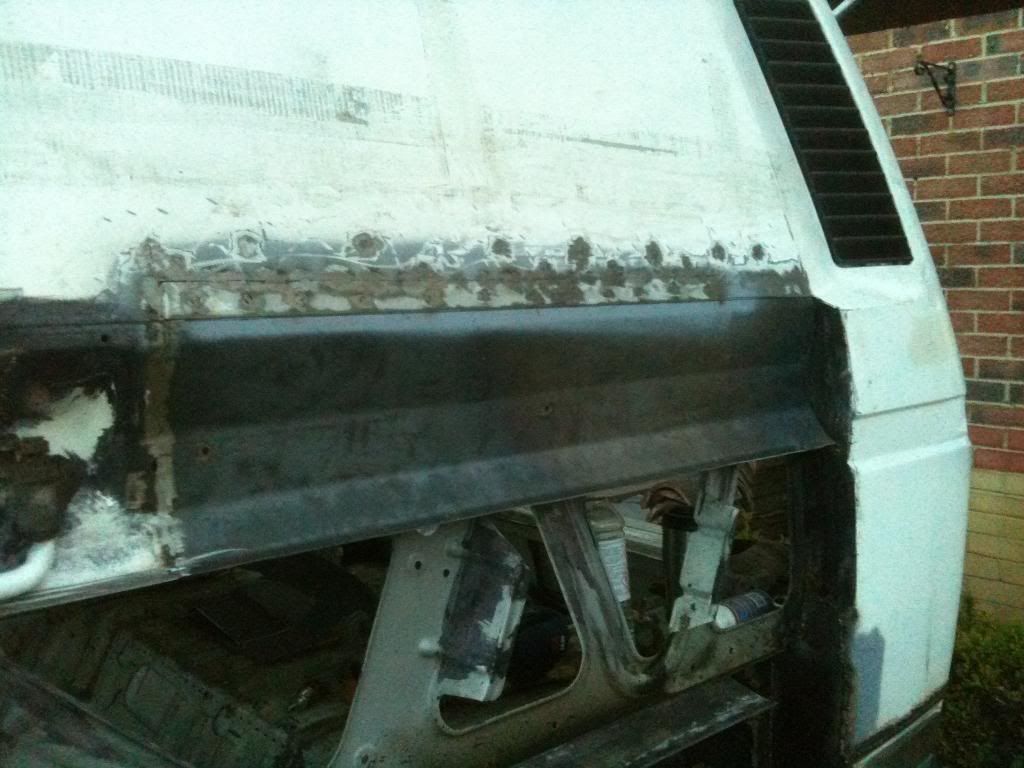
And looks good. Needs some filler above it. The rot went quite high so I had to cut a lot out. I'm going to do this before I put the runner back on.
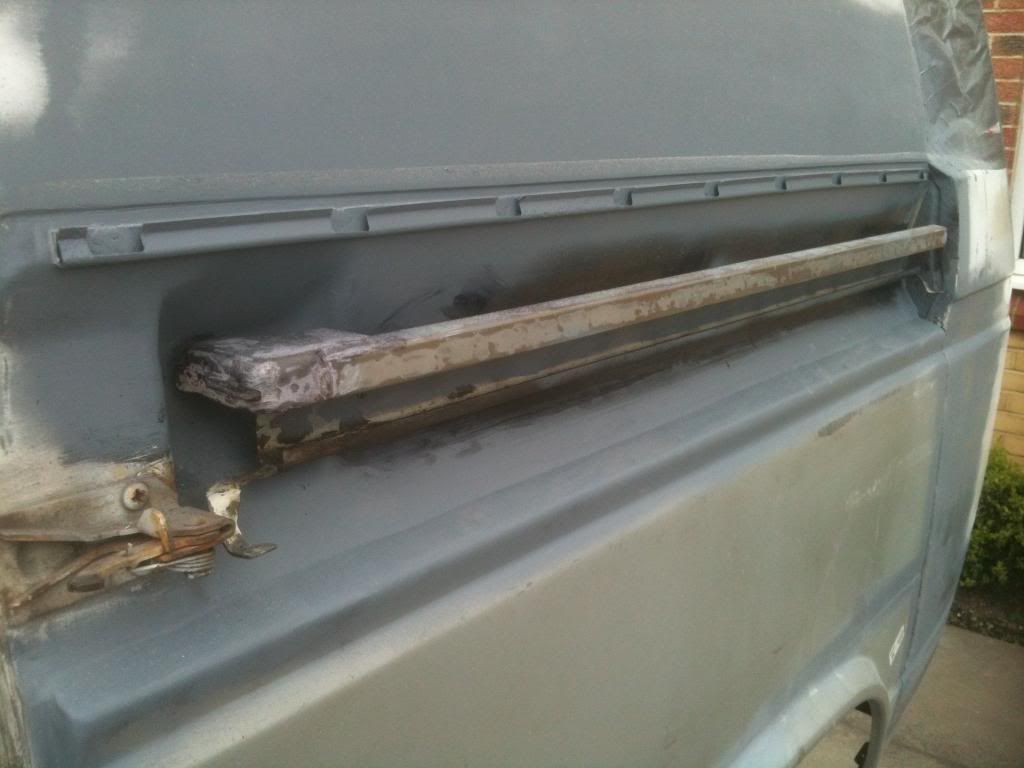
I need one of these
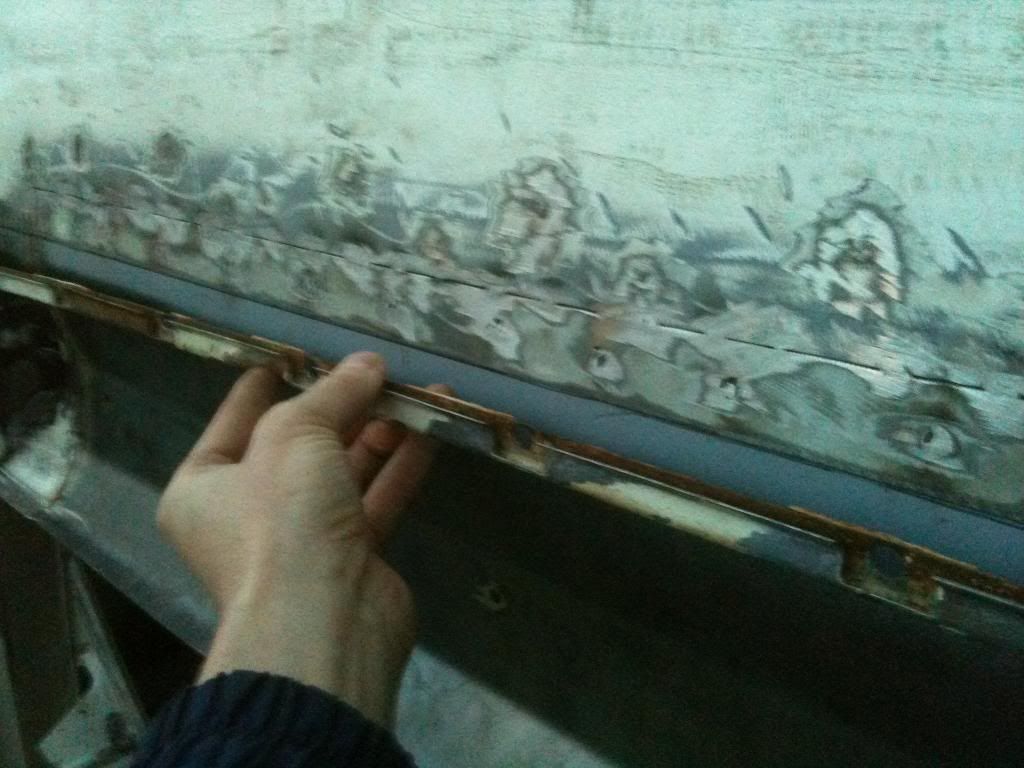
It's the thin strip that holds the sliding door runner cover on. Can't find them for sale. Any ideas please?
Re: Restoration of Boycey!
Posted: 22 Apr 2014, 21:11
by Funbus
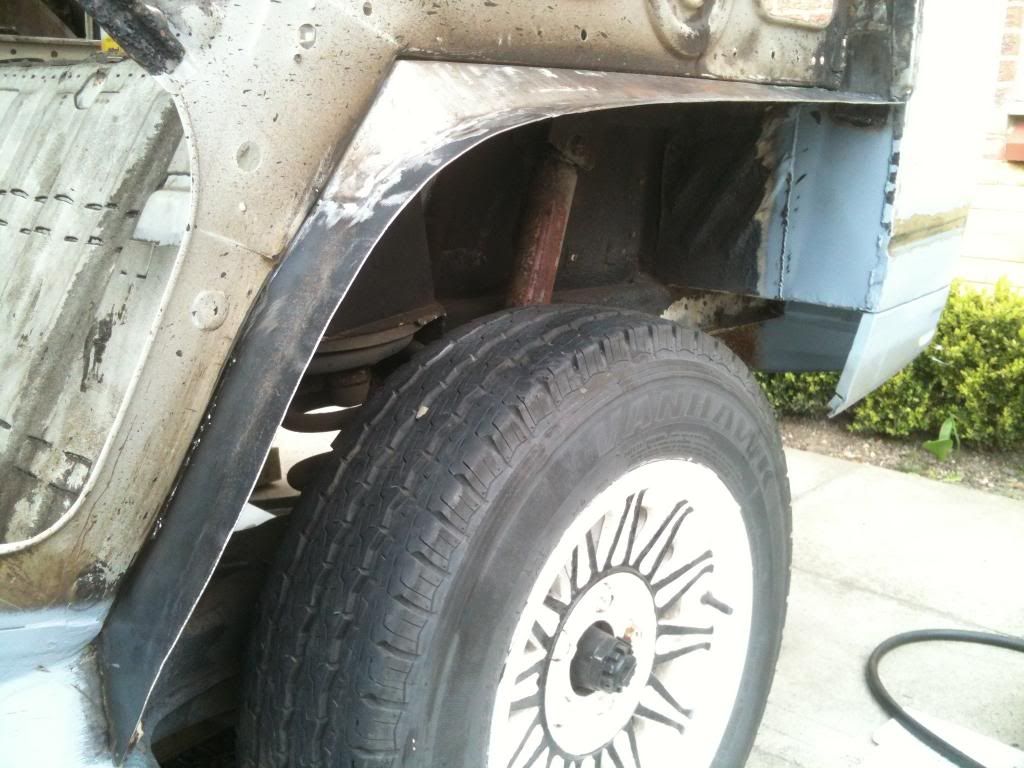
I'm looking at getting this side finished before the weekend. Inner Wheel arch is now rebuilt and panel ready to go back on. I'm just wondering what's best to stick on the 3 lugs that is on the inside of the wing. These ones
I was thinking of using sikaflex 512 as I will be getting some for my roof anyway. Any thoughts?
Re: Restoration of Boycey!
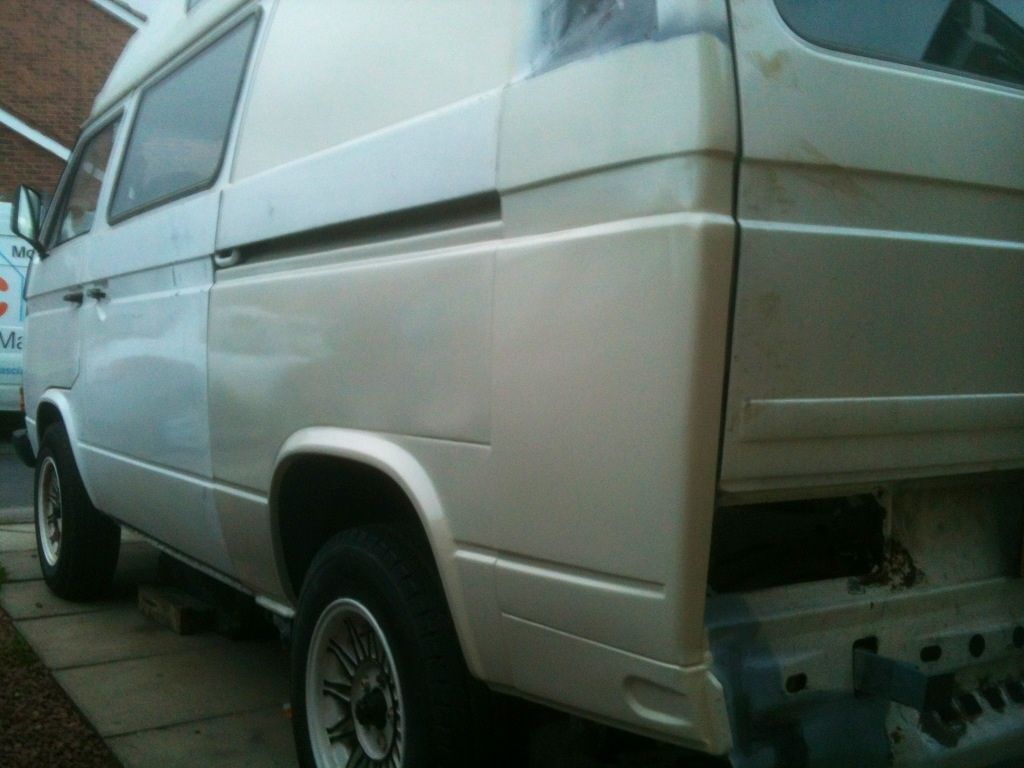
Posted: 04 May 2014, 22:35
by Funbus
Well I've been cracking on with the passenger side. Sorted out the inner rear wing.
And got the rear wing on. Spot welded down the front edge, bottom, rear edge and top. I put a 1 inch strip on the inside to weld to the top of the inner wheel arch. I've slightly warped the panel getting carried away with to much heat. I've learned my lesson and won't do it on the other side. Not bad for a first attempt though
I've refitted the sliding door runner. I used a couple of the holes from inside the van when I drilled the spot welds out when removing it, so I know it's in exactly the same place. And I've re used the door runner cover bracket because I couldn't source a new one
It's all back together now. Looks okay now it's all sealed up.
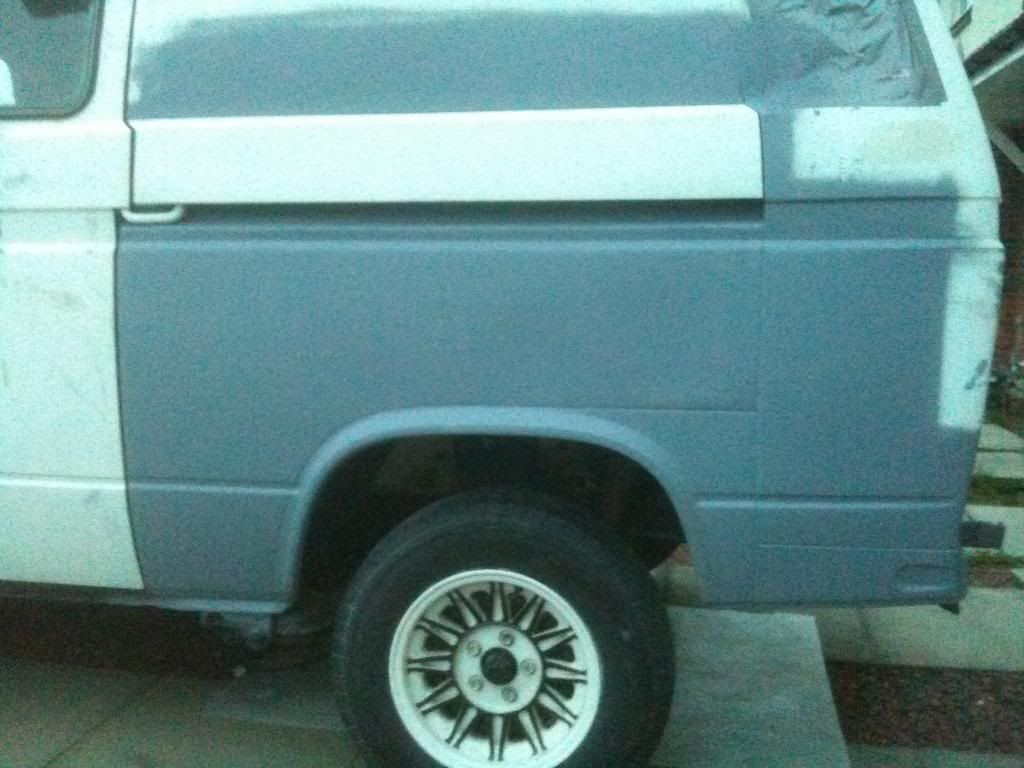
Re: Restoration of Boycey!
Posted: 07 Jun 2014, 20:48
by Funbus
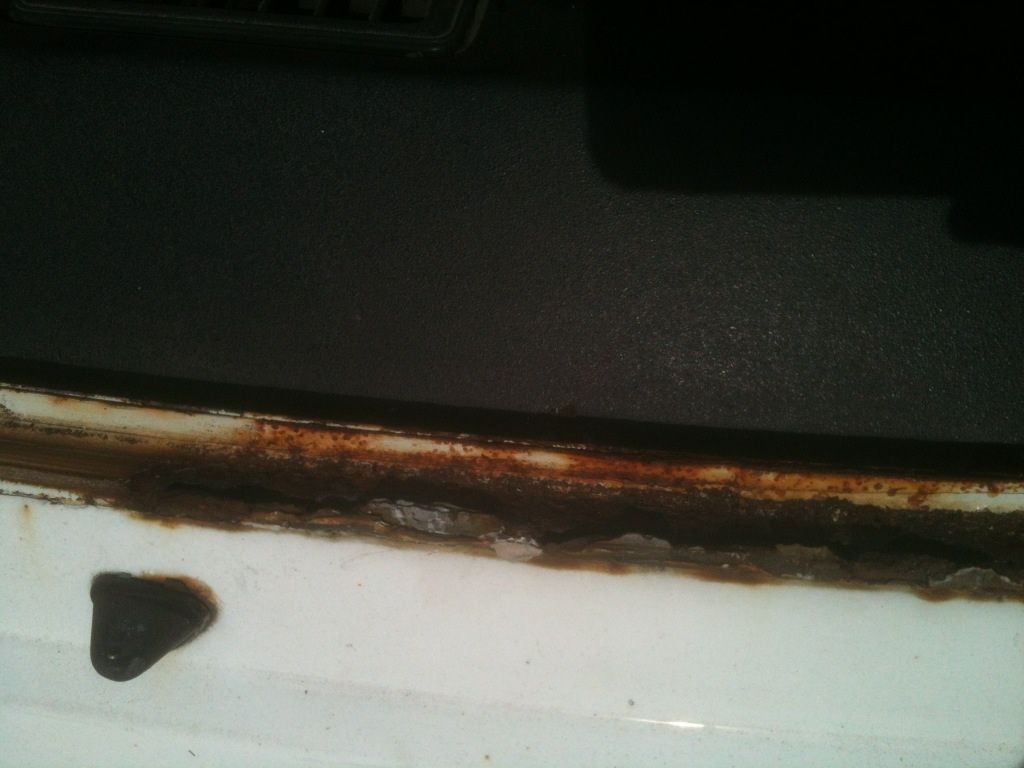
Got a bit of paint on the side, well it's been on for a while now!
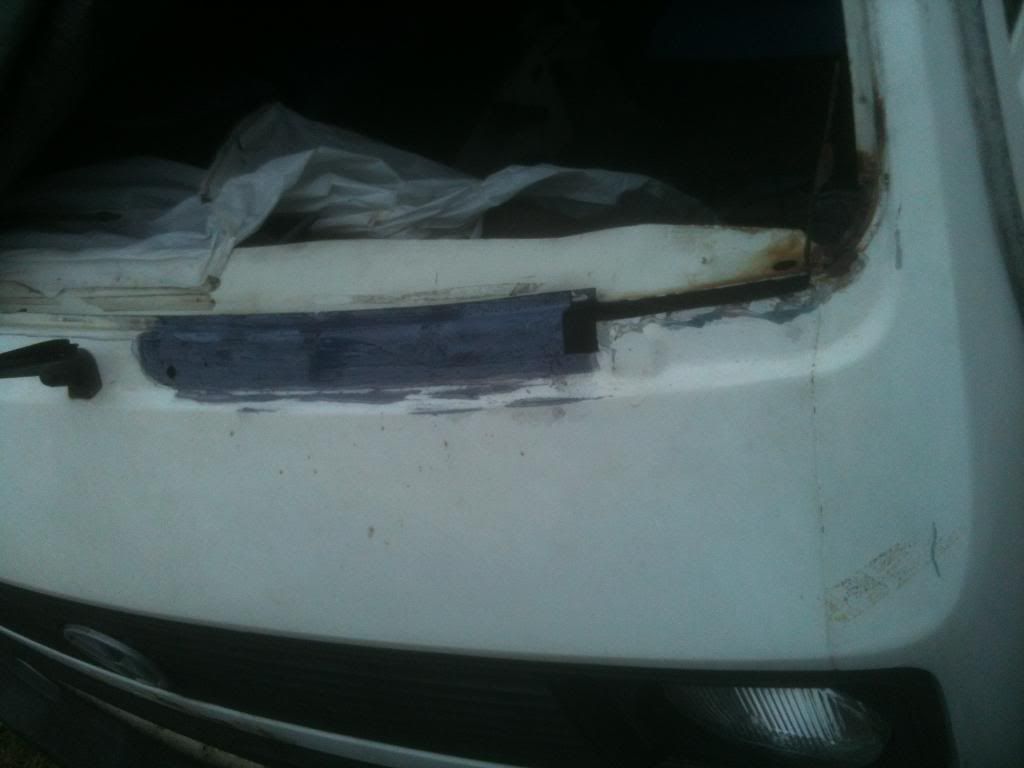
I've started on the windscreen. More rotten than I thought. Bit above the drivers side
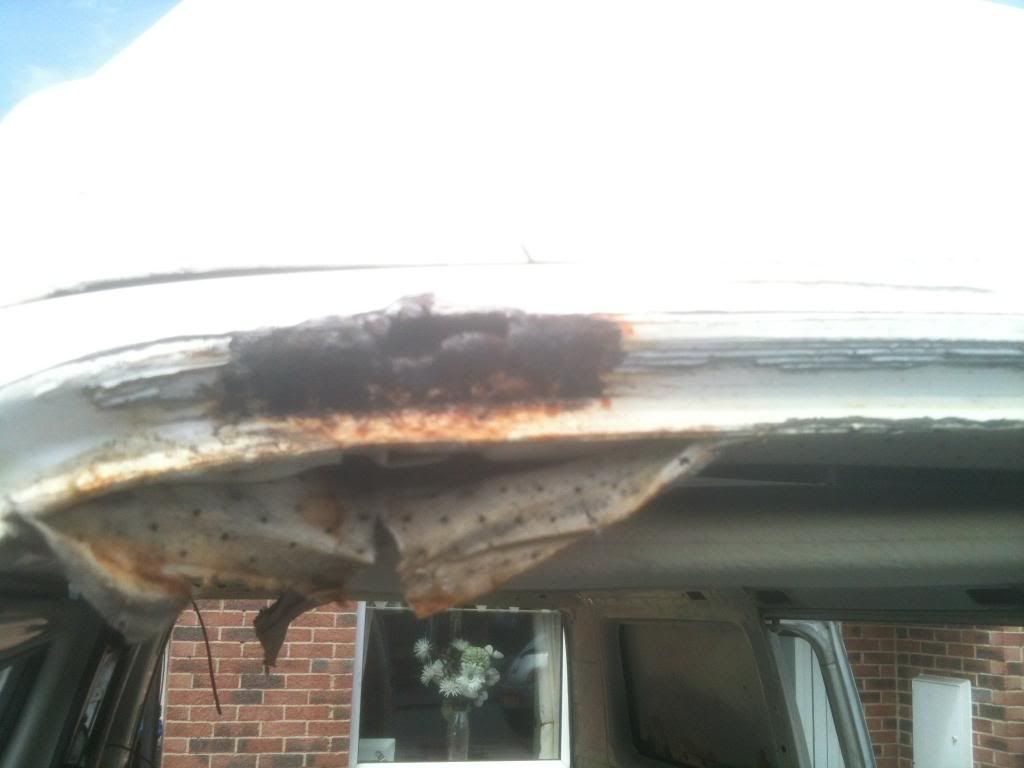
Which I've cut out and replaced. No pic of the repair as yet due to rather wet weather.
Needed this sorting before I glue the roof on or ill have big problems in the future.
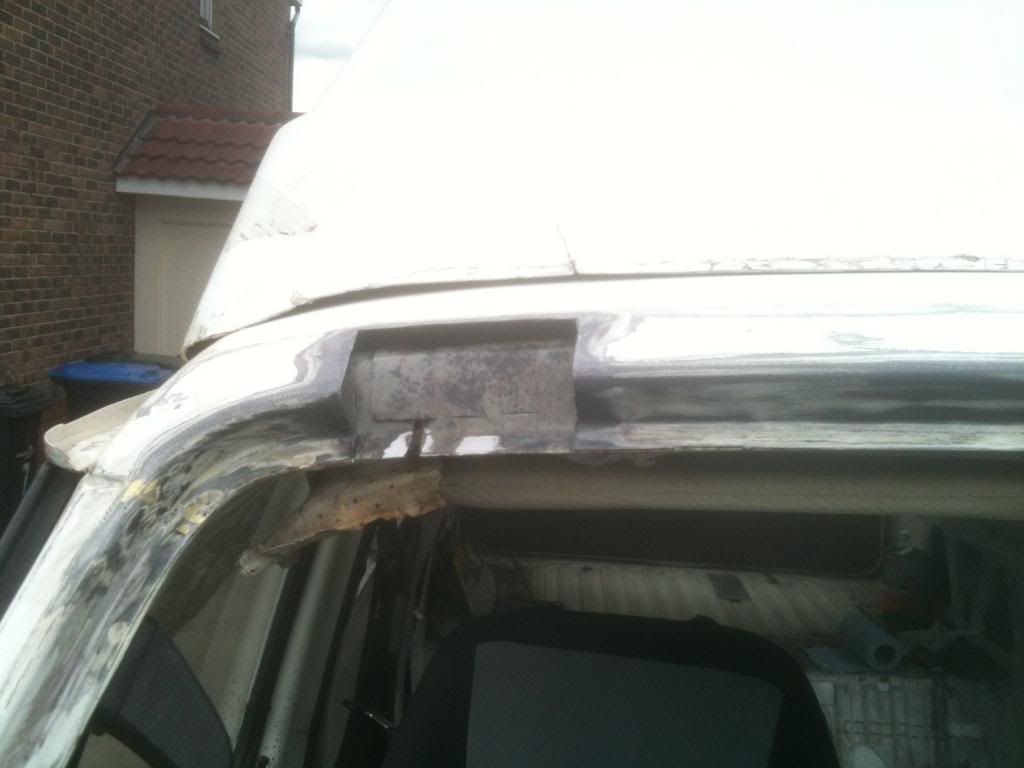
Re: Restoration of Boycey!
Posted: 07 Jun 2014, 20:53
by Funbus
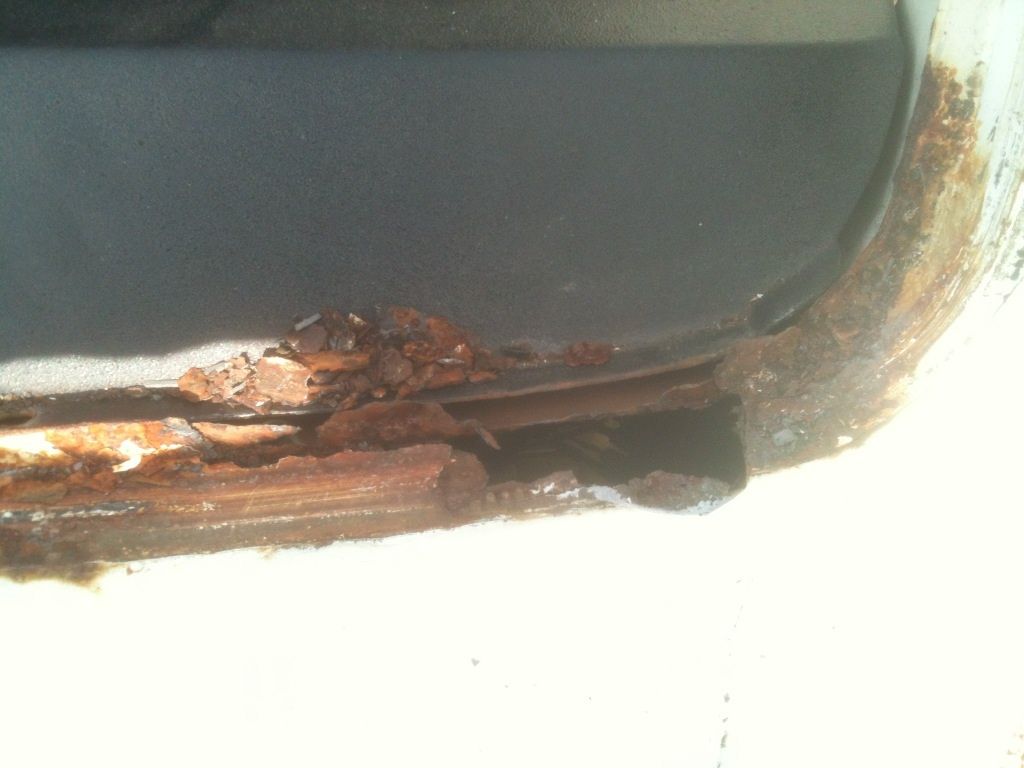
Bottom no better, passenger side about quarter of the way across edging up the pillar aswell
Re: Restoration of Boycey!
Posted: 07 Jun 2014, 21:00
by Funbus
I replaced the bottom in 6 inch pieces so that I could get the curve right
Up to the corner. I then made a corner piece up and slotted that in.
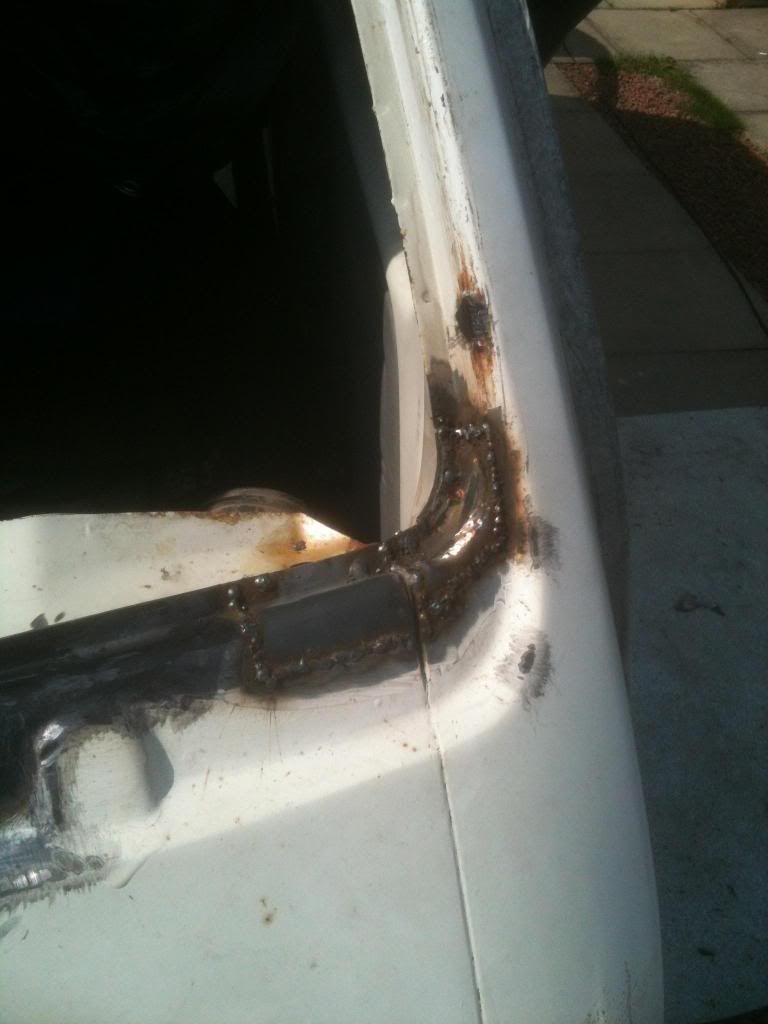
It's been painted now. Pics to follow. Needs another coat of paint before refitting window with new seal, vewib.


