Page 10 of 11
Re: 2.1 WBX engine rebuild noob....
Posted: 19 Jun 2017, 08:12
by sherlylock
ajsimmo wrote:Now don't get too excited and go banging the rear main crank seal in before you've set the endfloat!
And good job on the assembly lube. I use it on everything that moves (sparingly), including shell bearings, cam gear, rockers and valve tips, cam followers etc. Basically if it needs oil, it gets assembly lube (for that first start up moment). Since using it, engines sound much quieter and smoother more quickly from 1st start. That's gotta be a good thing!
Yep - end float next up on the list, along with pistons/liners. I've got quite a few spare shims from the three spare engines that came with the van......and Brickwerks are usually quick with delivery so should be able to get this done quite quickly. Already have the seal and new flywheel bolts too.
Wish I'd applied the assy lube in more areas now.....crank main bearings/conrod big ends had plenty of oil on assy but it's obviously not as "clingy" as the assy lube.
Re: 2.1 WBX engine rebuild noob....
Posted: 19 Jun 2017, 08:23
by itchyfeet
Nothing to stop you filling oil filter plugs out coil discooneted and cranking until get oil through the system takes a while though.
Re: 2.1 WBX engine rebuild noob....
Posted: 21 Jun 2017, 09:26
by sherlylock
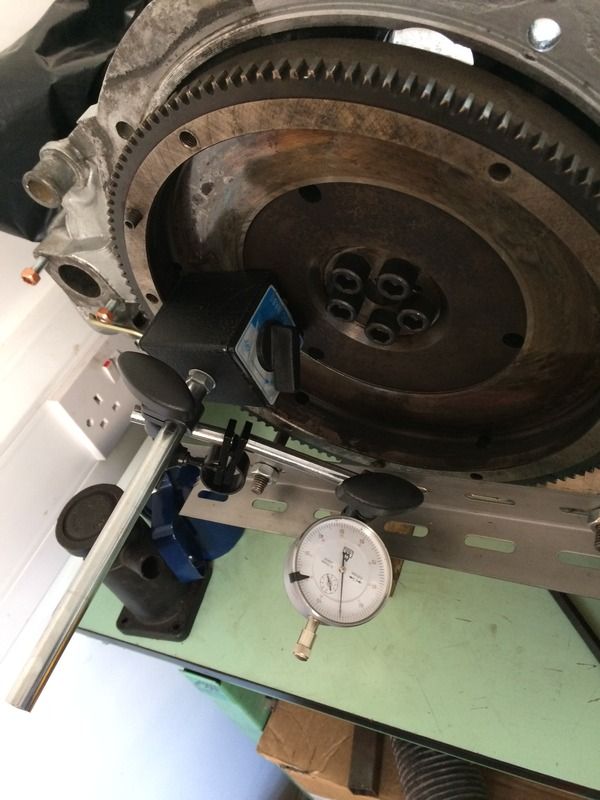
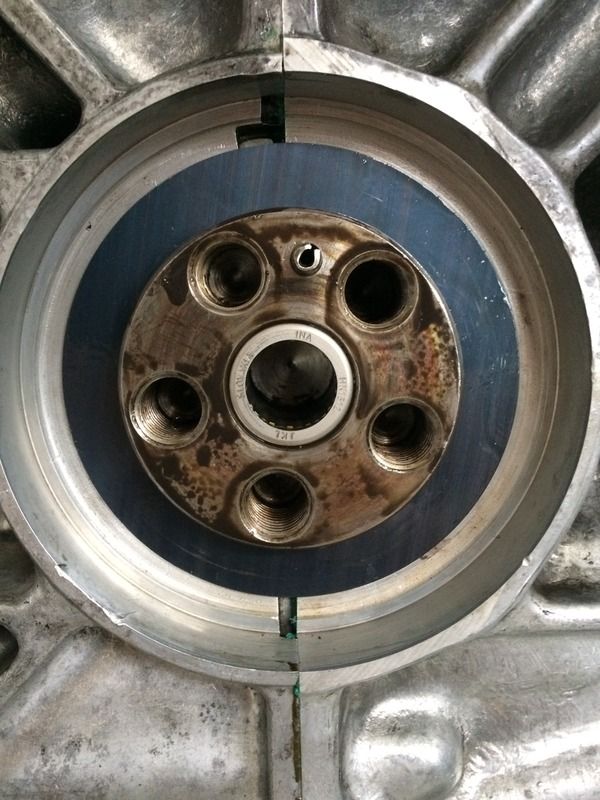
Mounted the outer thrust washer, the dia81 shim and the flywheel so I could check the crank endfloat.
DTI on mag base mounted to some steel angle strip - pull flywheel back and forth and measure the movement.

0.67mm movement recorded - I have 2x 0.35mm and a 0.3mm in my collection (thought I had more in the stash of spare parts!) so I can't make the 0.6mm needed to reduce the endfloat to the lower limit of 0.07mm
So I've ordered 2x 0.3mm shims from Brickwerks.......should be here later today.

Re: 2.1 WBX engine rebuild noob....
Posted: 21 Jun 2017, 11:14
by itchyfeet
Try it again with a bit more wellie or take a smidge off the thrust washer with fine wet and dry on a sheet of glass
Re: 2.1 WBX engine rebuild noob....
Posted: 22 Jun 2017, 07:54
by sherlylock
itchyfeet wrote:Try it again with a bit more wellie or take a smidge off the thrust washer with fine wet and dry on a sheet of glass
Think I'll be doing this!
Rechecked the setup yesterday and it looks like I'm at 0.63 end float (without the shims). I set the dti up with the mag base attached to the flywheel and the probe reading off the angle iron. I think before I was seeing some flex on the steel (it's quite thin) with the weight of the magbase. Doing it this way is giving me much more repeatable readings.
So......I need to shim out 0.53 of endfloat to hit 0.1.......which will be tricky when 0.3mm shim seems to be the smallest available from VW. RealOEM suggests there was a 0.24mm shim available (Pt No. 021105291) but this is out of stock/discontinued everywhere I look.
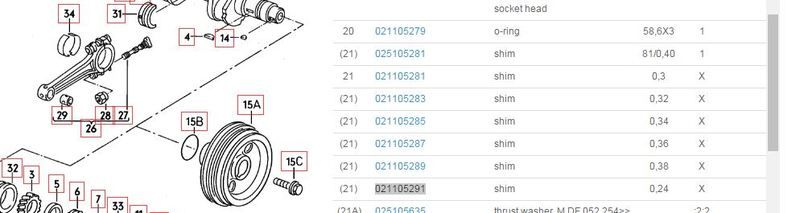
So how acceptable is it to tickle some material off the thrust washer....? I'm looking at removing a minimum 0.04 to hit the smallest acceptable endfloat of 0.07mm.
Re: 2.1 WBX engine rebuild noob....
Posted: 22 Jun 2017, 10:29
by itchyfeet
Hang on....
Can we assume you have left the larger 0.4 shim in place
I fit shims and measure whats left
I never remove them all and measure
if it binds up then remove just one shim and measure
I do mag base on flywheel pointer to the gearbox stud and bracket to stop flywheel rotating.
Do you have a new thrust washer or old?
if new try the old one
if old try buying a new one
Re: 2.1 WBX engine rebuild noob....
Posted: 22 Jun 2017, 12:40
by sherlylock
itchyfeet wrote:Hang on....
Can we assume you have left the larger 0.4 shim in place
I fit shims and measure whats left
I never remove them all and measure
if it binds up then remove just one shim and measure
I do mag base on flywheel pointer to the gearbox stud and bracket to stop flywheel rotating.
Do you have a new thrust washer or old?
if new try the old one
if old try buying a new one
Just for completeness I'll add the detail here too (after discussing on f'book)
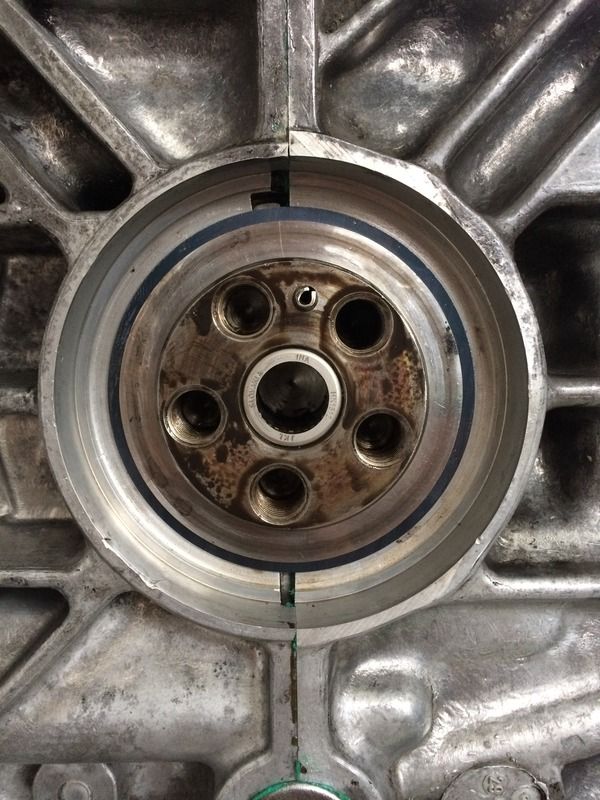
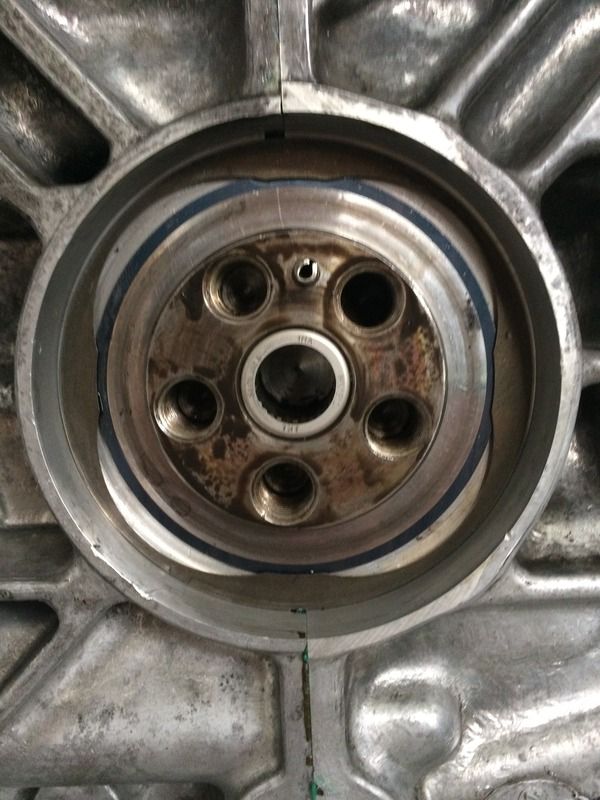
Endfloat was measured with a new 0.4mm spacer shim in place and I'm getting 0.63mm float.
The additional float is then taken up with a combination of 2x shims. Aiming for 0.1mm float as per the VW engine build manual I'm following it's suggested that the calc to do is:
measured end float - 0.1 = amount to shim. In my case 0.63 - 0.1 = 0.53mm
VW used to sell a 0.24mm shim as far as I can tell. This is no longer available. If it was I could make up the gap using a 0.24 and a 0.3 to give 0.54mm. The smallest shim available is now 0.3 so the smallest endfloat I could shim out would be 0.6mm.
Excellent suggestion about looking at alternative thrust washers. I dug out the old thrusts from when I stripped the engine, cleaned it, fitted it and had a measure up. New thrust thickness 2.49mm .......old thrust 2.42mm. That 0.07mm difference gives me a bit of clearance to play with. (The same as taking material off the new washer......but already done).
After fitting and checking I'm now at 0.7mm float (without adjustment shims).
Using a 0.3 and a 0.32 shim I'm now at 0.08mm endfloat......which is at the tighter end of the permissible tolerance.
Bolted it all up and I now measure 0.08 float on the DTI. Happy days.
Re: 2.1 WBX engine rebuild noob....
Posted: 22 Jun 2017, 13:16
by itchyfeet
Re: 2.1 WBX engine rebuild noob....
Posted: 22 Jun 2017, 19:34
by weimarbus
Just a thought to add to this, due to the cam gear teeth being at an angle ( not straight cut) I always find that you get more end float if the crankshaft is allowed to rotate, if it is not allowed to do this the end float is reduced due to friction on the gear teeth. I have always twisted and push, pulled, to set.
Re: 2.1 WBX engine rebuild noob....
Posted: 23 Jun 2017, 07:16
by itchyfeet
How do you get an accurate measurement with a dial gauge when rotating?
Llease explain how you measure?
Re: 2.1 WBX engine rebuild noob....
Posted: 23 Jun 2017, 16:30
by sherlylock
weimarbus wrote:Just a thought to add to this, due to the cam gear teeth being at an angle ( not straight cut) I always find that you get more end float if the crankshaft is allowed to rotate, if it is not allowed to do this the end float is reduced due to friction on the gear teeth. I have always twisted and push, pulled, to set.
To clarify are you rotating, checking, rotating, checking, rotating, checking......? I did a similar thing (i.e. checking the endfloat in different crank positions).
Fitted the shims/retaining shim and oil seal/o-ring to the crank.
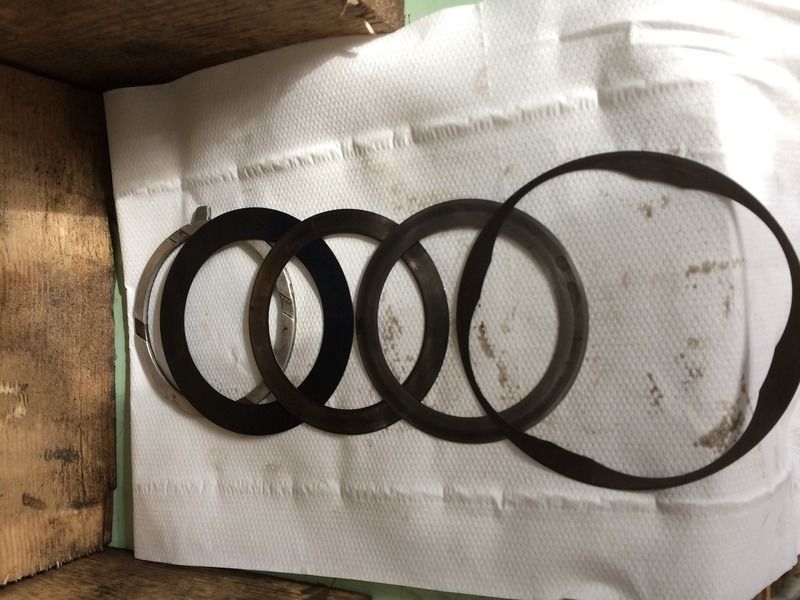
Old thrust washer cleaned and fitted (to allow me a bit more end float)

New 0.4 spacer shim - sent by Brickwerks in error so I thought I'd fit it.
End float shims (2x) fitted
Retaining shim fitted
Crank oil seal tapped home
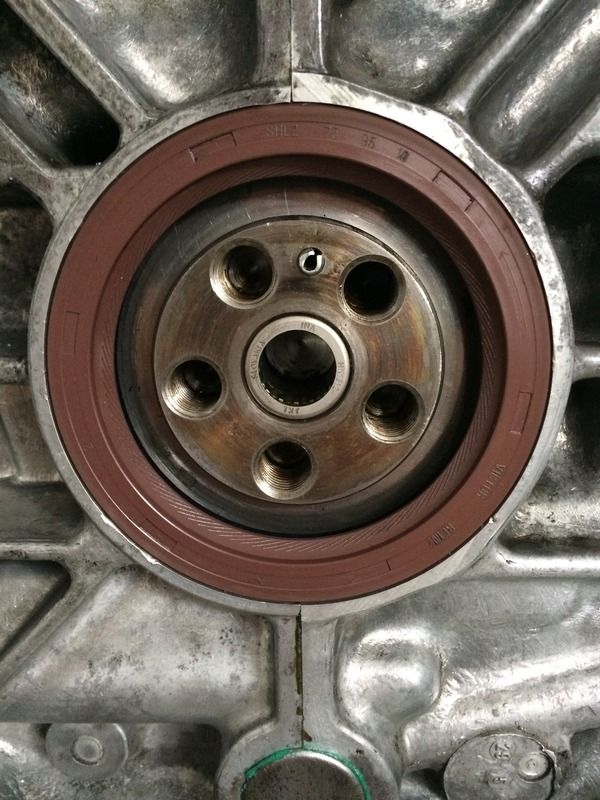
Flywheel O-ring replaced - nearly forgot this as the old one looked like it'd become part of the flywheel
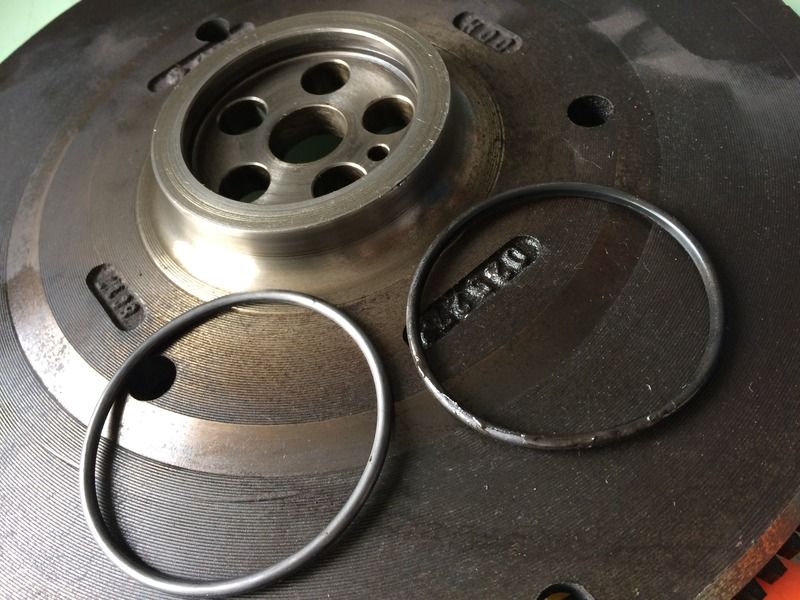
Flywheel on - just need to add the felt washer in before I forget......
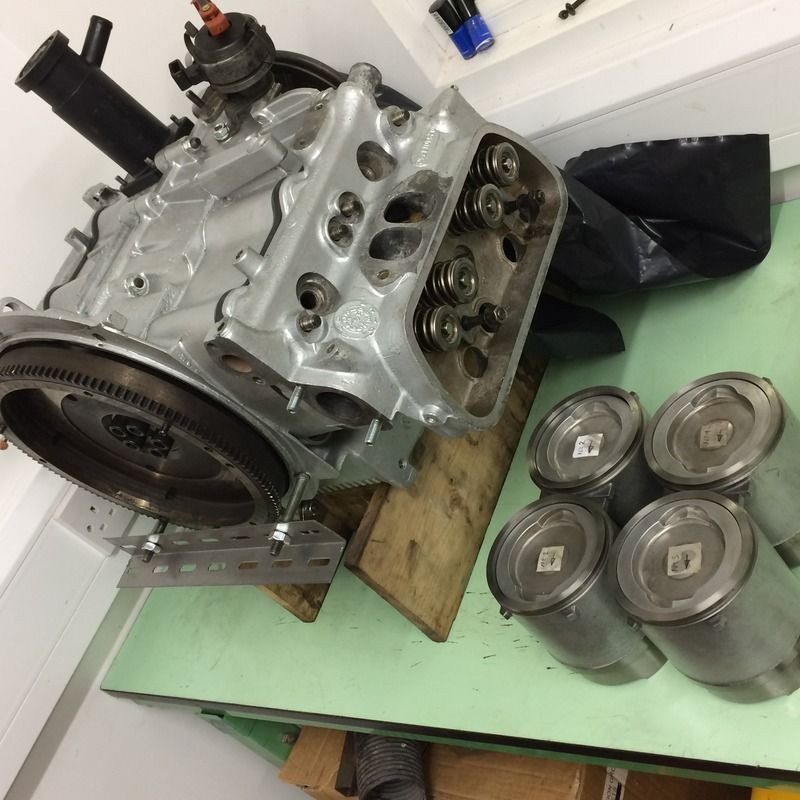
Pistons/Liners next up.....(heads temporarily placed onto block! Note pistons/liners in foreground)

Re: 2.1 WBX engine rebuild noob....
Posted: 23 Jun 2017, 19:41
by weimarbus
It's looking good, just to clarify, the dial gauge base is clamped to the engine mounting face and the dial gauge contacts the clutch pressure plate face, I don't rotate as such just backwards and forwards by about 15-20 degrees whilst pushing and pulling to take up any backlash or friction in the helically cut cam gears, doing this can make a difference of several thou.
Re: 2.1 WBX engine rebuild noob....
Posted: 27 Jun 2017, 12:06
by sherlylock
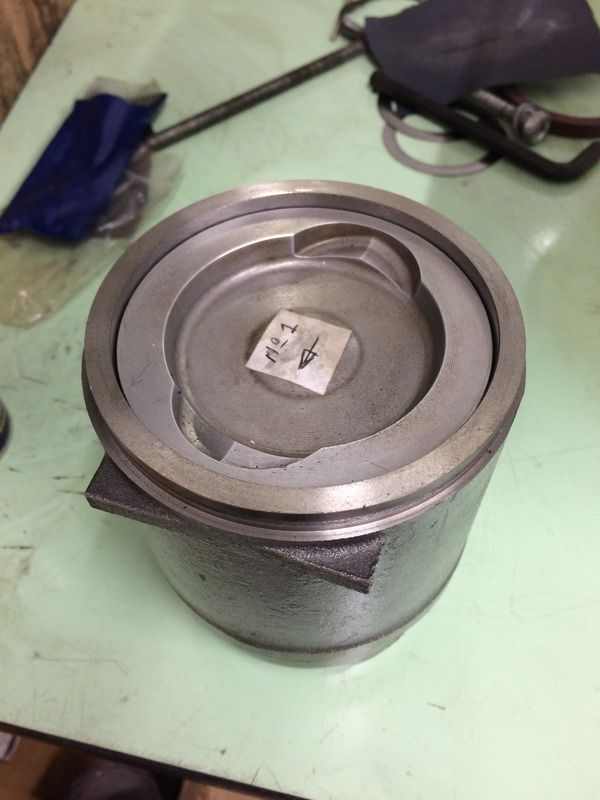
Turned my attention to the pistons/liners....
Measured the new QSC liners to see what size they are. Borrowed a bore mic from the machine shop we now have at work - it was an imperial mic so had to convert.
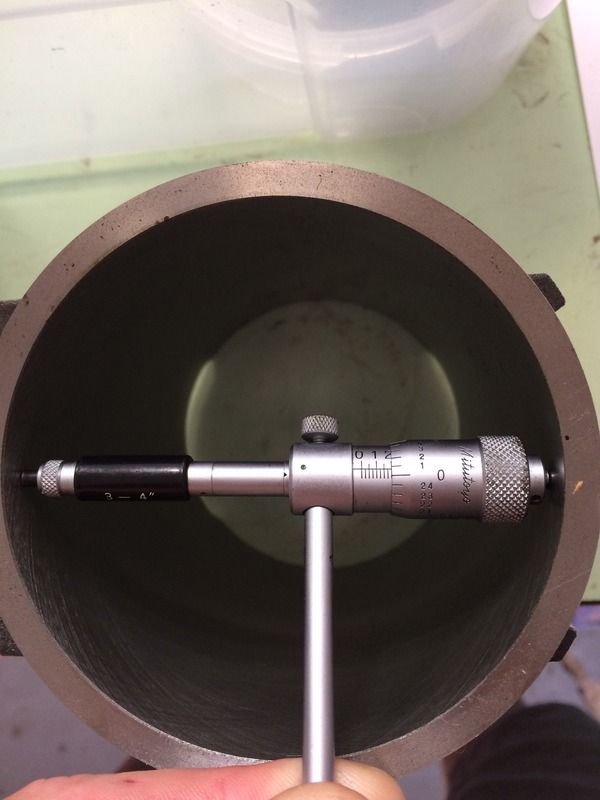
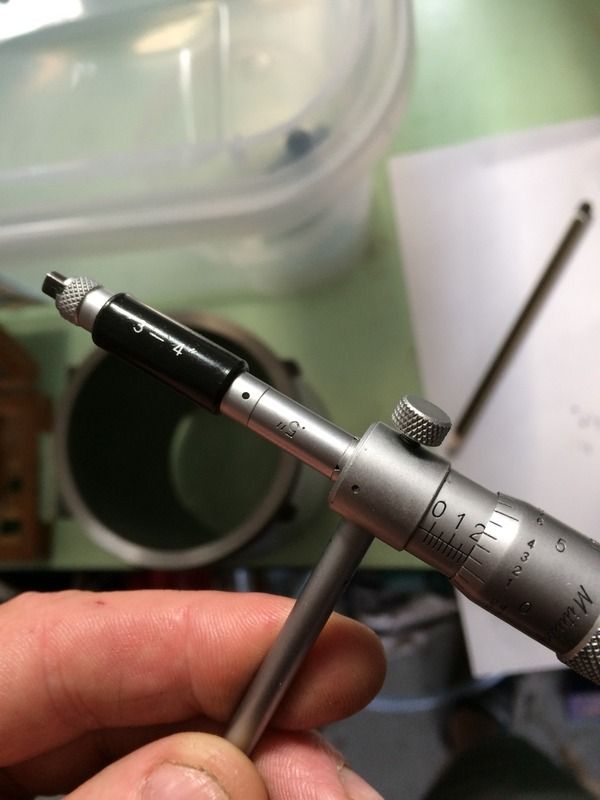
Measured up at 3.701" - which is 94.005mm. In spec - measured in a couple of positions around the bore to check for ovality. Not sure on the quality of these QSC items but I bought them from California when the exchange rate was more favourable, pre-brexit so they worked out quite a reasonable price. I'd read a few articles about QSC pistons and liners (mainly from the US)......but no conclusive negative reports to put me off using them. Quite a few reports to say the pistons were not up to spec (but these were reports from a few years previous - so who knows how accurate the parts are now).
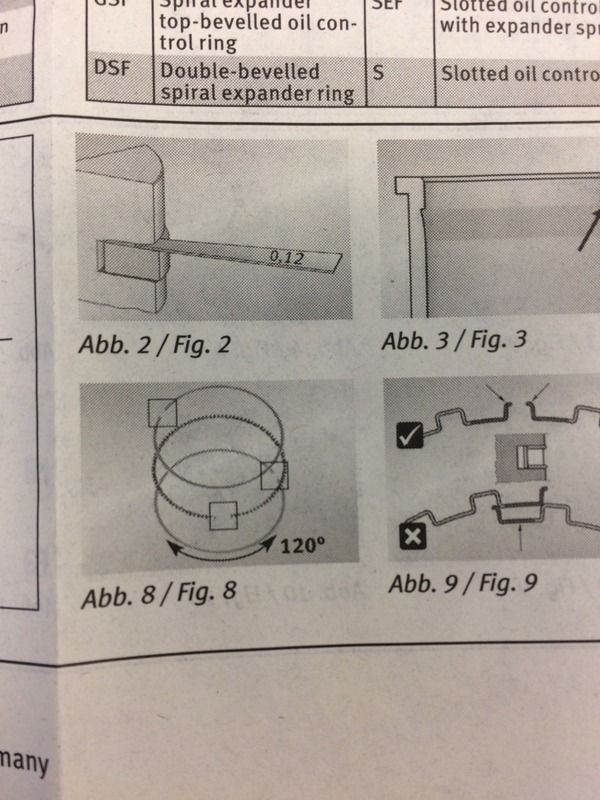
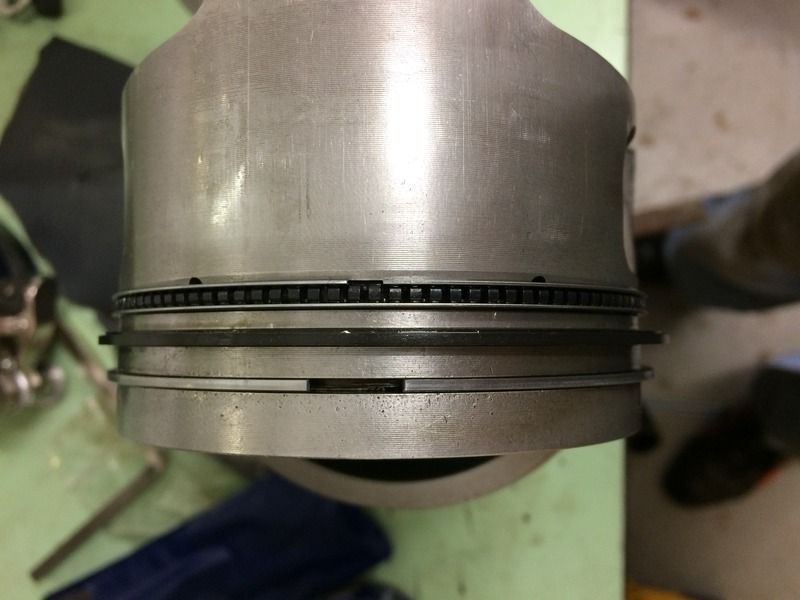
I'd already gapped and fitted the new KS rings to the pistons (and cleaned them up)......so it was a case of making sure the rings are positioned 180deg out to each other - to ensure that the gaps in the rings don't line up. (Oil compression ring is made up of 3 parts which get fitted 120deg out from each other anyway).
The VW build manual I'm following suggests the compression ring has it's gap pointing towards the top of the engine on assy (meaning 2nd compression ring gap faces down and the third oil control ring gap faces up).
Fitted the piston ring compressor with plenty of oil.....lined up over the liner and knocked them in using a rubber hammer handle. First time I'd ever done this and it worked a treat.
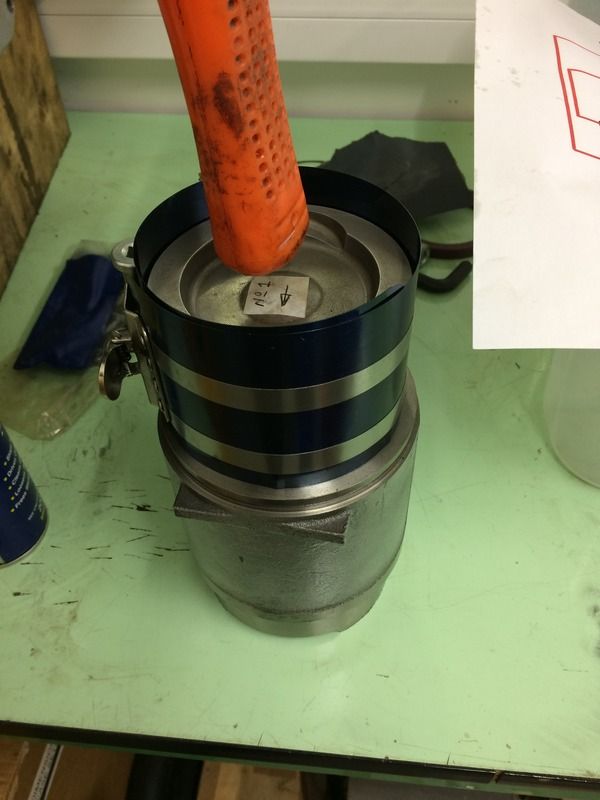
Repeated for all 4
Re: 2.1 WBX engine rebuild noob....
Posted: 27 Jun 2017, 12:19
by itchyfeet
does that flywheel have the insert to hold the felt ring?
thought about it but didn't offset the upper and lower oil scraper parts in mine in the end, where did you read that?
Re: 2.1 WBX engine rebuild noob....
Posted: 27 Jun 2017, 14:31
by sherlylock
itchyfeet wrote:does that flywheel have the insert to hold the felt ring?
thought about it but didn't offset the upper and lower oil scraper parts in mine in the end, where did you read that?
There's only a plain bore for the felt washer to sit in on this flywheel (I assume it just presses in and butts up to the needle roller bearing in the end of the crank?) What is the insert that you mention?
The 120deg offset of the 3x ring components for the oil scraper came from the instruction booklet that came with the ring set.