Page 3 of 7
Re: Procrastinating never got anyone anywhere
Posted: 29 Aug 2018, 20:36
by adie89
So it’s been fairly quiet with a family weekend then I’ve been doing truck driving lessons this week with test today, passed btw, so I’ve only got a couple of hours a night.
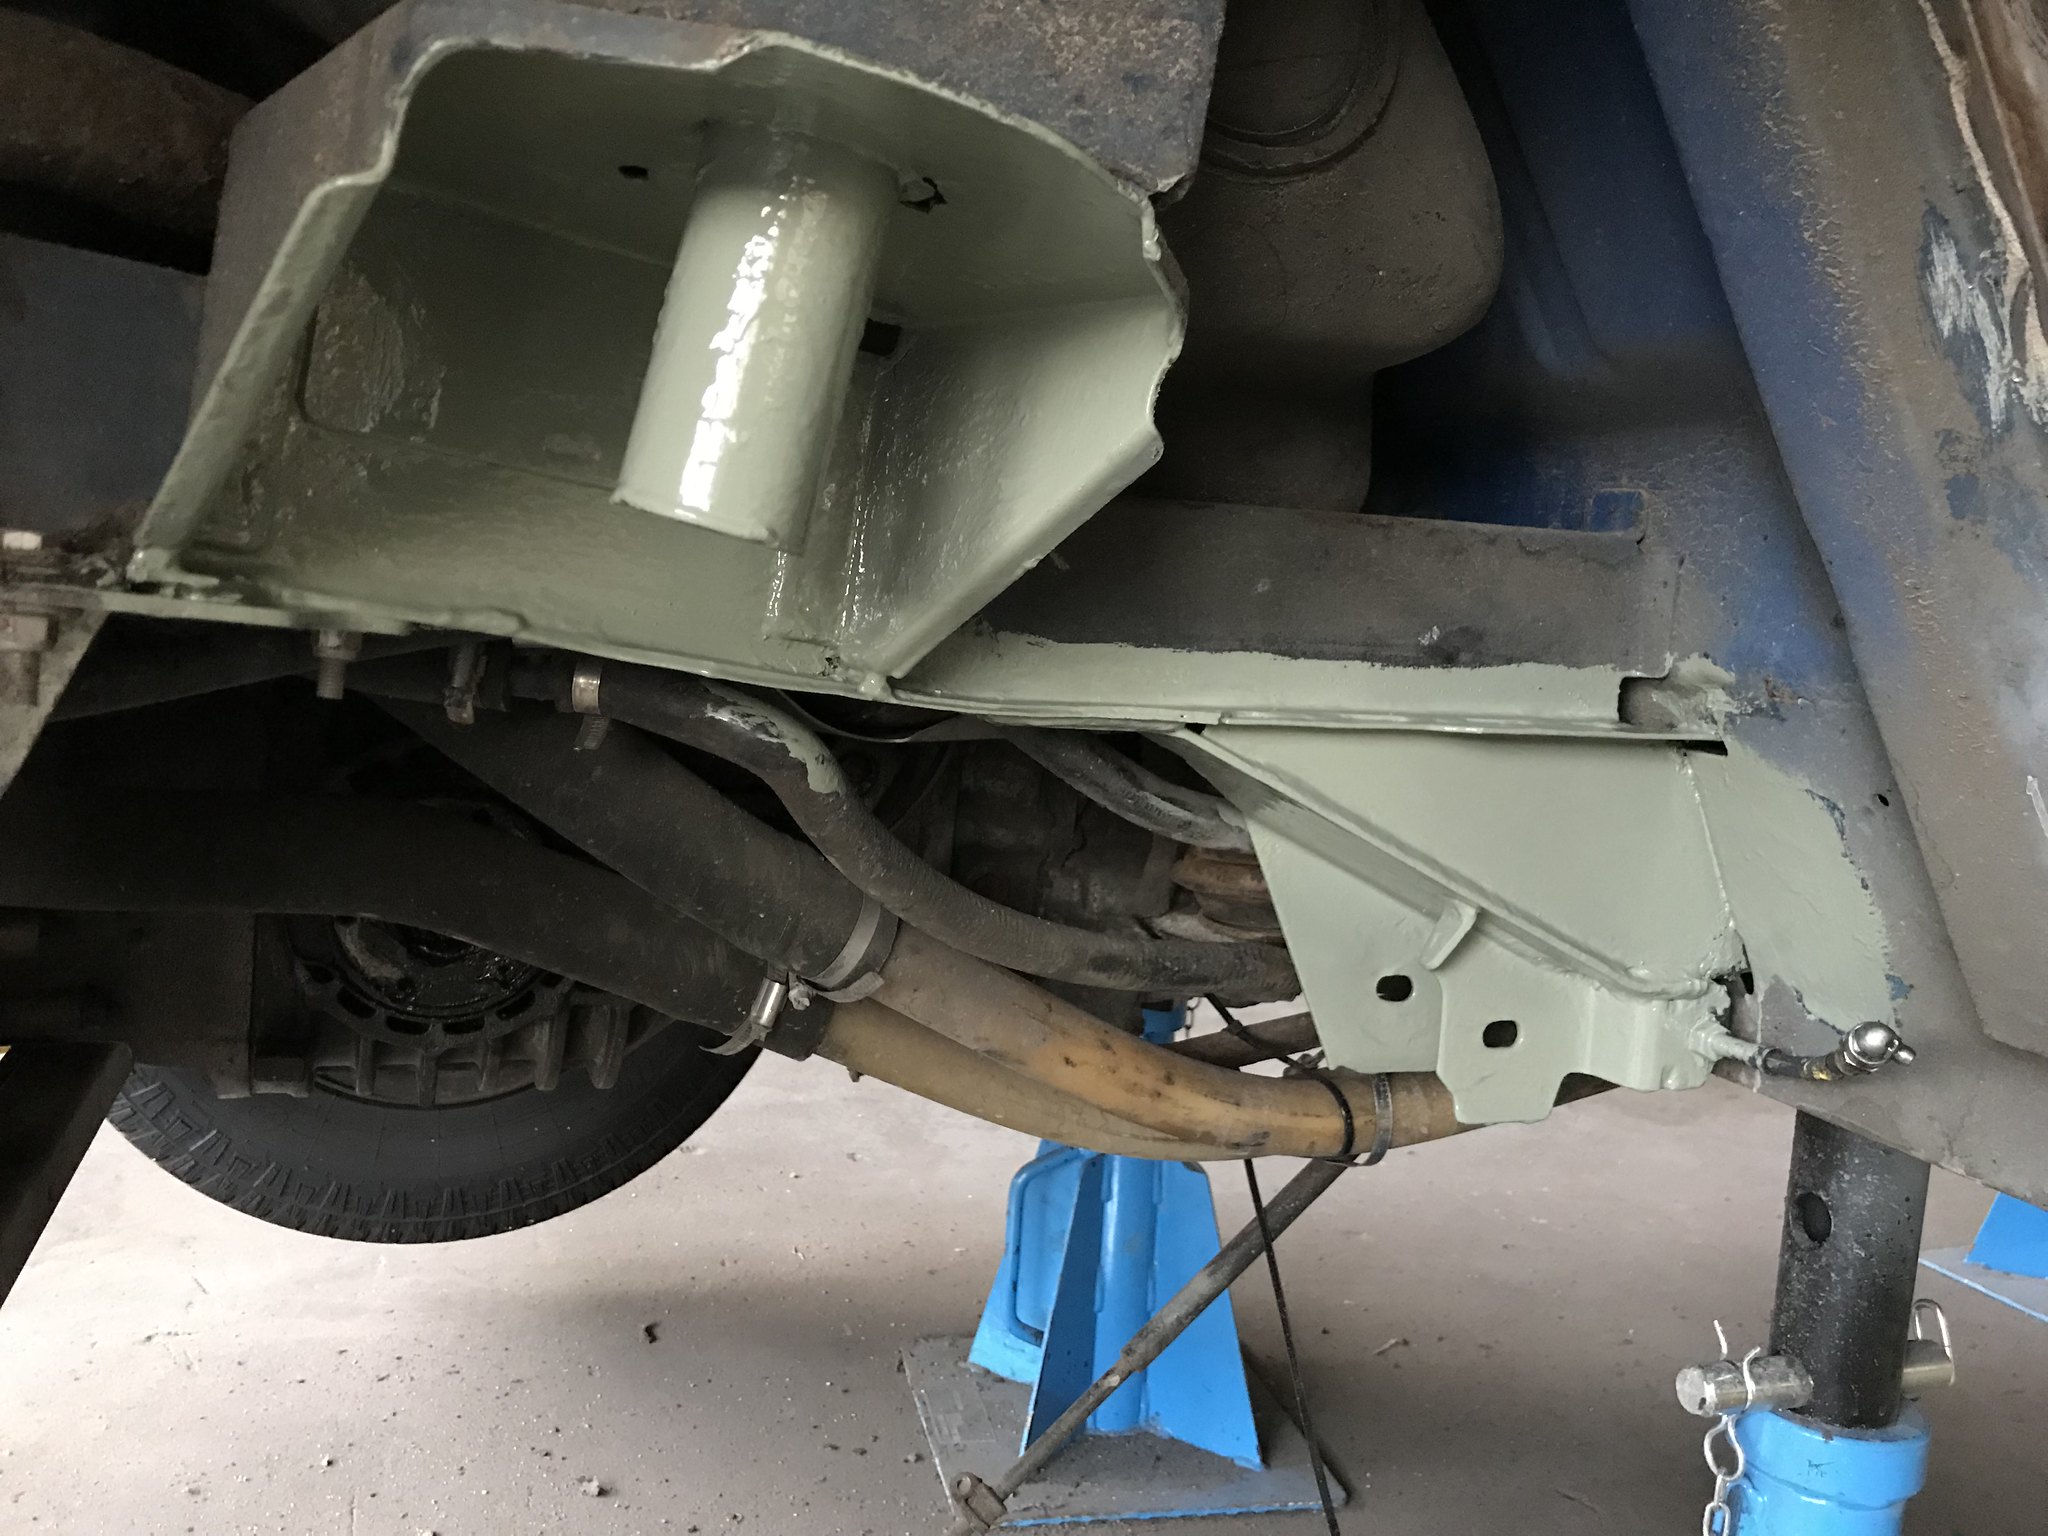
The rear suspension mounts have been gribblied off with a knotty brush, cv primered yesterday then the colour got brushed on tonight, tip from the top... fast hardener is really fast 45 mins in the pot and it was like tar, 60min and it was rock hard.

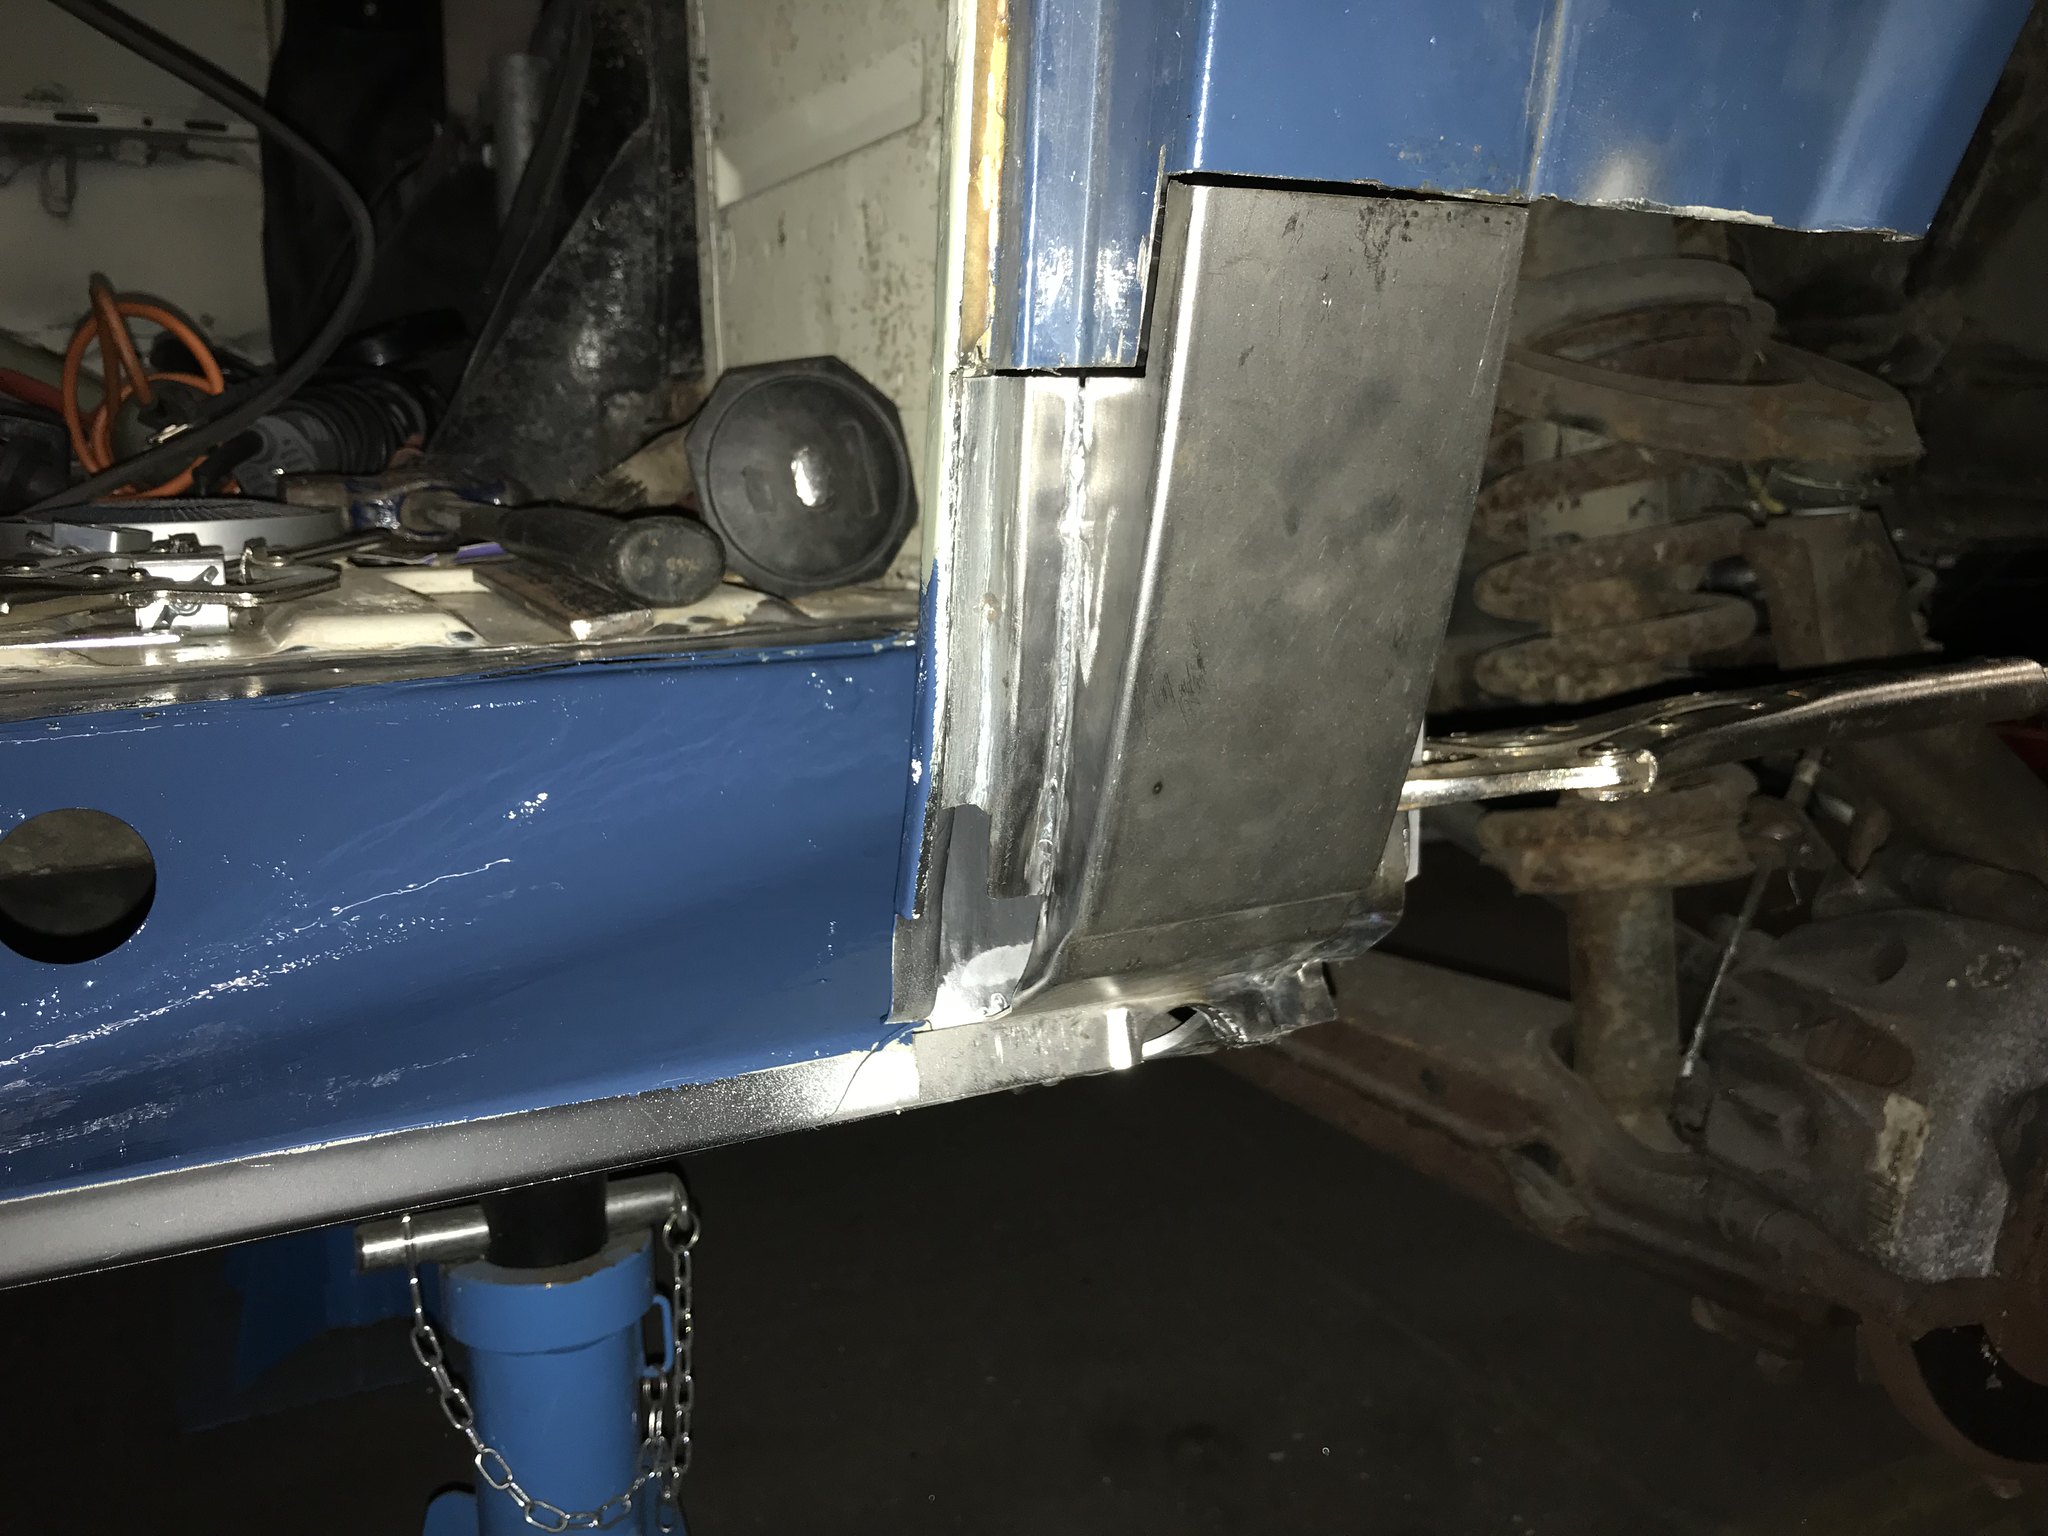
Inner sill was already cv primered so I seam sealed each end where the moisture had gathered in the cracks and rotted it out before at both ends and then the colour coat got brushed on.

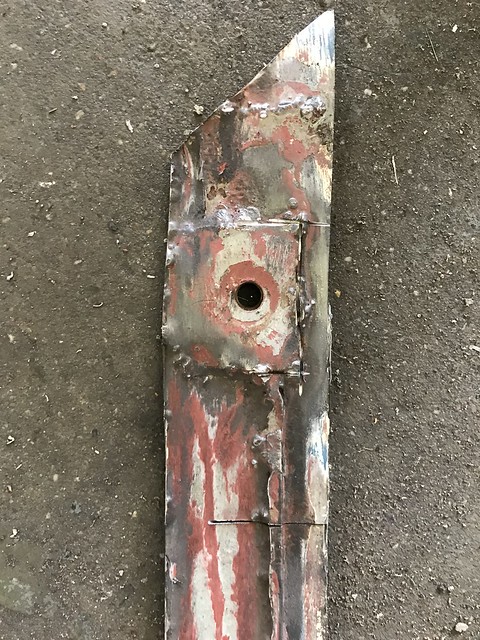
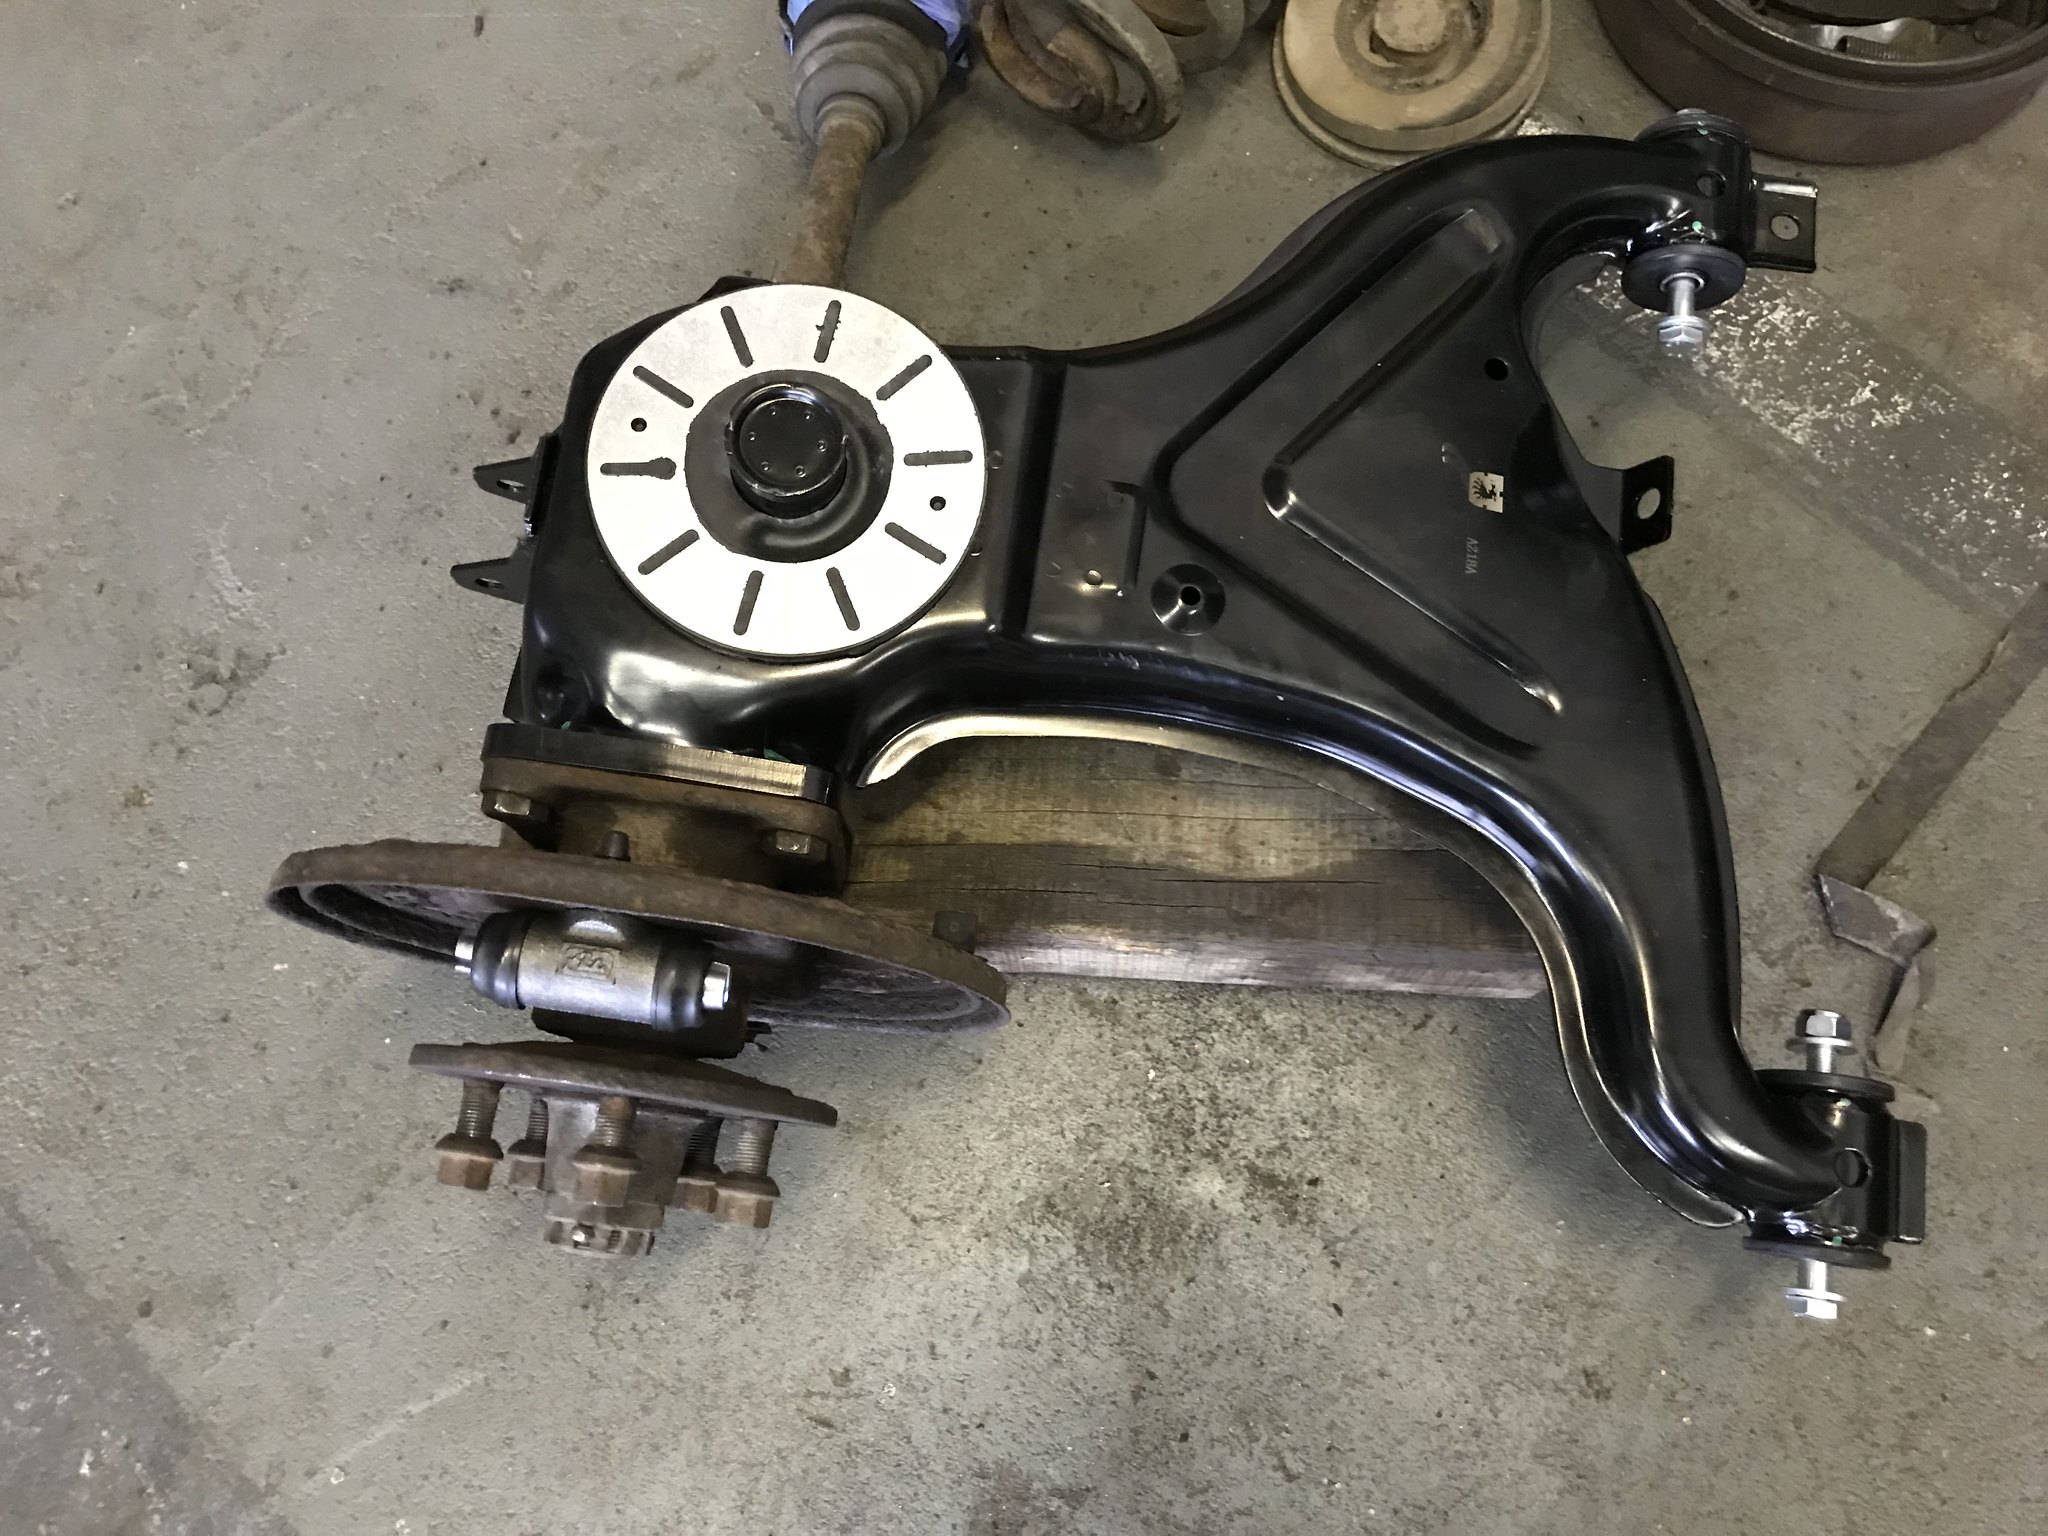
New trailing arm built up, yes I know the back plate is honking but there are none In stock and It’s more important that I can get the bus on the floor, so at some point it’ll all come off and get zinc plated I hope.
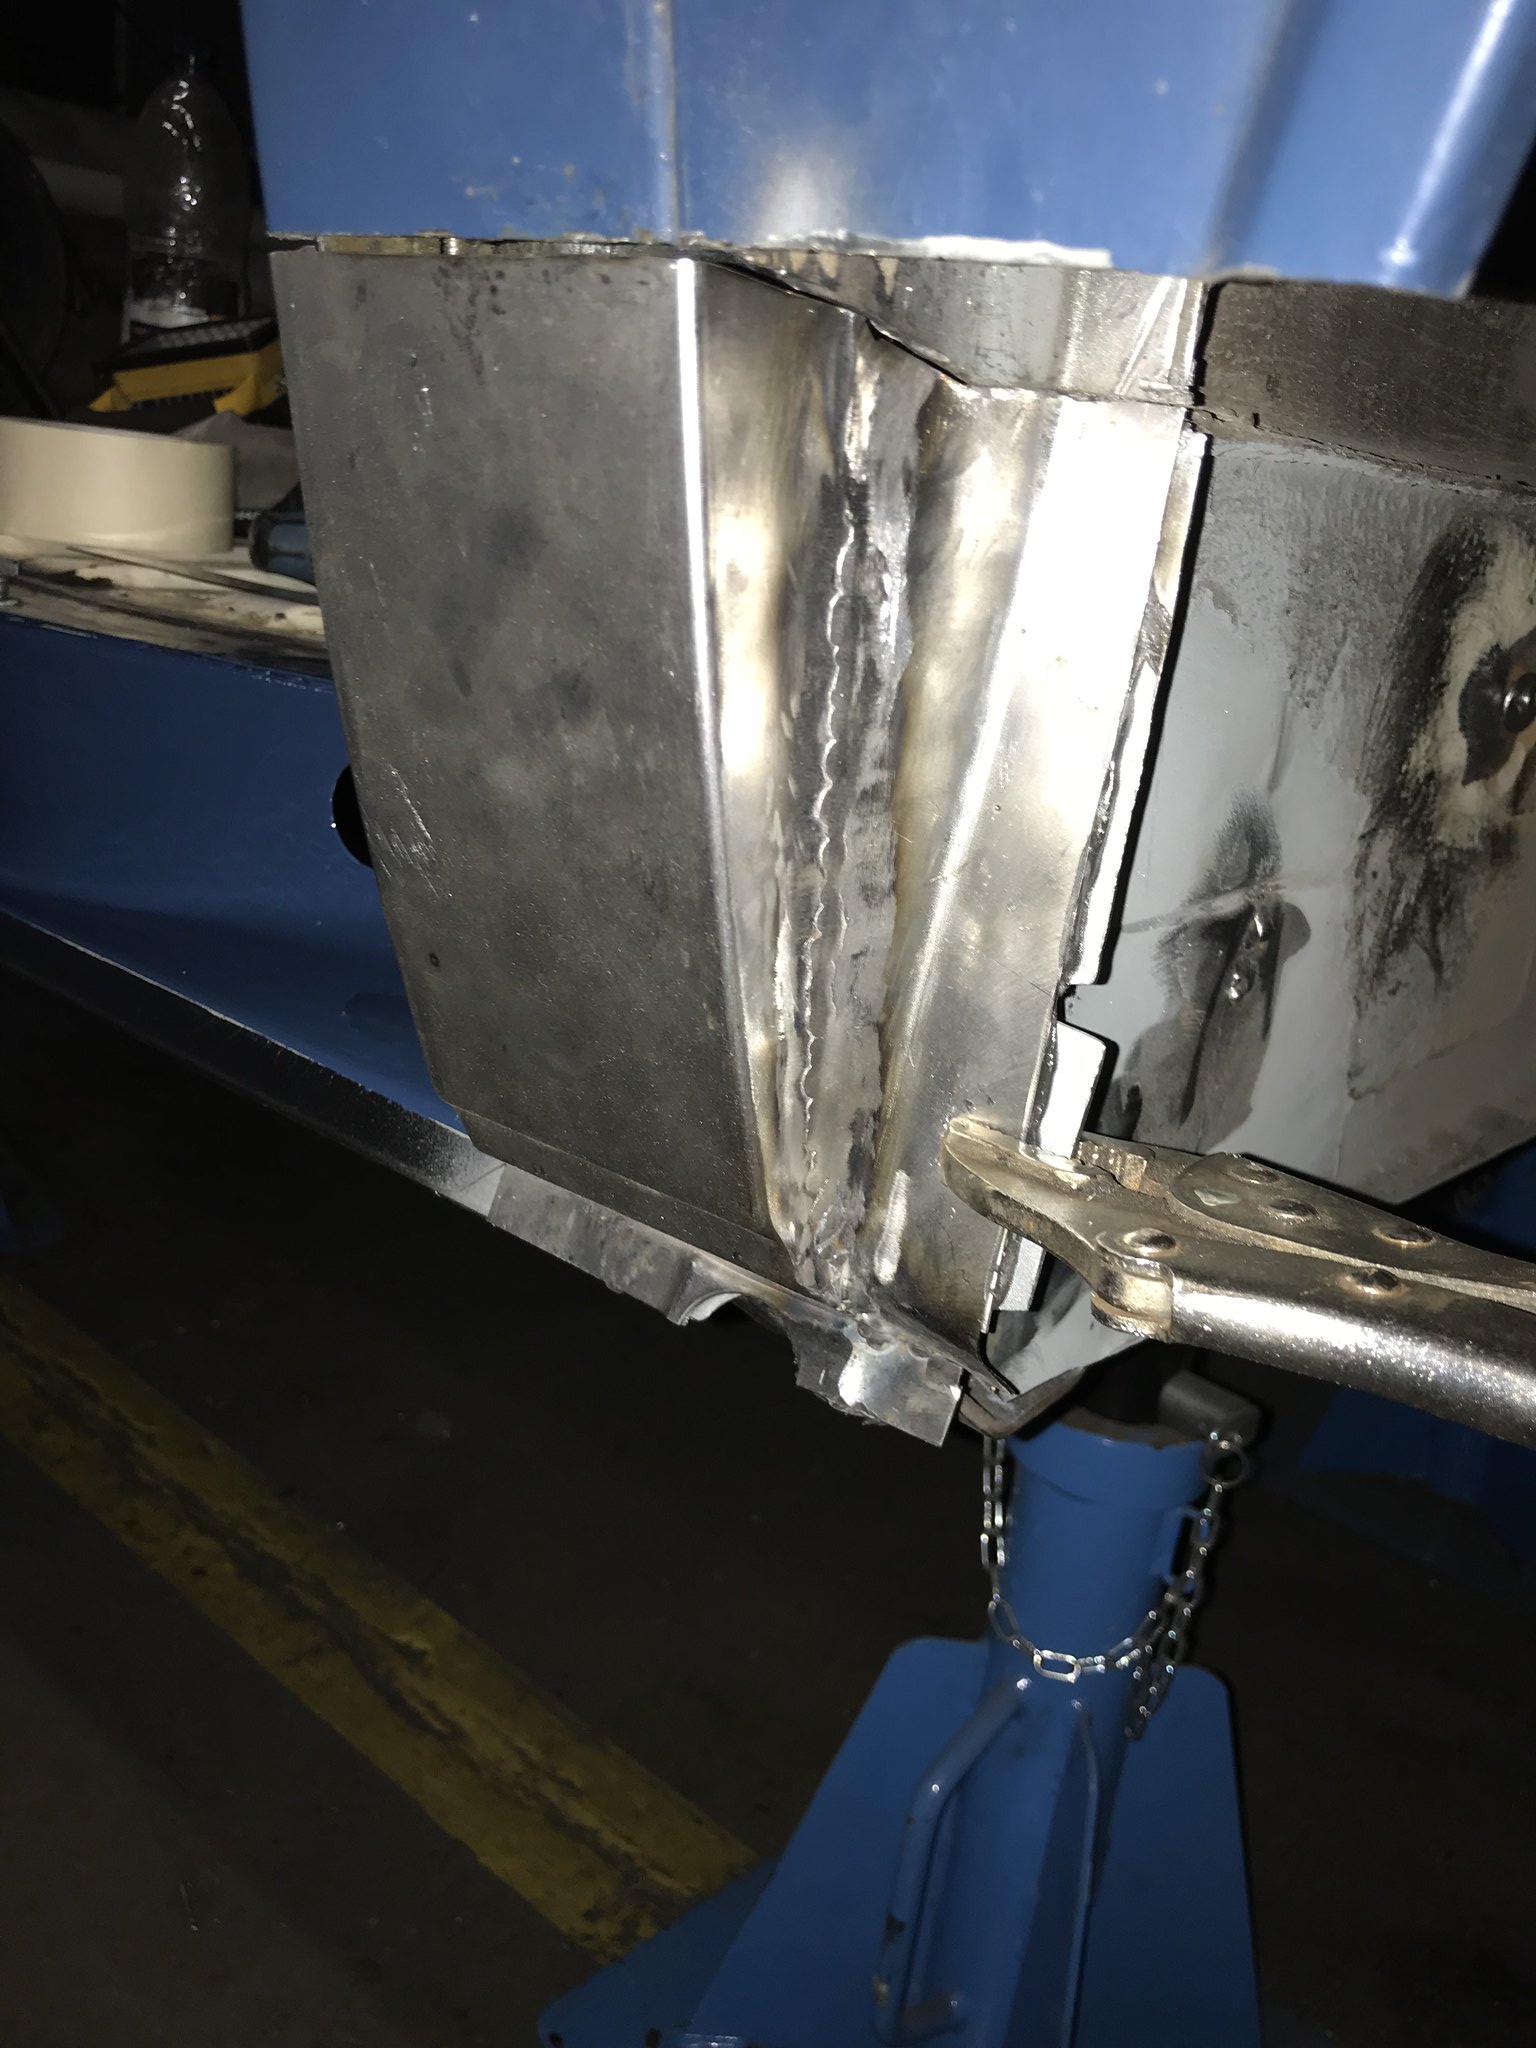
Finally the b pillar outer is nearly finished using a combination of sheet, repair panel and original cuts. I aim to finish it, prime it inside and stitch it in tomorrow. Before I get started on the c pillar.
Re: Procrastinating never got anyone anywhere
Posted: 02 Sep 2018, 17:37
by adie89
Re: Procrastinating never got anyone anywhere
Posted: 02 Sep 2018, 22:04
by RogerT
Nicely done

Re: Procrastinating never got anyone anywhere
Posted: 03 Sep 2018, 06:16
by 937carrera
Thanks for posting that.It's all a bit complicated in that section, seems like you had a bit more metal than I have.
Those seat belts mounts are a common problem too.

Easy for people to assume all is OK, unless that peel of the sealant on the underside.
Re: Procrastinating never got anyone anywhere
Posted: 04 Sep 2018, 20:47
by adie89
937carrera wrote:Thanks for posting that.It's all a bit complicated in that section, seems like you had a bit more metal than I have.
Those seat belts mounts are a common problem too.
Easy for people to assume all is OK, unless that peel of the sealant on the underside.
Worse, that seatbelt repair patch was on top! So it looked like it had just been repaired/reinforced rather than replaced with the equivalent of tin foil.
I remember looking at your thread and wincing, but you got the whole battery box panel?
Re: Procrastinating never got anyone anywhere
Posted: 04 Sep 2018, 21:12
by adie89
A delay in replying after a long day yesterday and a family day today.
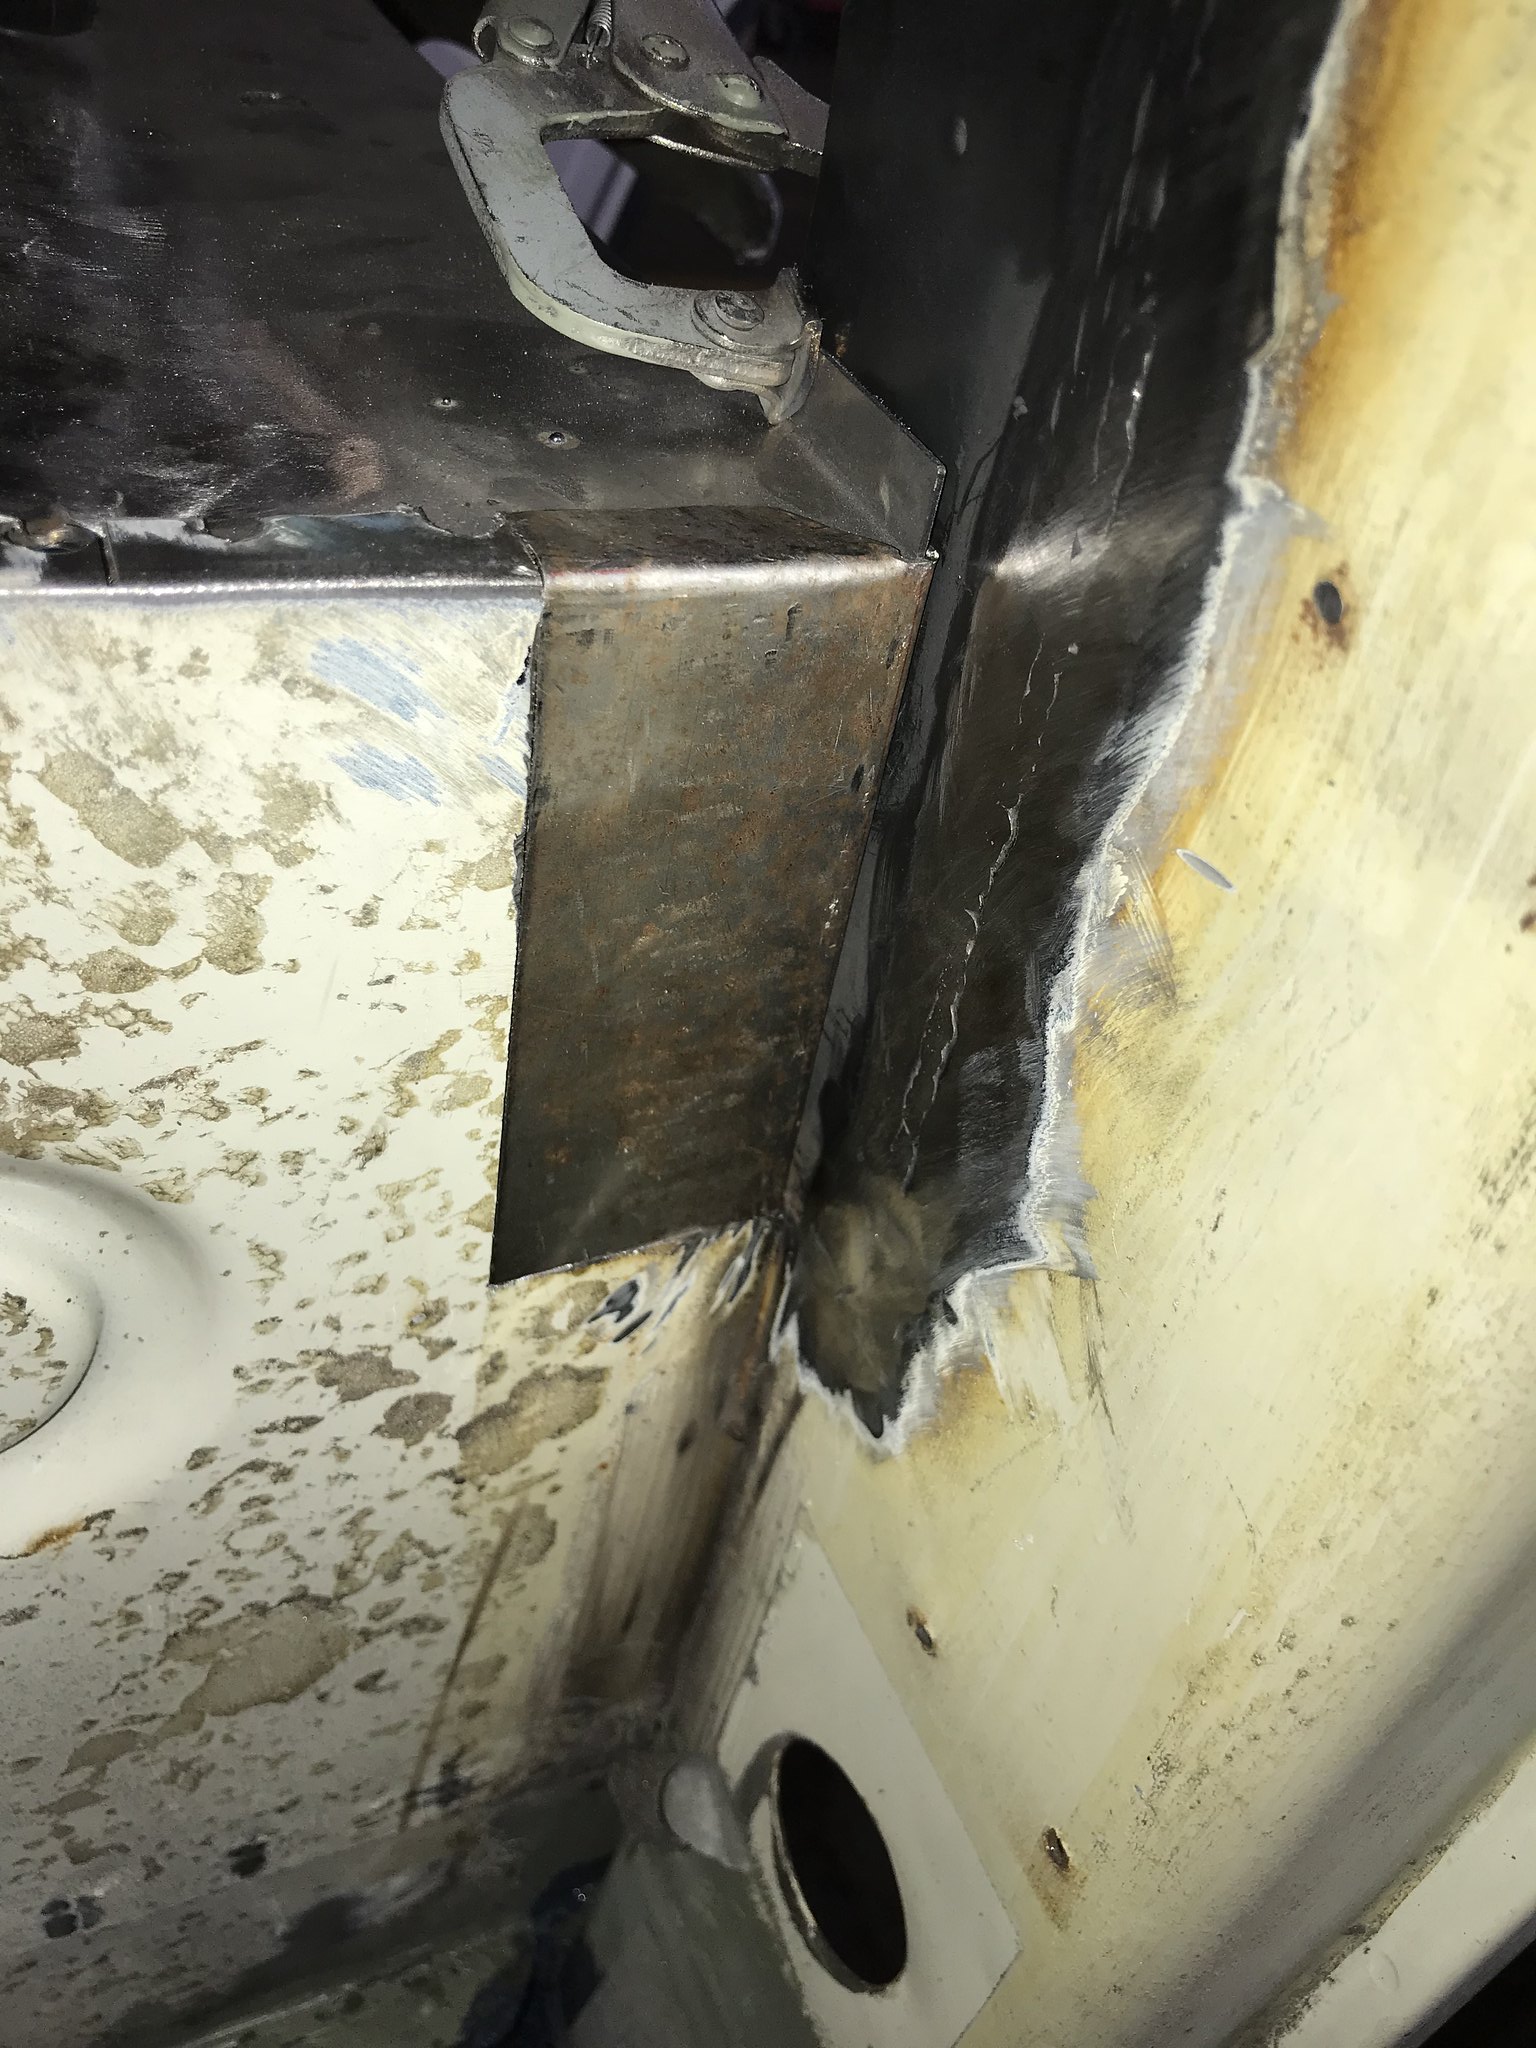
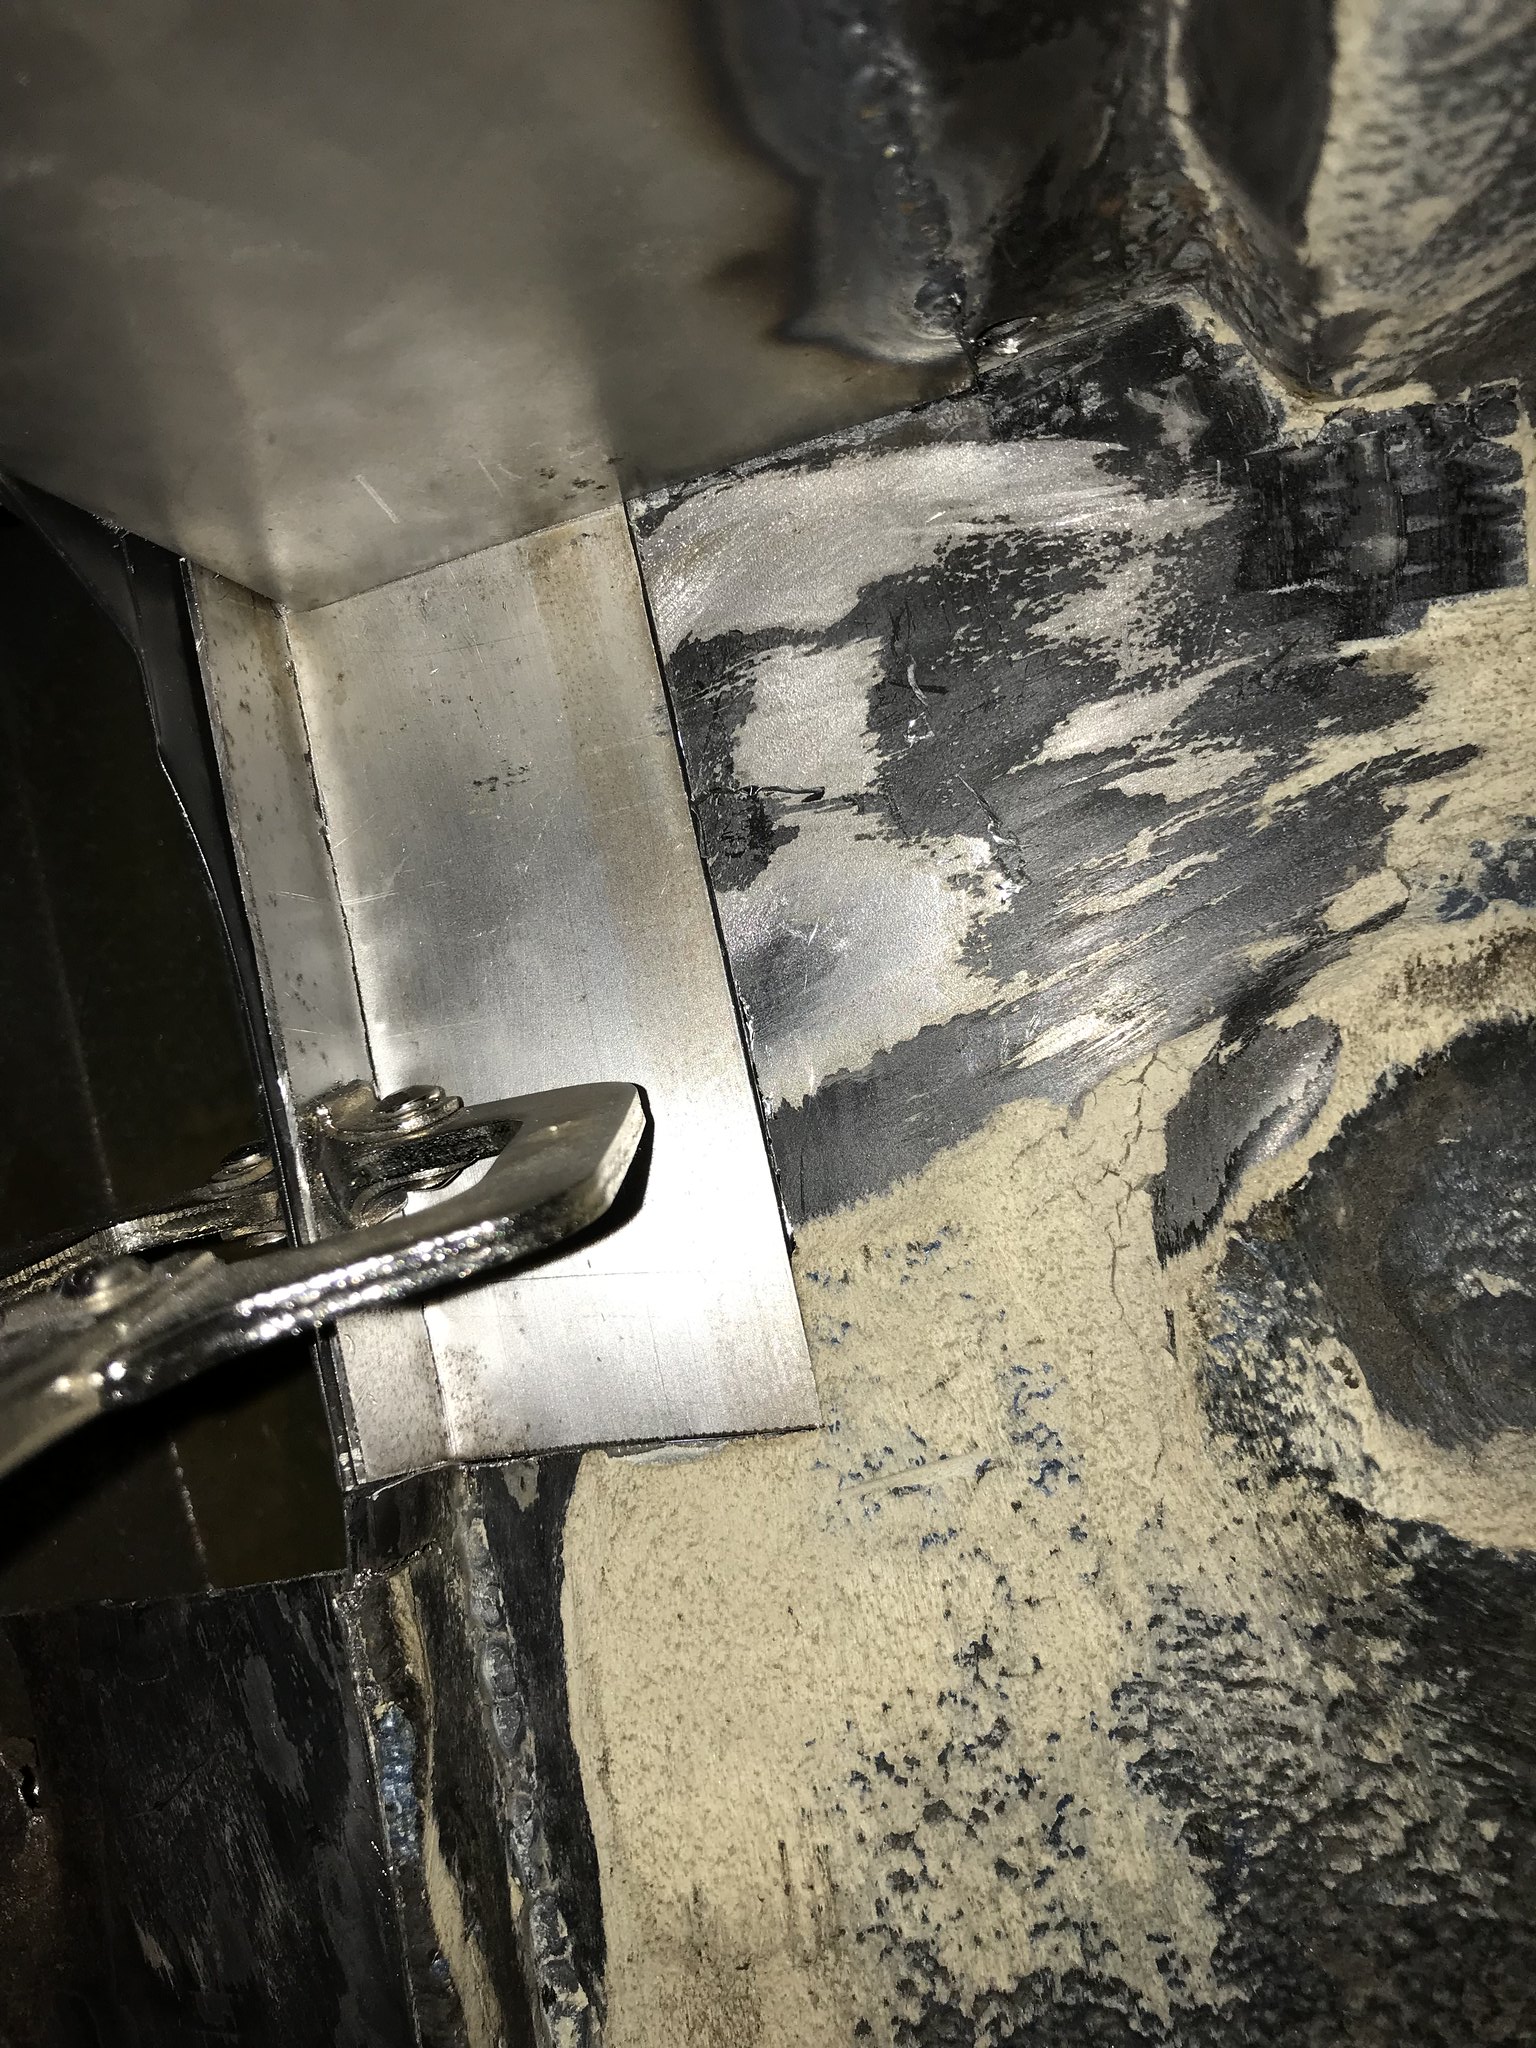
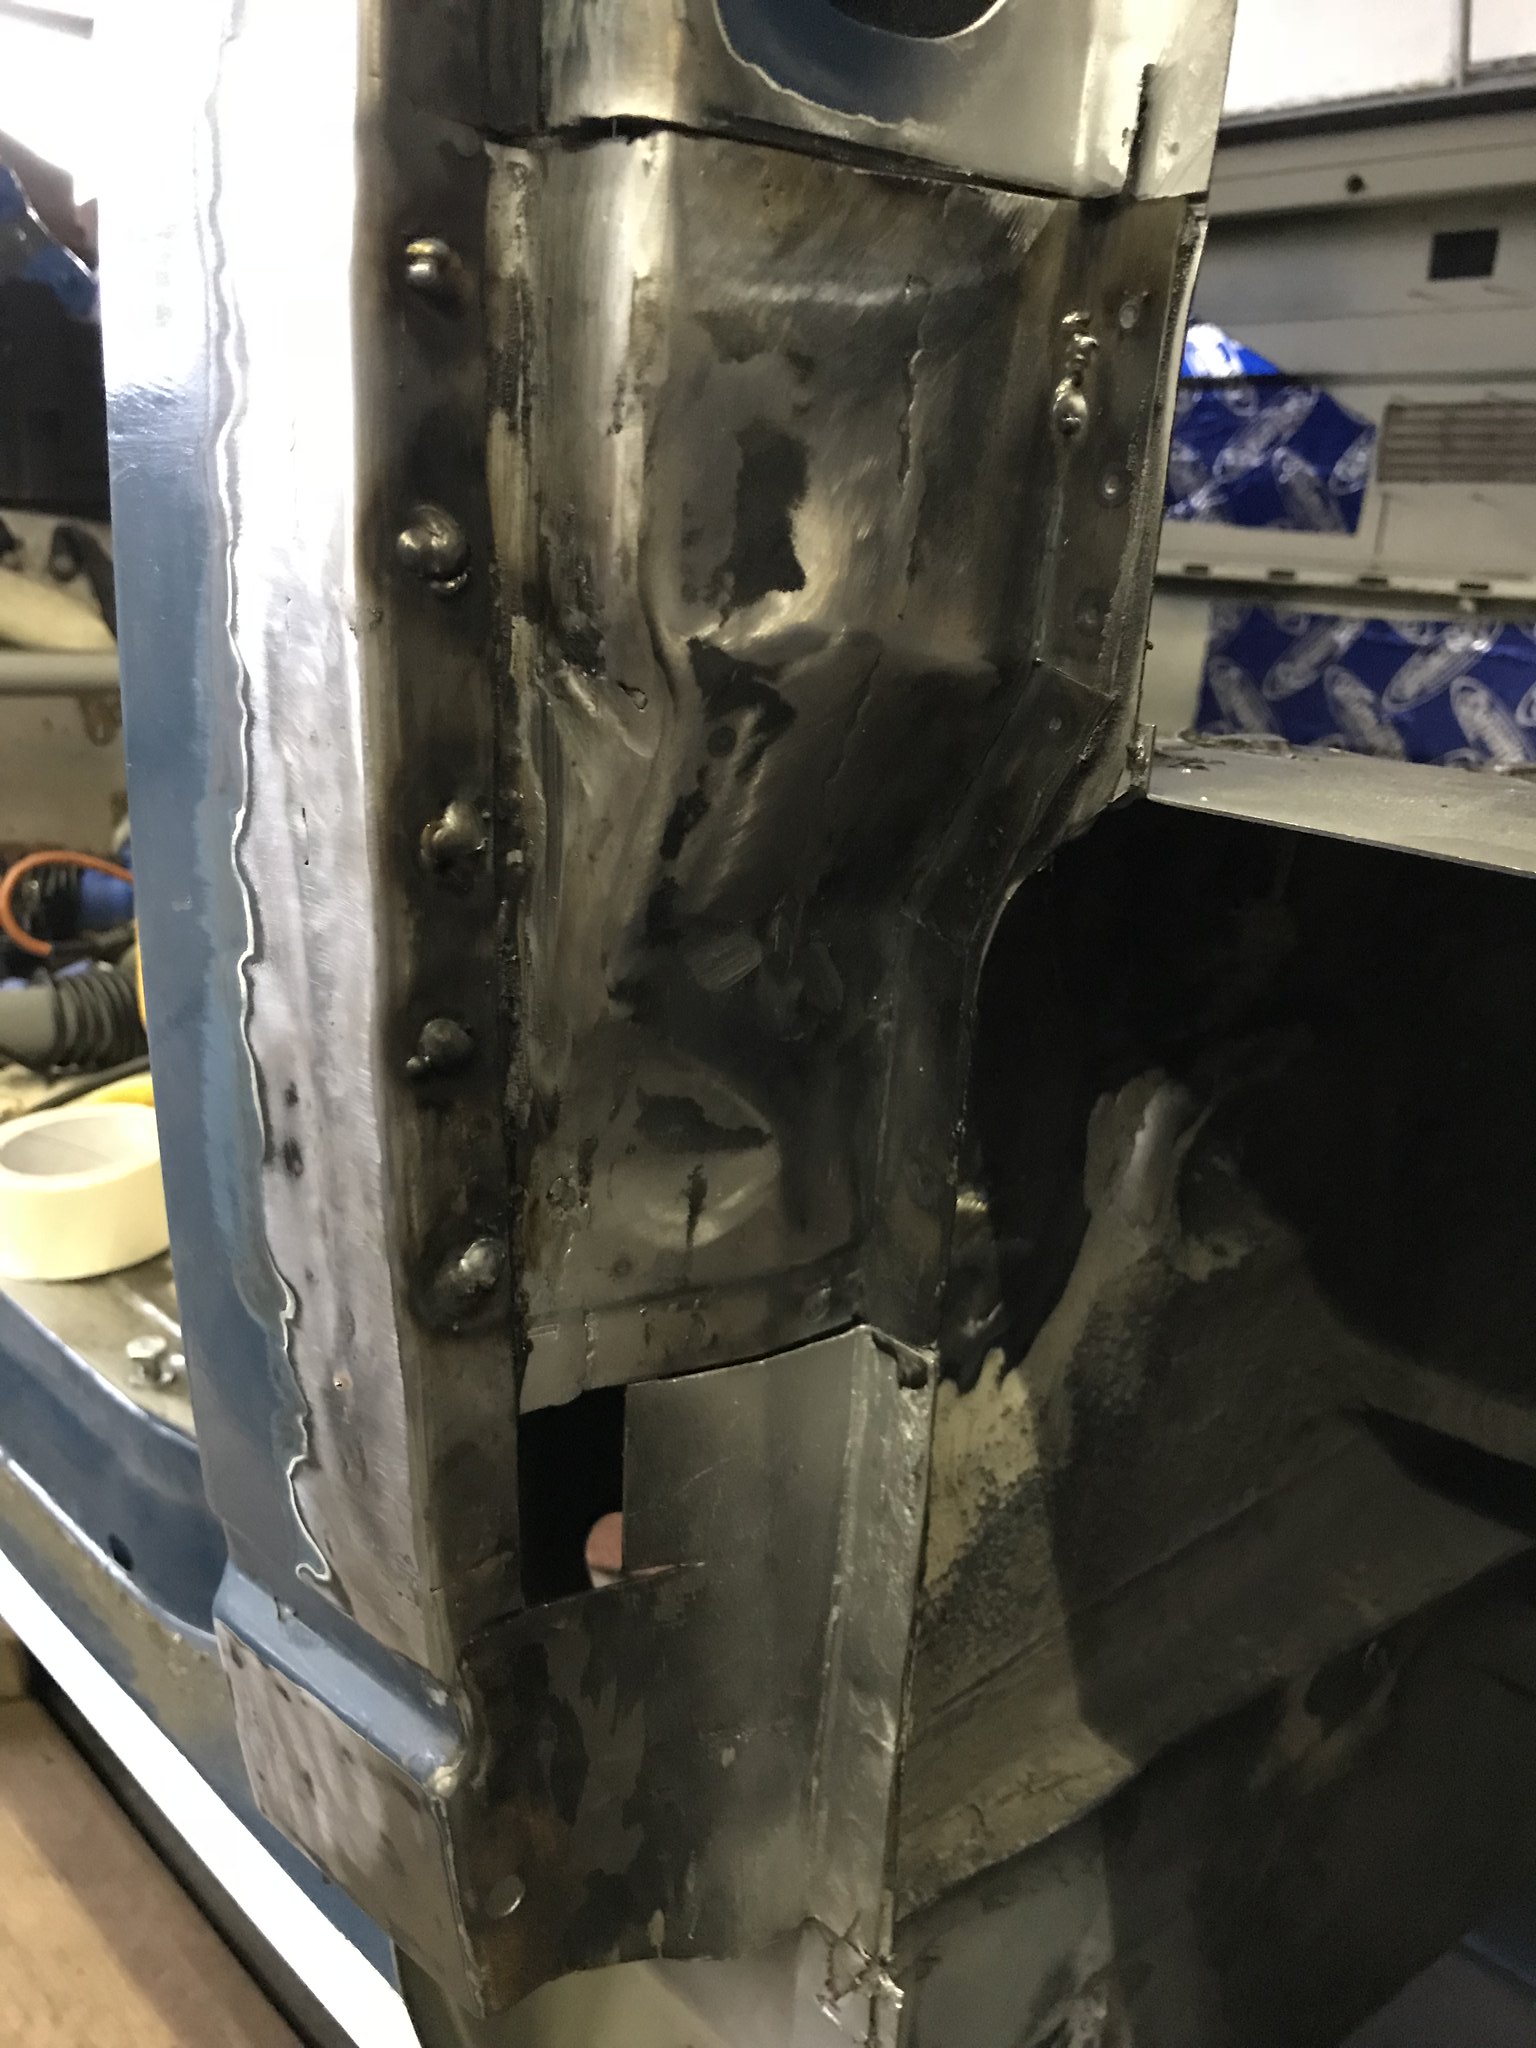
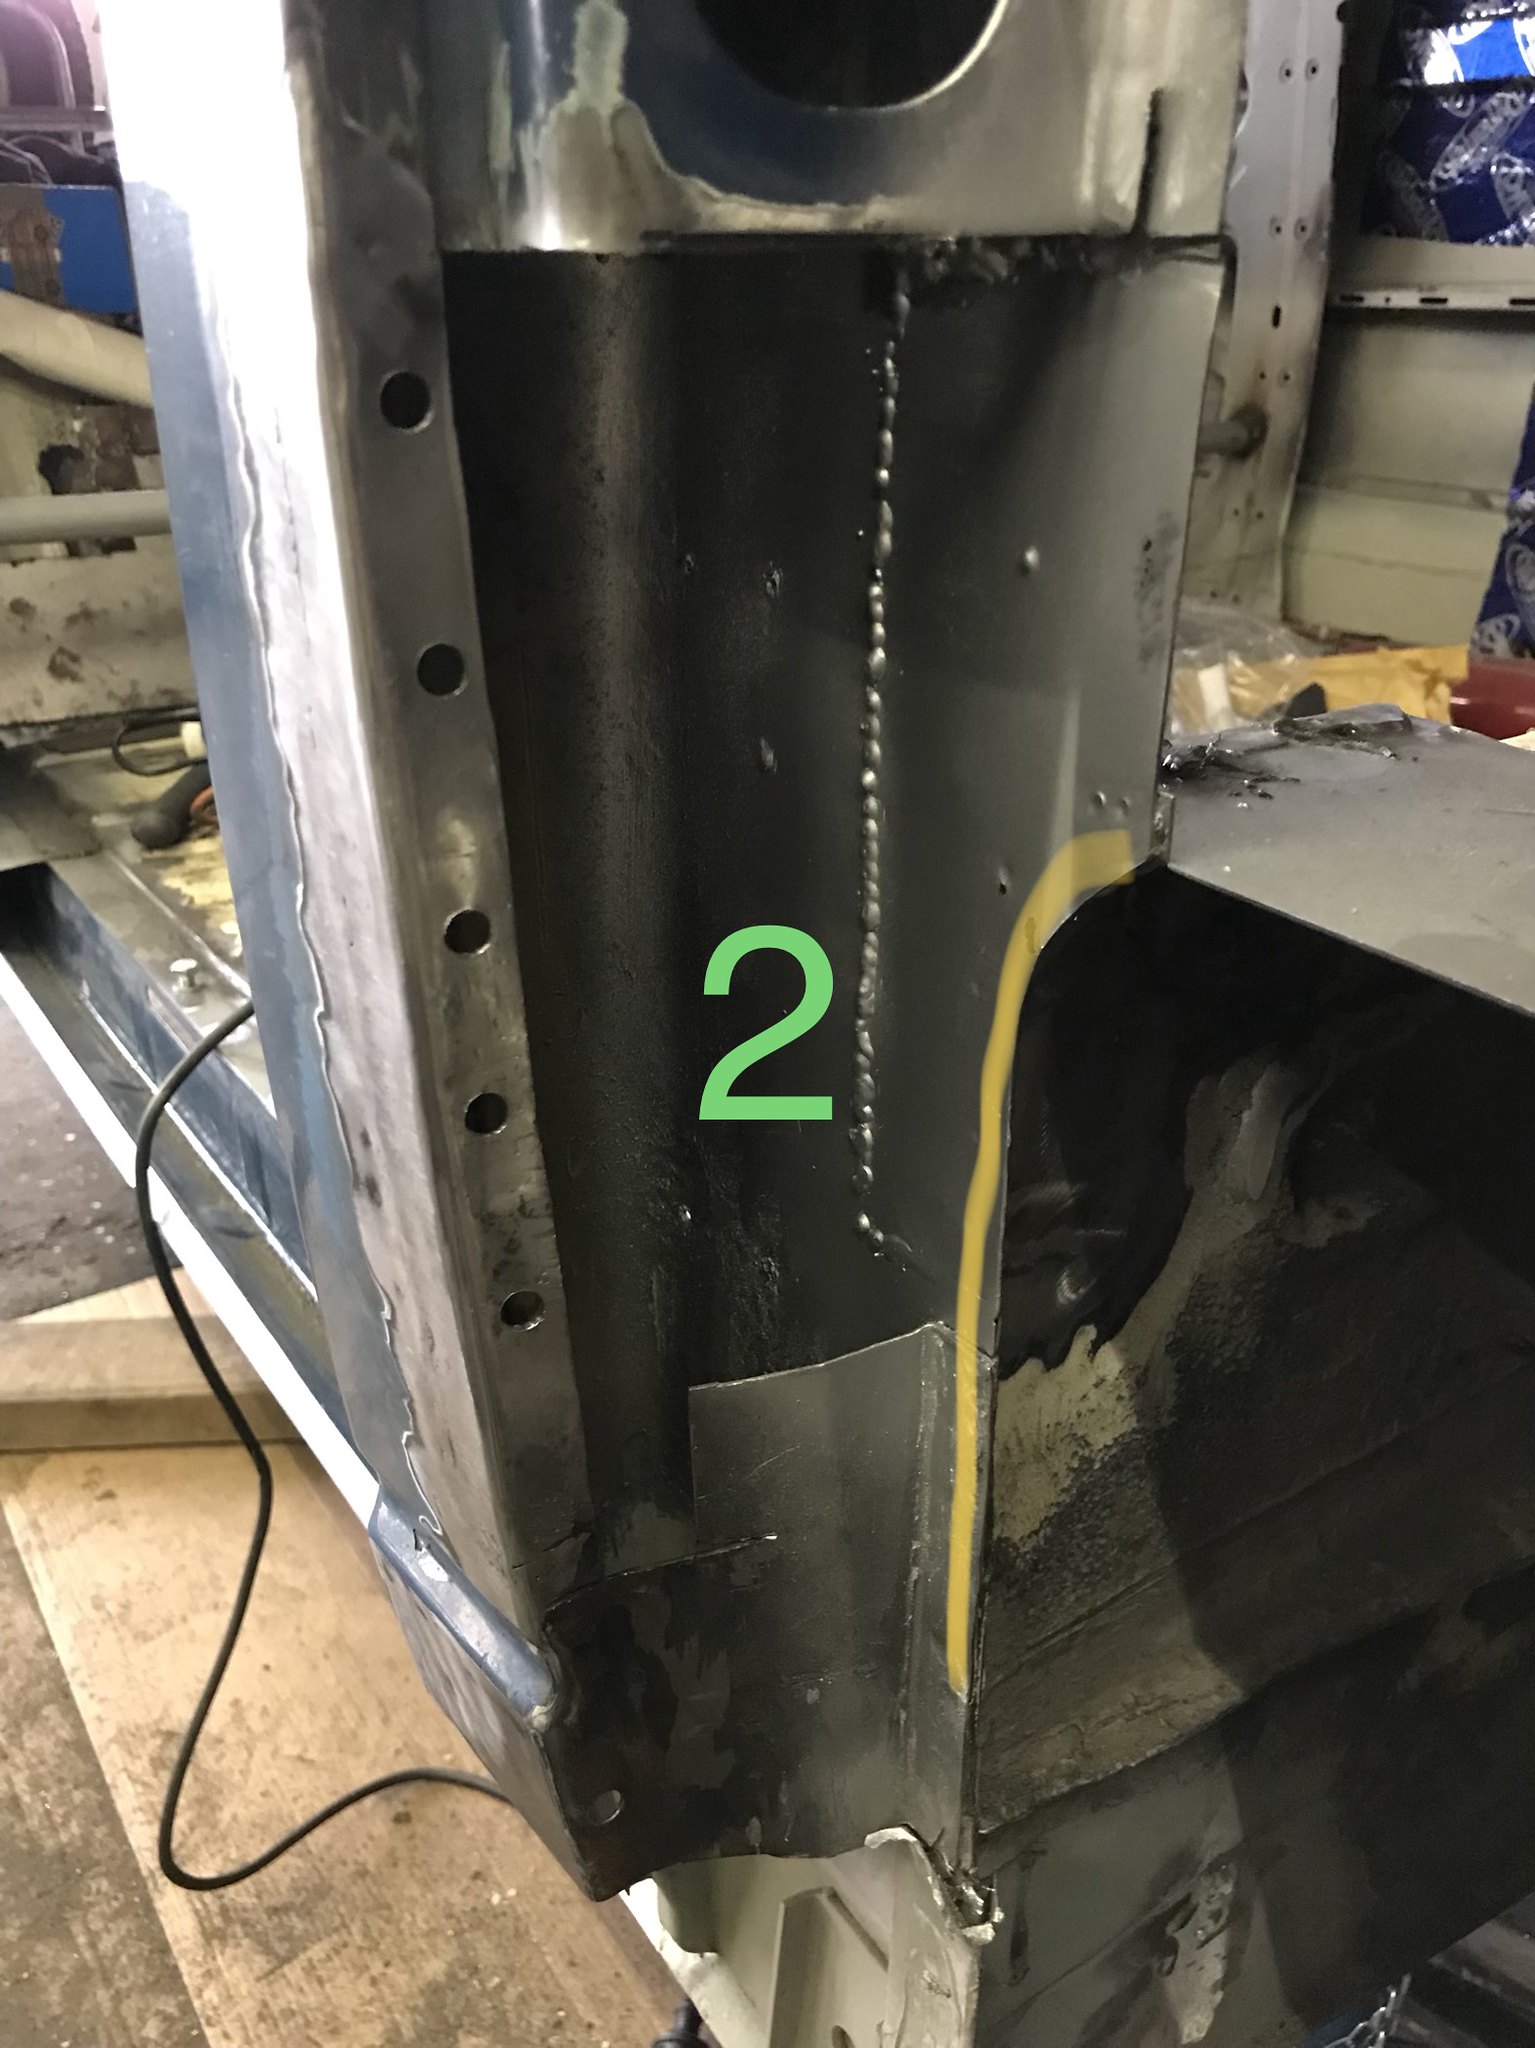
Got the repair patch on the back of the battery box welded in and ‘dressed’ I use that word in the same vain I’ve seen it commonly used... a lot of grinding after messy welds

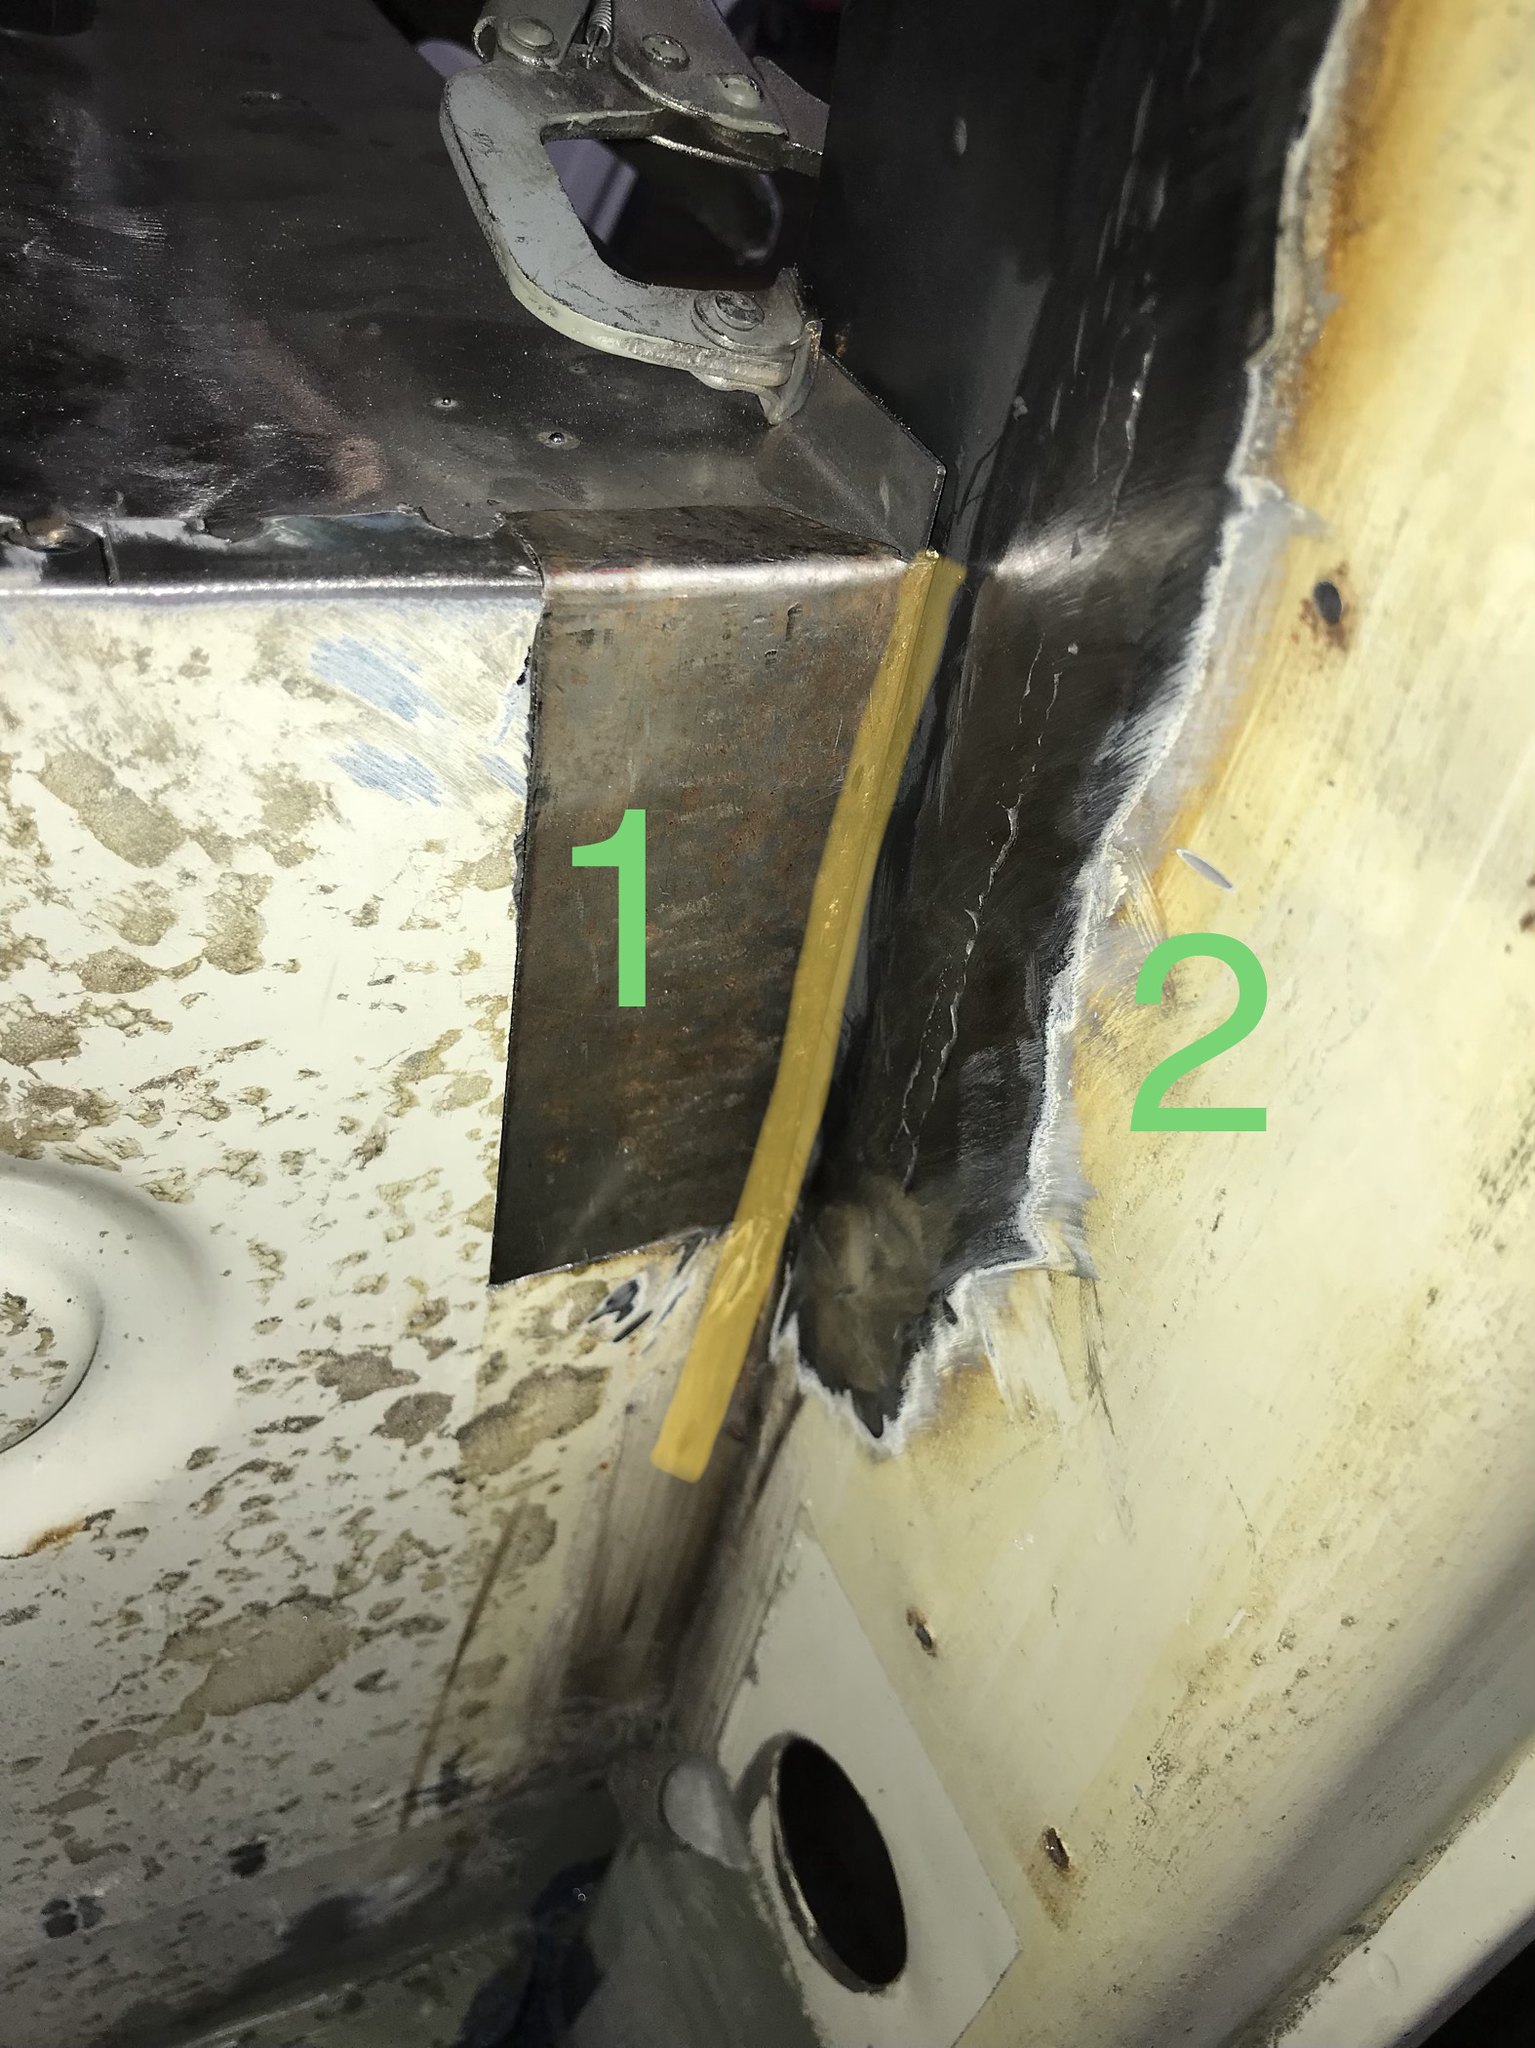
I then repaired the edge of the outer b pillar skin and drilled the holes to puddle weld, you can see the inner b pillar piece I had to stitch in, so at least I got another few quids worth out of my complete b pillar I bought

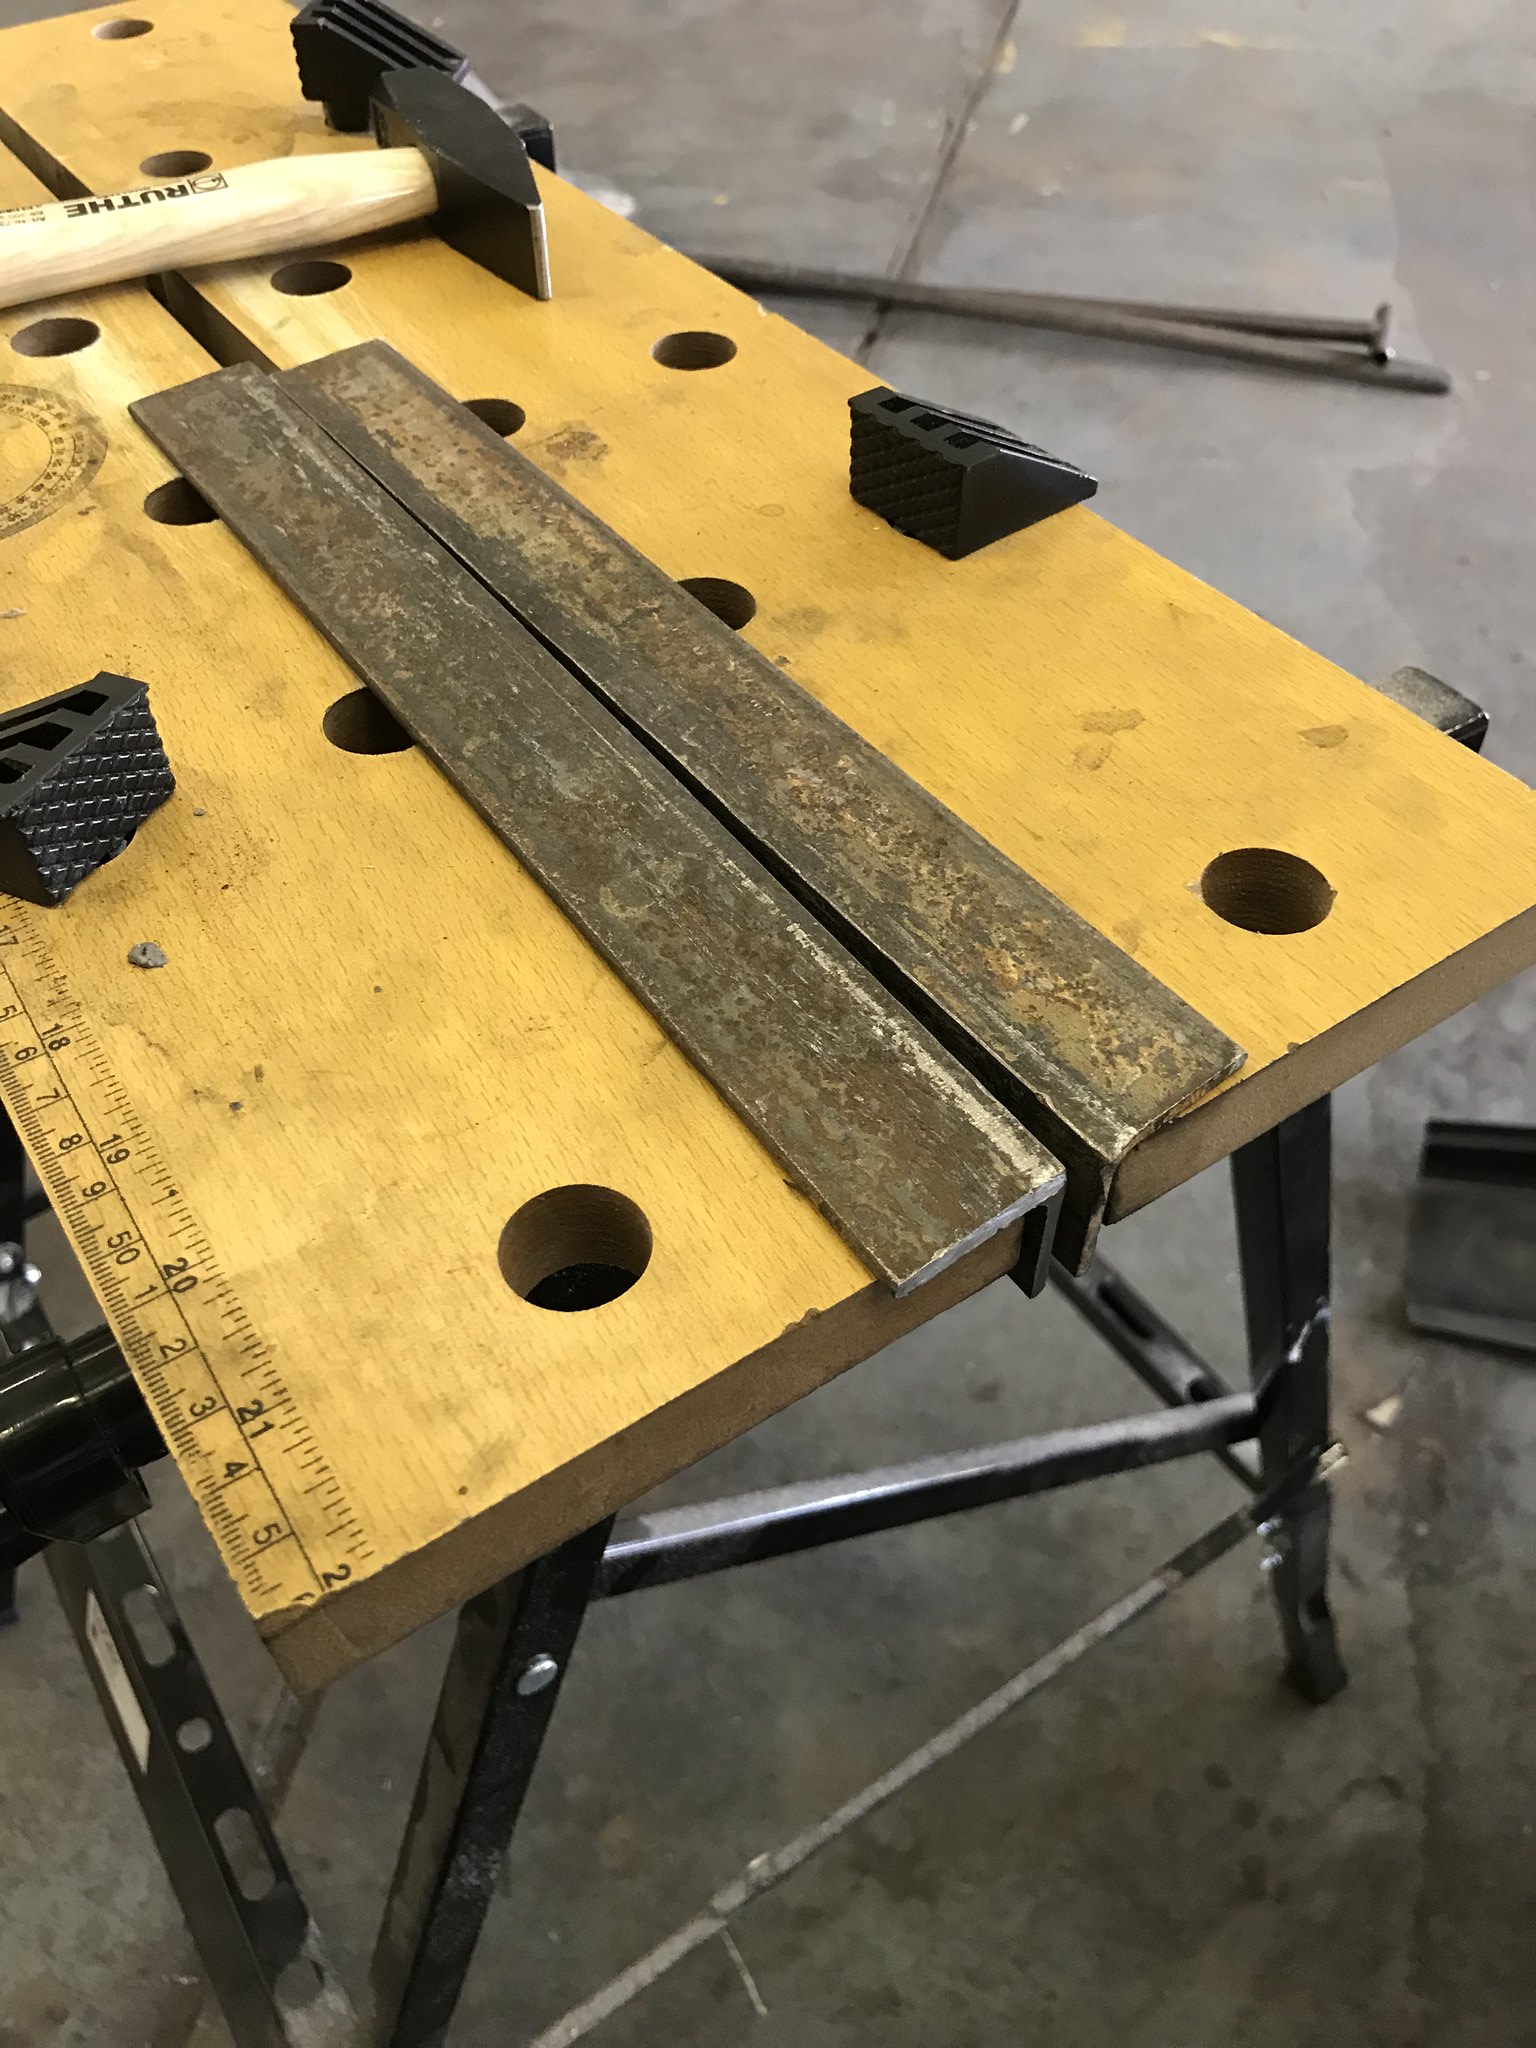
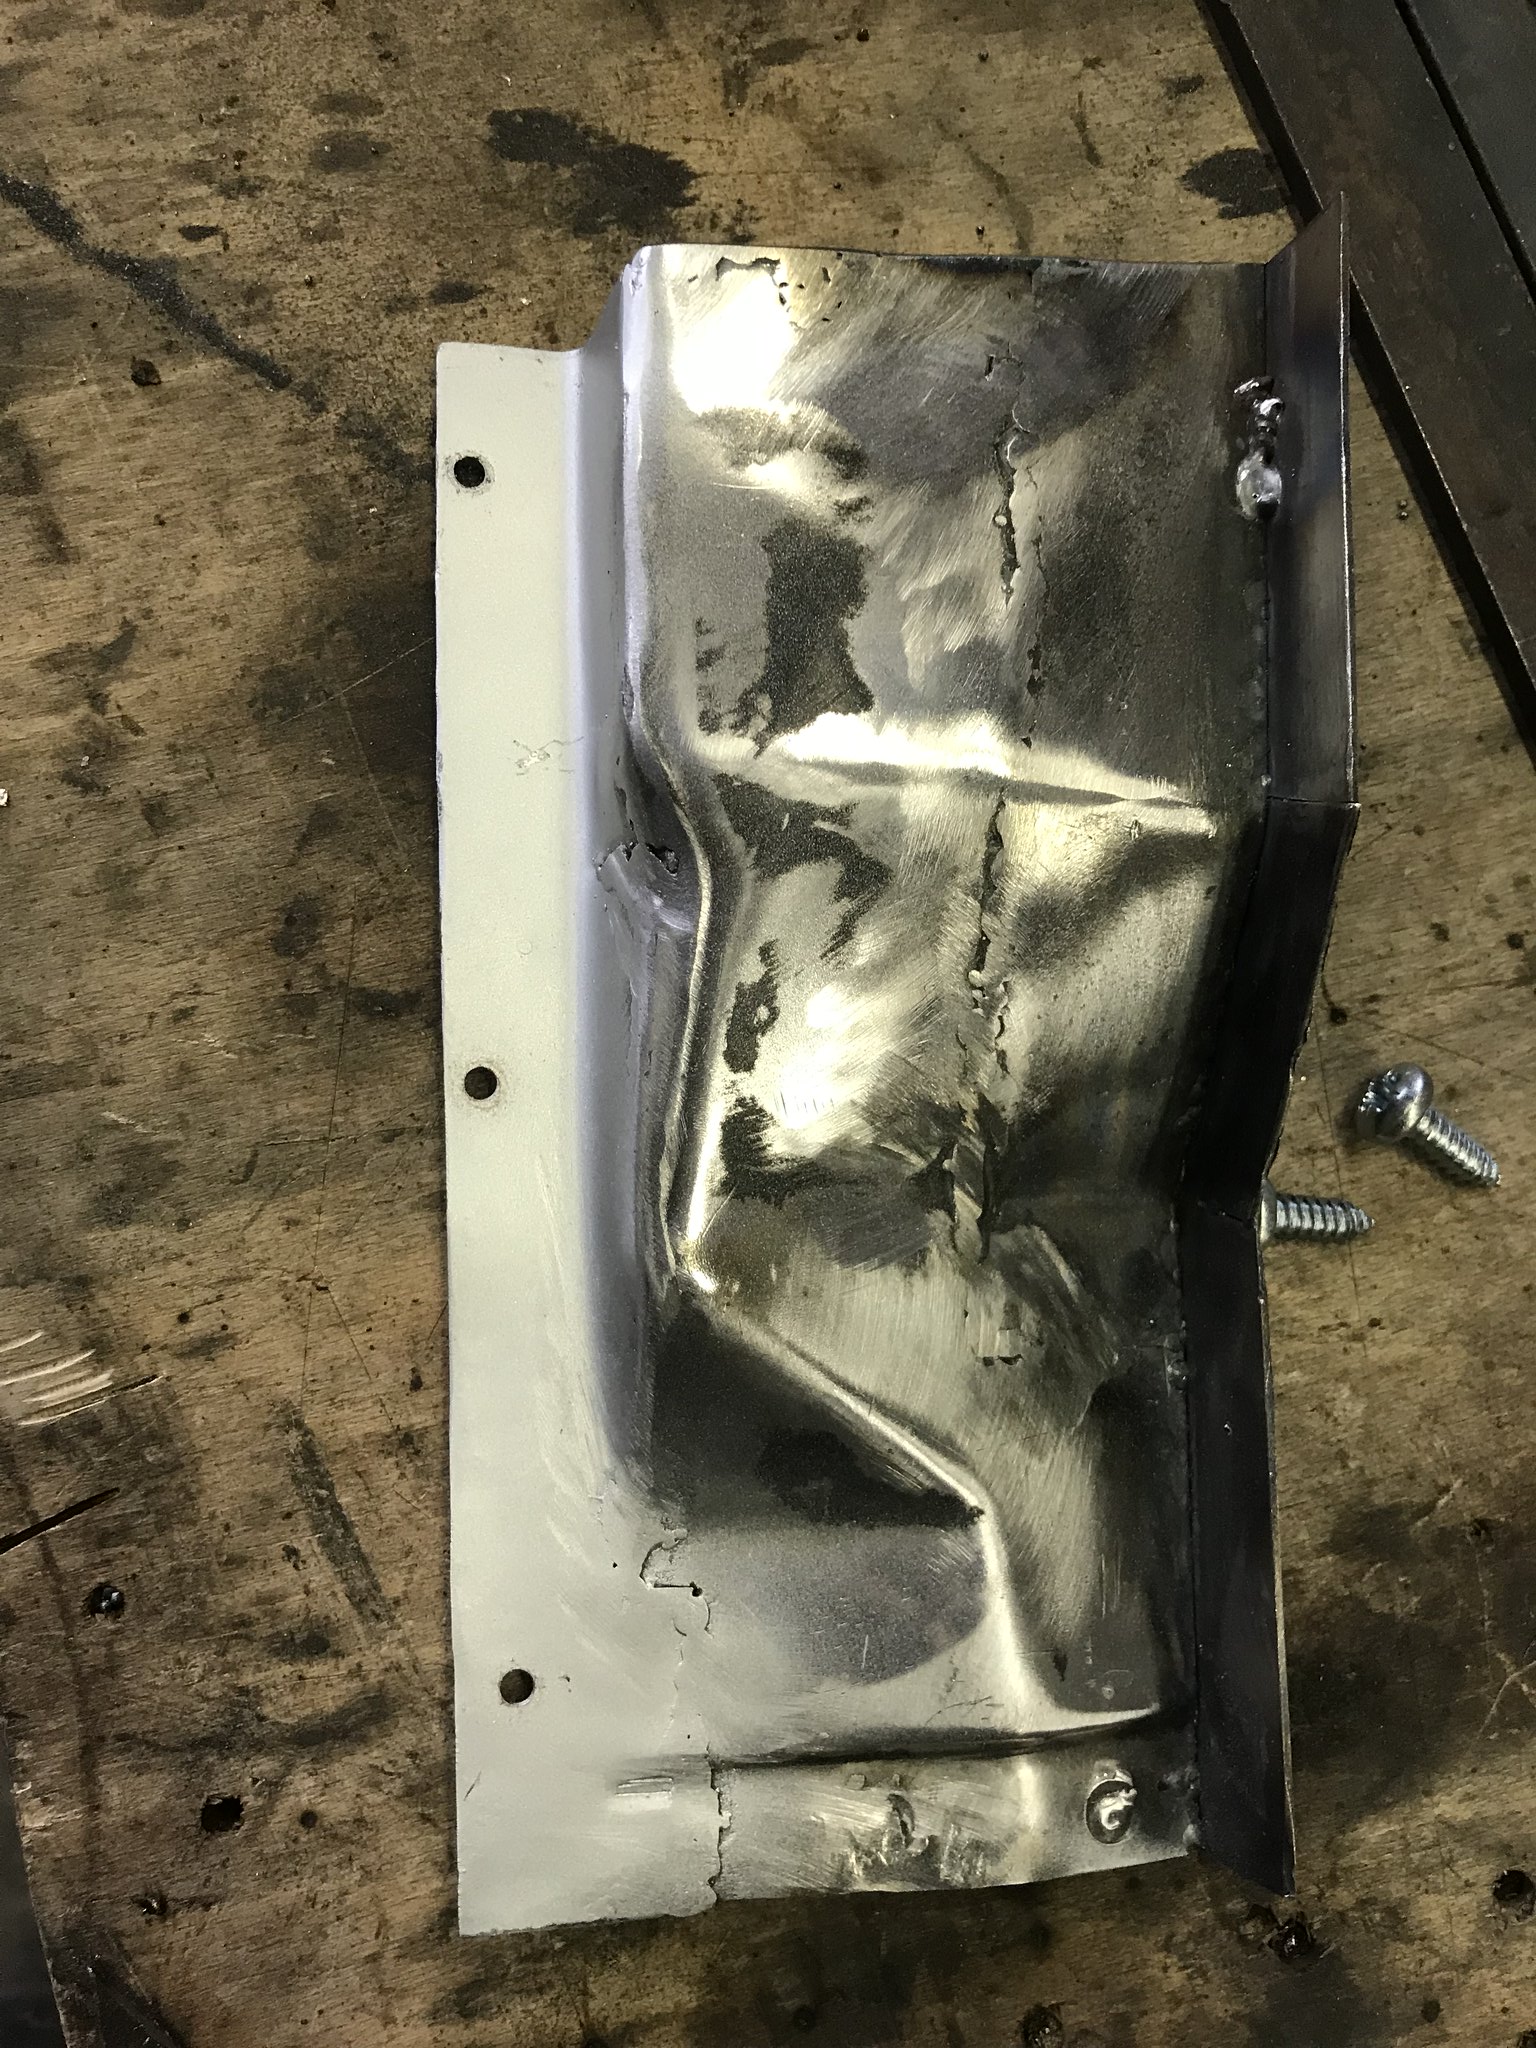
I wish I’d been able to buy this panel, it joins inner to outer b pillar and sits under the arch/door frame. After finally separating it from the arch it was a PITA to separate and repair, I repaired it in sections, clamping it to the bus before tacking sections where I could to get the shape right...ish. The right angle in the work mate and cardboard templates the order of the day. It’s not pretty but it’s thick and strong. All the curved profile on the left and the inch or so wide on the right is new metal
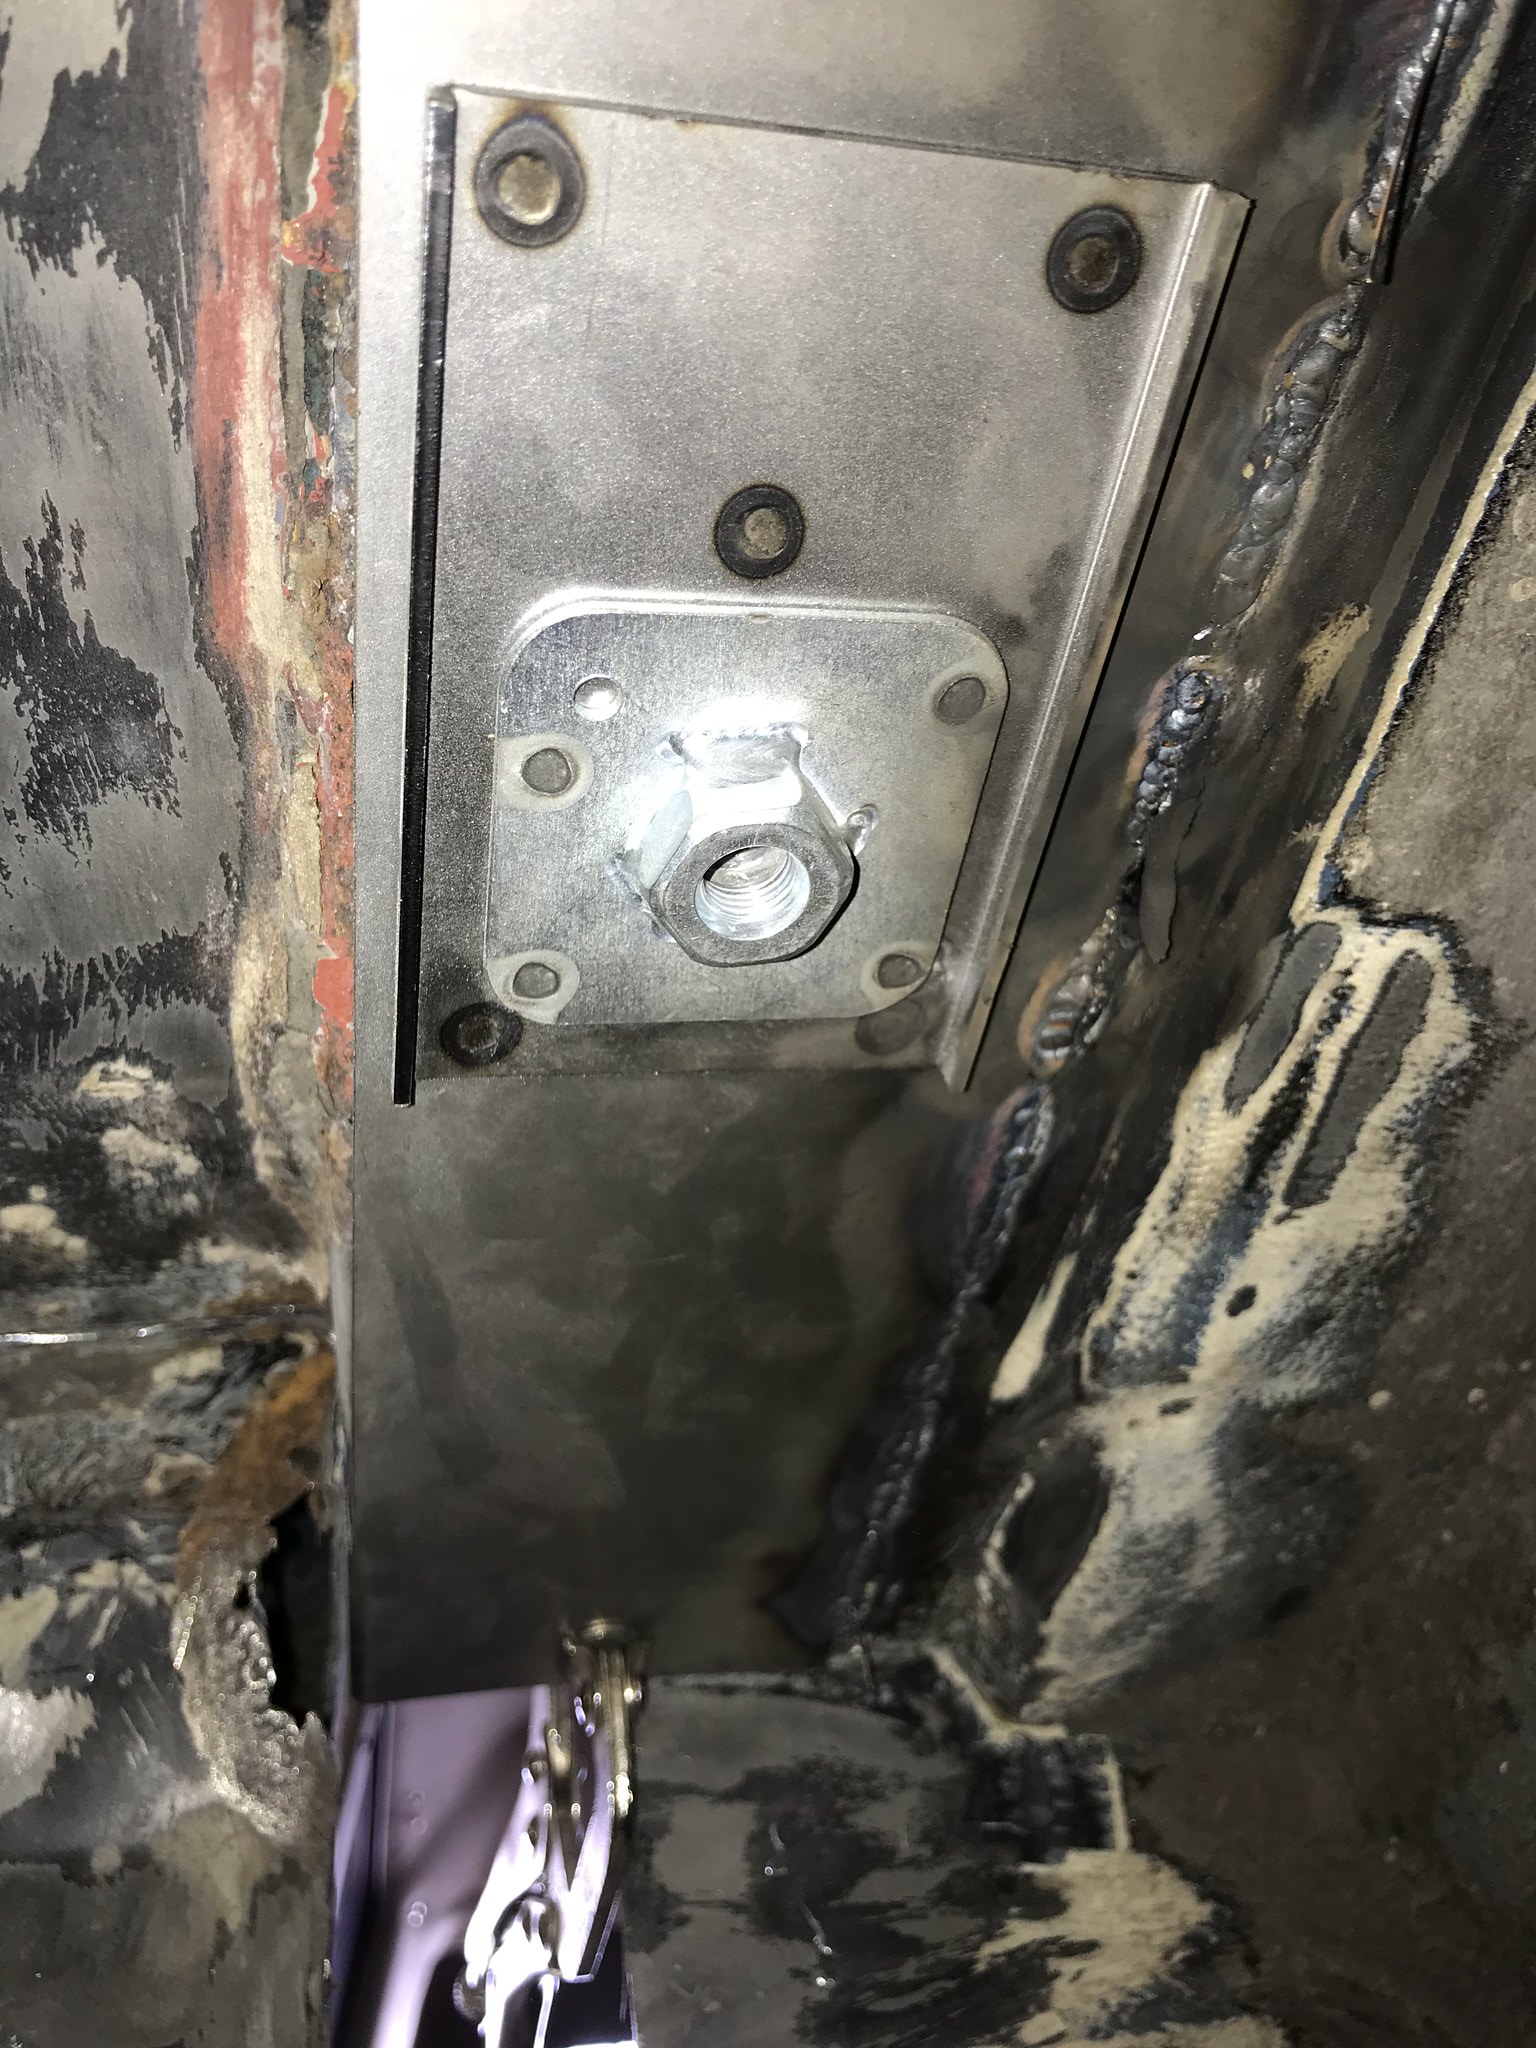
Panel bond, spot weld to the inner b, panel bond and puddle weld to the the outer b. I have a cunning plan to paint the inside involving a long handled paint brush from the bottom before I close off the the b pillar
And as a reminder that my holiday and life hasn’t revolved around Greta...
Re: Procrastinating never got anyone anywhere
Posted: 05 Sep 2018, 19:47
by 937carrera
That B post section is a complicated beast isn't it.
Can you upload some photos of the battery box repair too, may be helpful for me in confirming where everything should meet up.
Congrats on the truck test BTW. Was that C or C + E ?
Re: Procrastinating never got anyone anywhere
Posted: 05 Sep 2018, 21:20
by adie89
937carrera wrote:That B post section is a complicated beast isn't it.
Can you upload some photos of the battery box repair too, may be helpful for me in confirming where everything should meet up.
Congrats on the truck test BTW. Was that C or C + E ?
Will do, I didn’t take pictures today as I was mostly painting and baking layers quickly, so I’ll play catch up tomorrow, but yes definitely complicated. Only because of the shapes though.
It was both started C Monday tested Wednesday, C+E Thursday test Friday. Driver training is part of my transport manager job so I got one of my instructors to take me one on one. I figured it was a bit hypocritical to lecture road safety if I couldn’t even drive the vehicles!
Re: Procrastinating never got anyone anywhere
Posted: 05 Sep 2018, 21:32
by 937carrera
adie89 wrote:
It was both started C Monday tested Wednesday, C+E Thursday test Friday. Driver training is part of my transport manager job so I got one of my instructors to take me one on one. I figured it was a bit hypocritical to lecture road safety if I couldn’t even drive the vehicles!
I think your instructor deserves a bit of recognition for that, putting the boss in for two tests in the same week and getting him through both. IIRC you can't apply for C + E until you actually have C on the licence in the UK.
Re: Procrastinating never got anyone anywhere
Posted: 05 Sep 2018, 21:43
by RogerT
Gordon Bennett! Is that piece hiding under the shut line of the RH door? Do I want to venture under there? I guess I’ll be there or thereabouts if I’m doing my B pillar!
Re: Procrastinating never got anyone anywhere
Posted: 05 Sep 2018, 22:01
by adie89
RogerT wrote:Gordon Bennett! Is that piece hiding under the shut line of the RH door? Do I want to venture under there? I guess I’ll be there or thereabouts if I’m doing my B pillar!
Spot on, it closes off the b pillar as a separate panel from about 20cm from the bottom to the bottom of the air vent. It is held to the arch with four of the biggest spot welds known to man. I had to cut the whole lot out, the. Find the spot welds and then separate. I only did because I had rust around a previous repair right at the top of the battery box where it meets the b pillar. A hell of a lot of sealant hides it. I did get fed up with it and stopped replicating all the panels and just butt welded them together. Wait till you try painting the inside of the pillar! I’ll post that tomorrow.
Re: Procrastinating never got anyone anywhere
Posted: 06 Sep 2018, 08:03
by multisi
That piece is part of the outer b pillar which is still available.
Re: Procrastinating never got anyone anywhere
Posted: 06 Sep 2018, 18:41
by adie89
multisi wrote:That piece is part of the outer b pillar which is still available.
I didn't realise it was part of the outer B it seemed separate. I’d seen the whole outer b pillar, but it was something like 250 quid +? I could justify the inner B after the PITA doing the other side, but not both plus I’d already got the repair piece not realising how much I still had to make, which got revealed bit by bit. In hindsight I probably would have bought the outer now.
E D I T - looked it up now, your spot on that it’s part of the outer. It was difficult to tell from the corrosion how it was constructed. That would have saved me several hours of work
Re: Procrastinating never got anyone anywhere
Posted: 06 Sep 2018, 18:57
by adie89
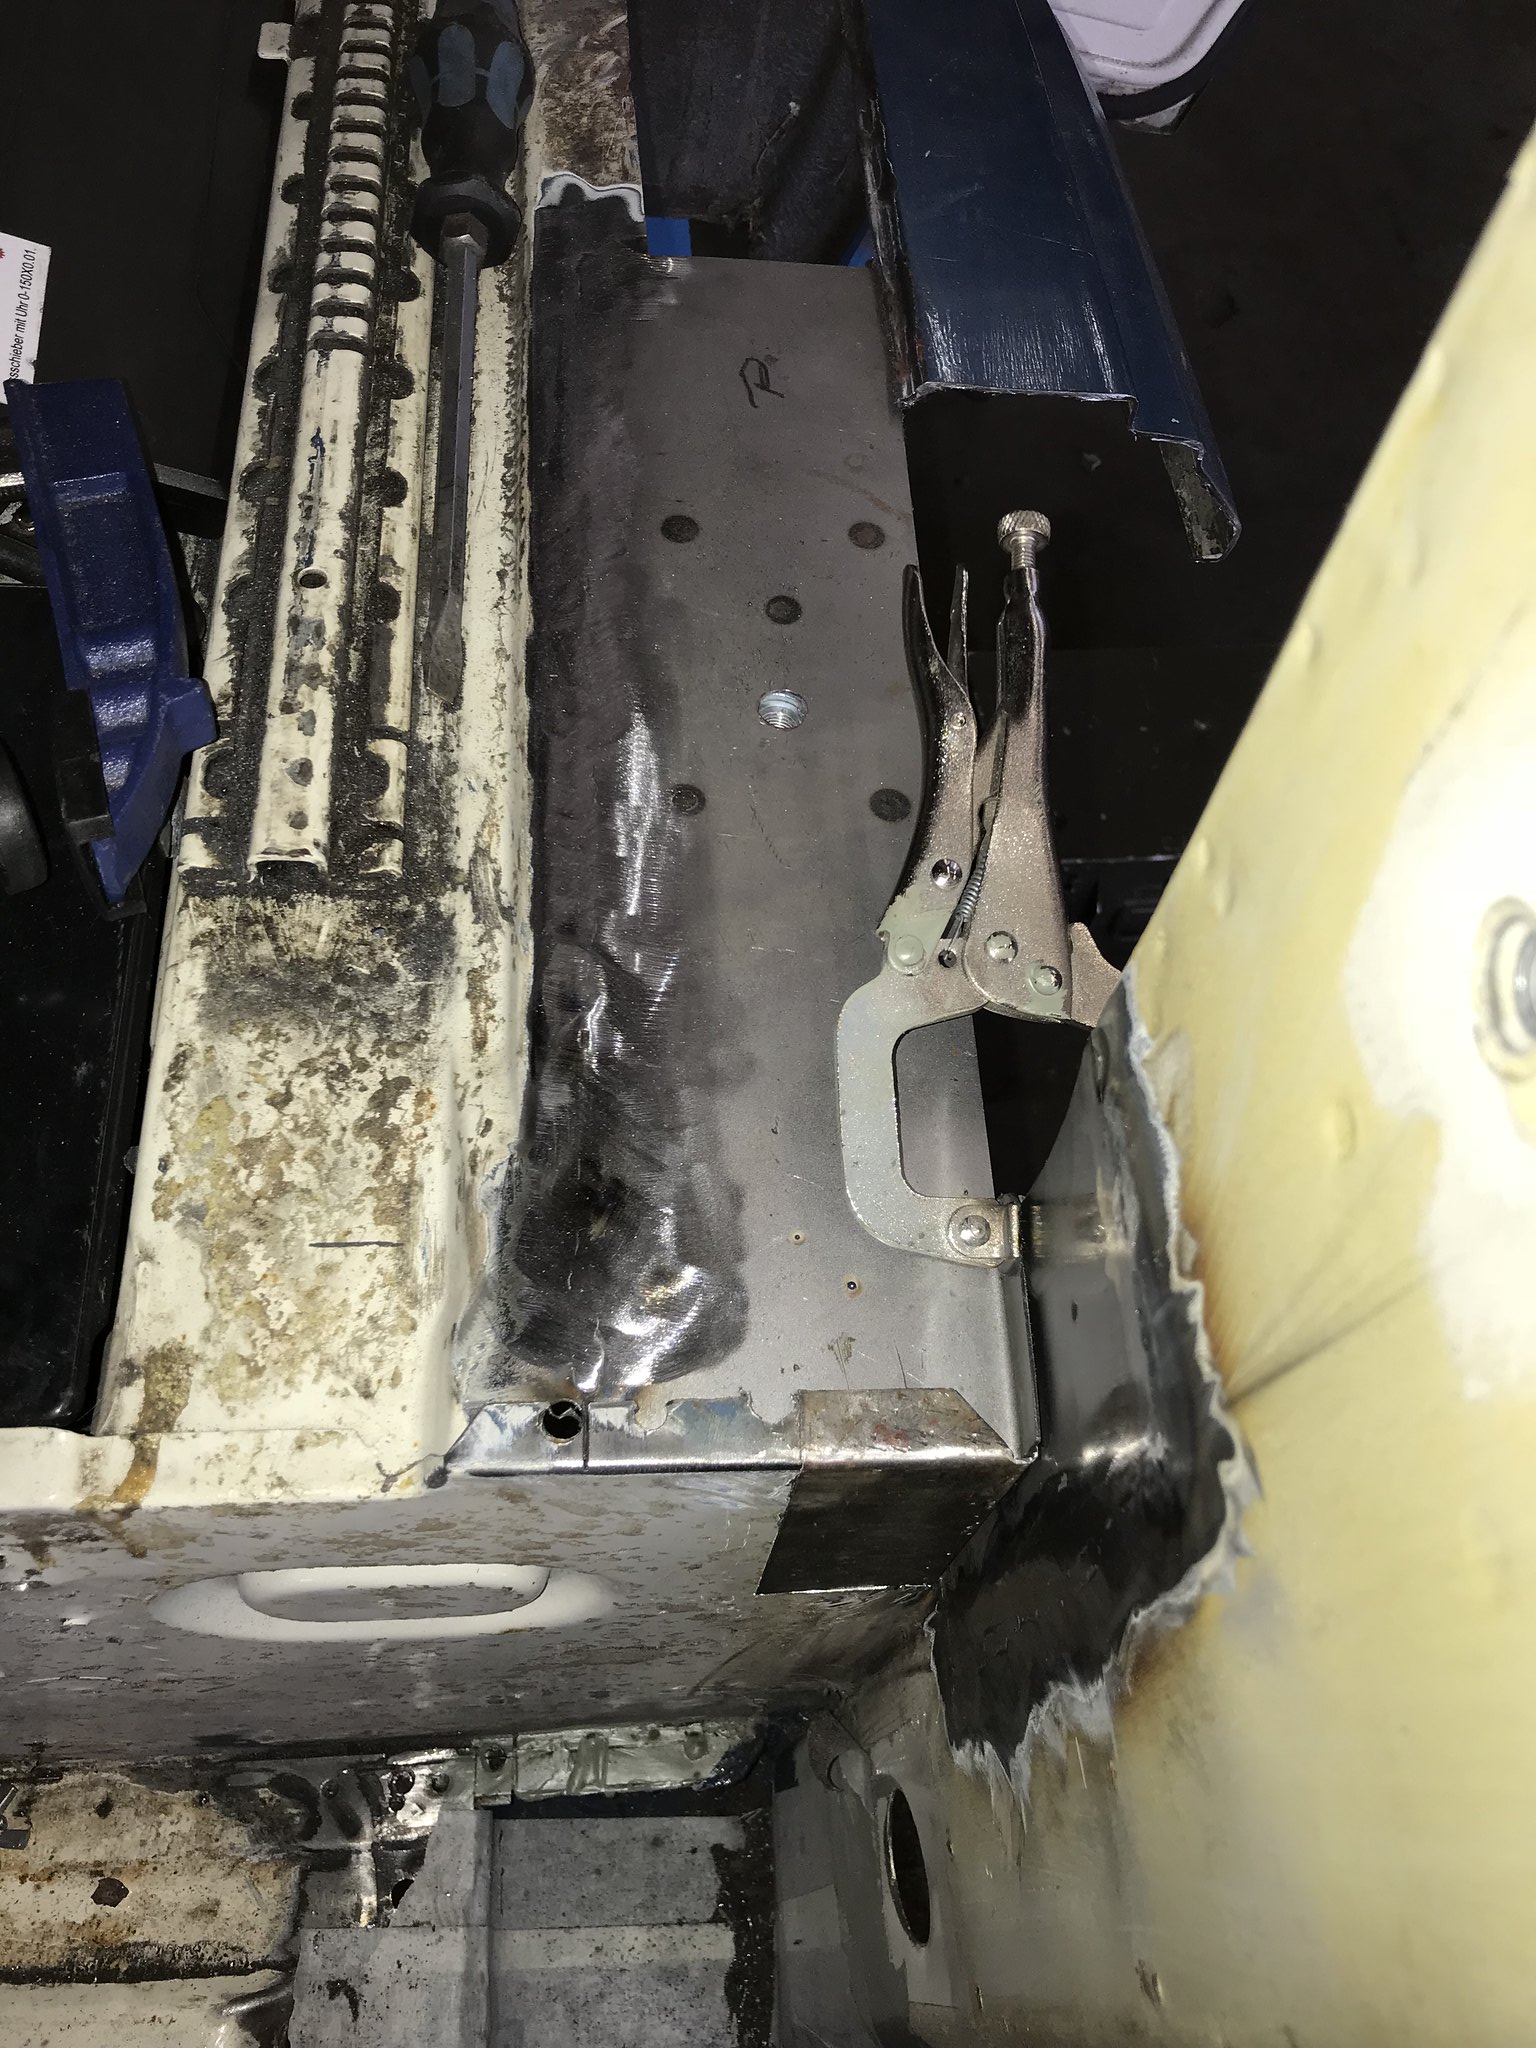
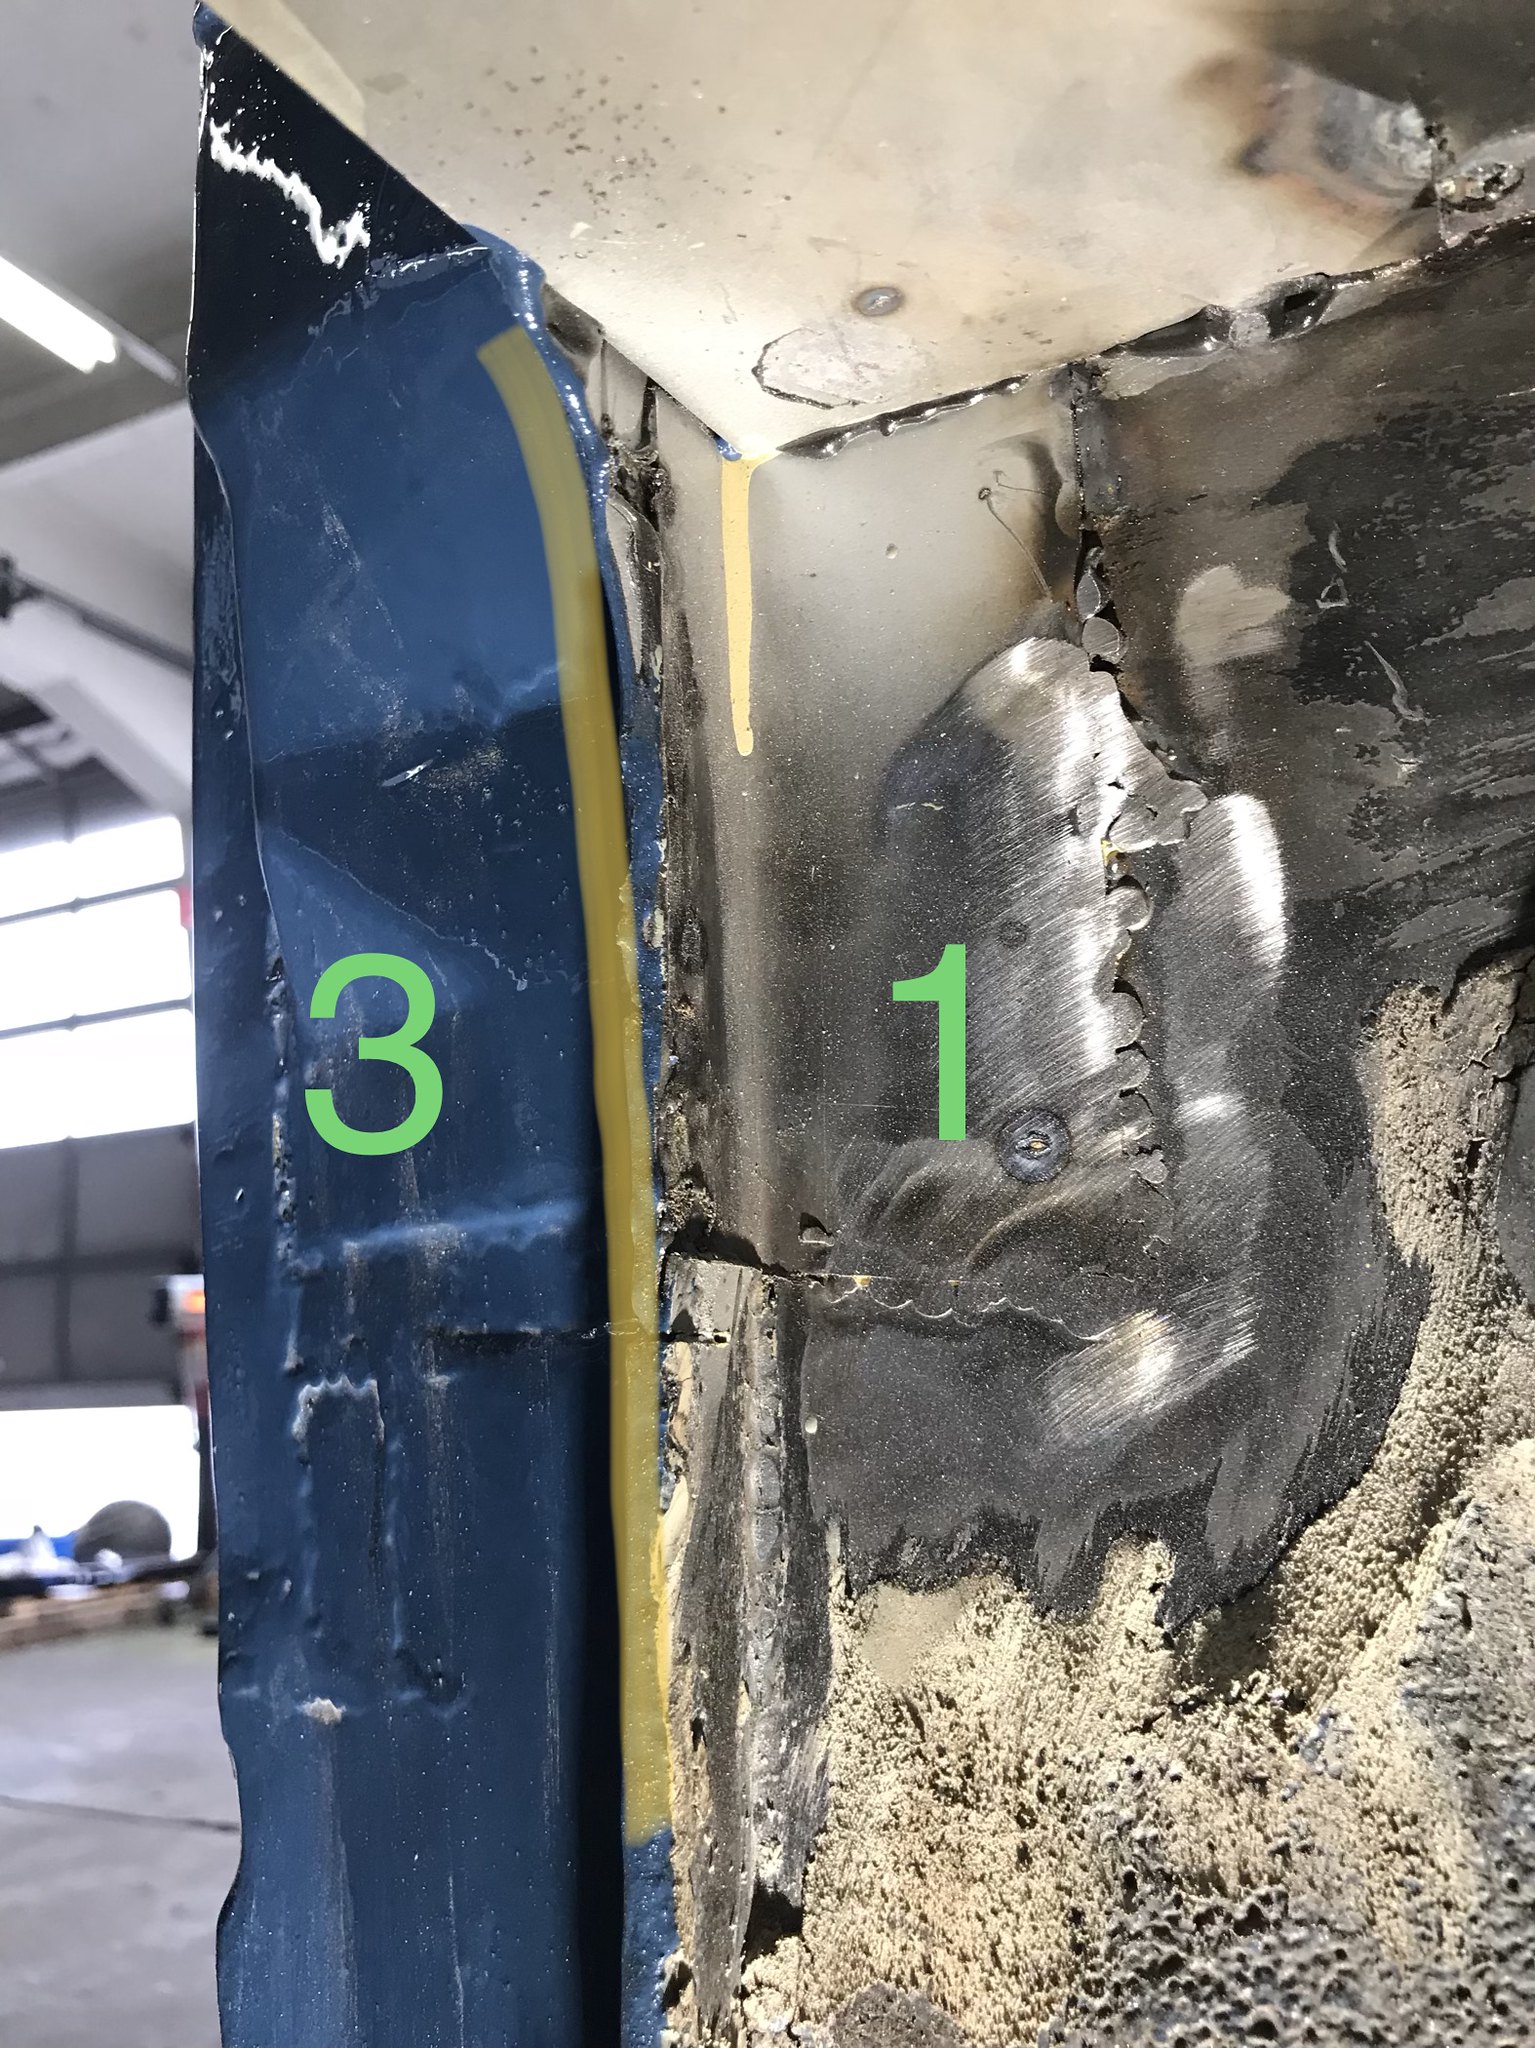
As asked by RogerT this is how the b pillar is constructed:
the yellow line is the seam, 1 is the rear of the battery box, 2 is the inner B, 3 is the outer
Today was spent cutting the bottom section of the sliding door rail off, grinding out rust, welding it back up to thickness then treating the remaining light rust.
Annoyingly I forgot to paint the inside of the lower b pillar panel with top coat so I couldn’t bond and weld it in today, especially annoying because I’d been painting top coat on other bits of the van.
I’ve also started welding in the remaining sheet metal around the seat belt panel and spent a lot of time cleaning off the old underseal
I don’t seem to have been too good with pictures the last few days...
Re: Procrastinating never got anyone anywhere
Posted: 06 Sep 2018, 19:51
by 937carrera
Thanks for that, most helpful, it was me rather than RogerT that made the request. IIRC he's dug deep and bought the full B pillar.
When I get back on mine I'll probably ask for confirmation of how the different components are layered