Gearbox Clutch CVs - Renovating 4 speed change mechanism Pt1
Introduction
Intro by Covkid:
Even with a good gearbox, things can reach a point where some gears are very difficult to get into and the whole thing starts to feel like you're driving the earlier bay window with the gear stick like a wooden spoon in a mixing bowl. Combined wear in gear change components adds up to magnified problems at the gear stick.
Note: Its worth considering before we move on, that a tired/worn or even leaky clutch slave cylinder will also cause very difficult gear changing so examine that first.
Whilst all the new parts combined are certainly not cheap, you may only need some of them. Replacing broken or worn parts can certainly transform the whole gear change train (it goes front to back remember). Most are available via Brickwerks and a few other outlets. If you're reading this you have probably already reached a point of no return anyway and now, thoroughly demoralised, need to sort the assembly out for good.
This detailed three-part article was penned and illustrated by member Itchyfeet, and shows the component parts, common wear points and how to restore a 4-gear change assembly to more-or-less original state. Clearly broken or severely damaged metal parts may need welding or fabricating etc but usually the wear is in the nylon parts which are readily available. Other items could be made up from scrap where prudent to do so. Some previously obsolete parts are becoming available too as owners begin to start fabricating their own in small batches. This trend, encouragingly, is likely to continue with the T25 already having reached cult status - hoorah for that.
There may be very minor differences between years, and certainly between petrol and diesel versions but the layout is still very similar. Wear points can be worse in some areas than others and but its as well to remember that none of this will put right a worn out gearbox. As a starting point to improve gear changes, this is a positive start though. This three-part article is specifically about the 4-speed mechanism as a whole.
If you just want to replace/renovate the front nylon bearing (onion) at the bottom of the gear lever, then scroll down to "Front bearing (onion) replacement" as you'll only need to work from the top, inside the cab, with no requirement to carry out these first few sections.
A 5-speed specific page can be found at http://wiki.club8090.co.uk/index.php/Gearbox_Clutch_CVs_-_Renovating_5_speed_change_mechanism_Pt1
You do not need to be a mechanic to do this job but you will need tools. This article was updated in May 2014.
Now its over to Itchyfeet!
Safety:
First a word about working safely. I did this with the van jacked. You could do the lot on the ground but if your van is lowered or you have a pie addiction best get it raised up a little. Where possible, use axle stands, but if this isn't possible, jack from the trailing arms at the rear and track control arms at the front with a hydraulic jack then lower onto something, if you don’t have a ramp you can use blocks of wood, if your jack won’t go high enough then lower onto a piece of wood then add another piece of wood between the jack and the vehicle and go up again, and again. Handbrake on. Just make sure it is safe!
The layout
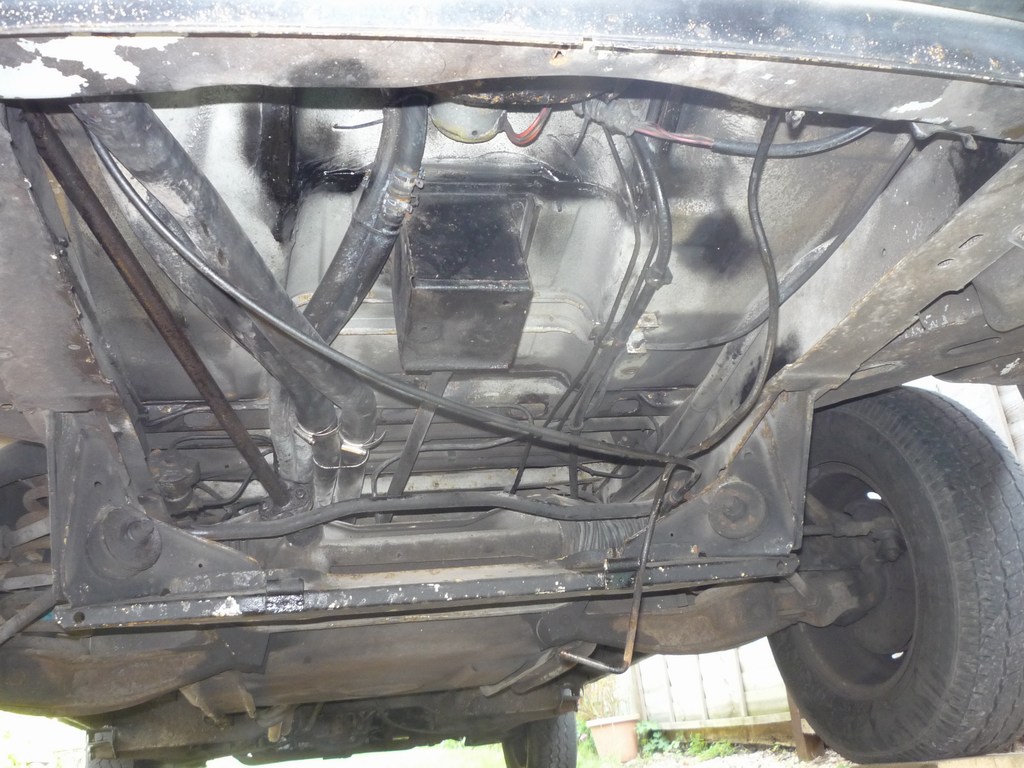
Photo: Underside of typical 4-speed vehicle with spare wheel removed (if fitted). The box houses the front linkage and nylon onion bearing.
Three sections:
Essentially, the gear change assembly has three basic areas.
1. (Above photo) The front end comprising gear stick and bearing assembly contained within a shift linkage housing or box.
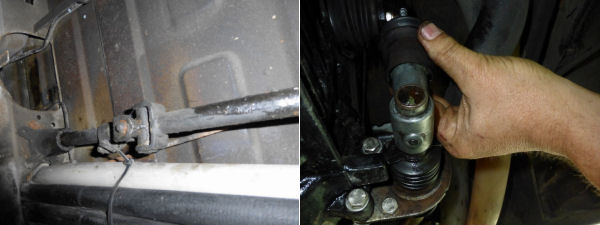
2. (Below left) The middle section with a bush, adjustment pinch bolt and universal joint
3. (Below right) The rear section with another bush and the gearbox selector lever.
Remember that the gear lever is indeed a lever so when you push left from inside the cab, it actually moves right underneath and if you push up, the gear change mechanism moves towards the rear of the vehicle.
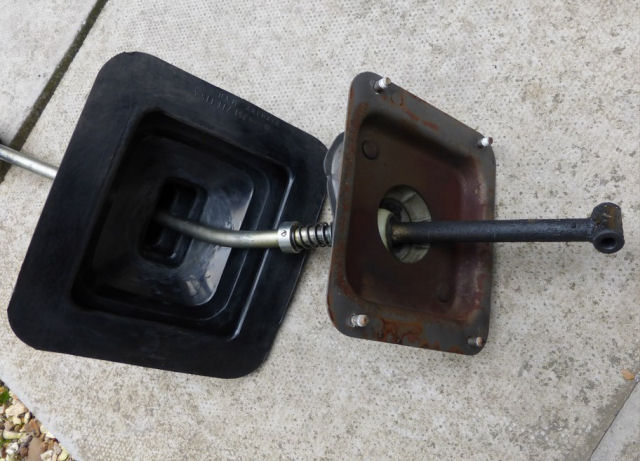
Photo: middle and end sections of gearshift linkage
Disassembly - Front Shift linkage
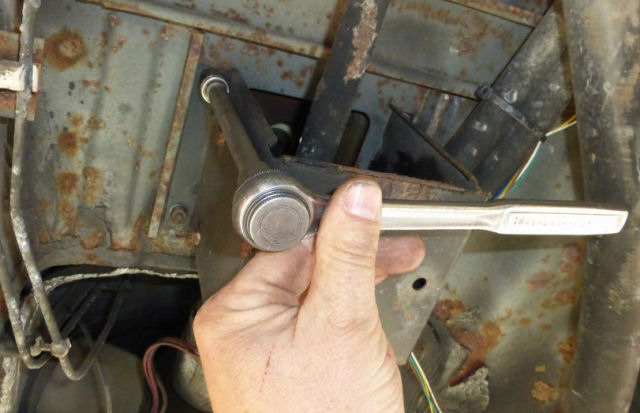
Starting at the front , lower the spare wheel and remove it, then release the four nuts securing the shift linkage housing. There are four to undo normally. They tend to be exposed to the weather so you may need plusgas to help move them.
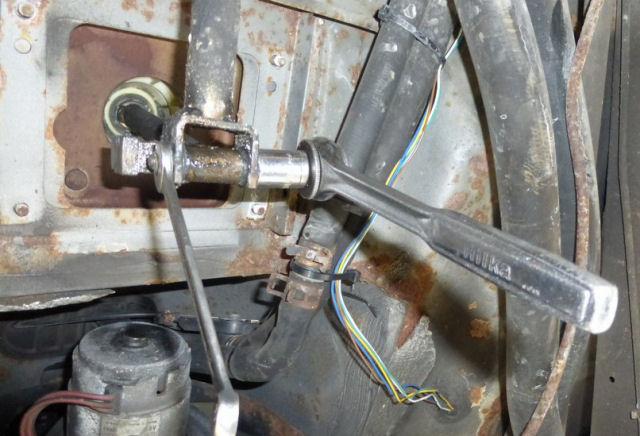
With the box safely out of the way, release the nut from the pin/bolt that holds the gear lever to the gear linkage (the nut is a different spanner size to the head).
You can now remove the whole gear stick assembly with the bearing, strip it down and replace or regrease the bearing and replace or check the two bushes on the end of the stick.
Note: Detailed front nylon bearing (the onion) disassembly and reassembly is shown in next section "Front bearing (onion) replacement" if you plan to do that too, although it can be done seperately from within the cab.
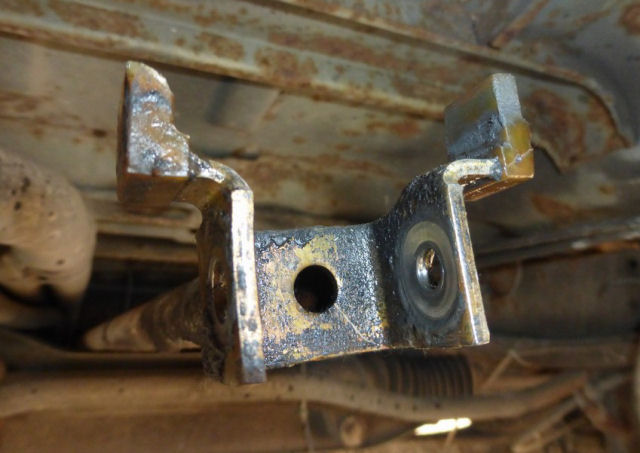
You can now inspect the tips of the front shift rod at this point. The side of the reverse gate (left on pic below) will probably be quite worn down as shown. They can be DIY repaired but I’m not aware of replacements for the 4-speed, only the 5-speed which are different. If you want to remove the rod you will need to release the pinch bolt as described later.
So dare I say reassembly is reverse preferably after you have cleaned it all, a little grease on the tips and pin is good. Then check you can get all gears.
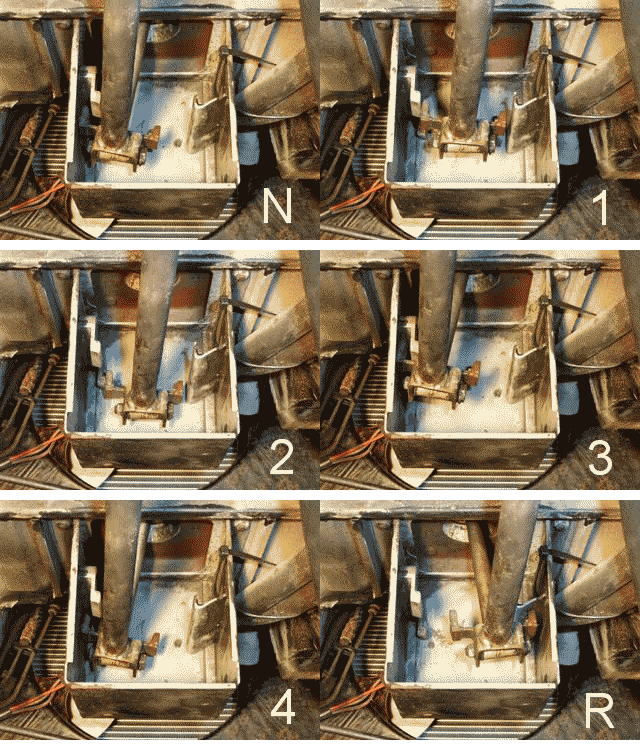
Below is an animation of the gear selection gates (N,1,2,3,4 and Reverse) in the Housing in the different gears - correctly set up. You're looking towards the front of the vehicle, from underneath. Remember forward with the stick is back below and left with the stick is right below (if you did basic physics at school, the nylon ball at the base of the gear lever acts as the fulcrum or pivot point).
Now on to the middle / rear section: http://wiki.club8090.co.uk/index.php/Gearbox_Clutch_CVs_-_Renovating_4_speed_change_mechanism_Pt2
However, if you want to replace front gearshift nylon bearing (base of gear lever) and sometimes described as the onion, heres how you do it...
Front bearing (onion) replacement
The gearstick linkage is scary to most people and it’s taken me years to get around to working on it - but actually it’s quite simple.
The gearstick bearing is often a big culprit for gear change problems. This job can be carried out on its own without any need to get under the vehicle which is why it is under its own heading. It is worth disassembling even if you don’t buy parts beforehand so you can actually check its condition and regrease if required. Once you've done it once, it’s a 15 minute job if you ever have to replace the bearing again.
This shows a late petrol 4 speed 14mm gearstick. In the Haynes and Bentley manuals it states the gear lever bearing plate on earlier models was slightly different but if you buy a replacement gear lever repair kit it will come with this version (I think) which is interchangeable. The process is actually similar on all T25s, irrespective of how many gears you have or whether its a diesel or petrol model.
Disassembly of front bearing
With your new nylon bearing kit sitting and waiting (hopefully), unscrew gear stick knob (may be tight) and slide gaiter off the stick.
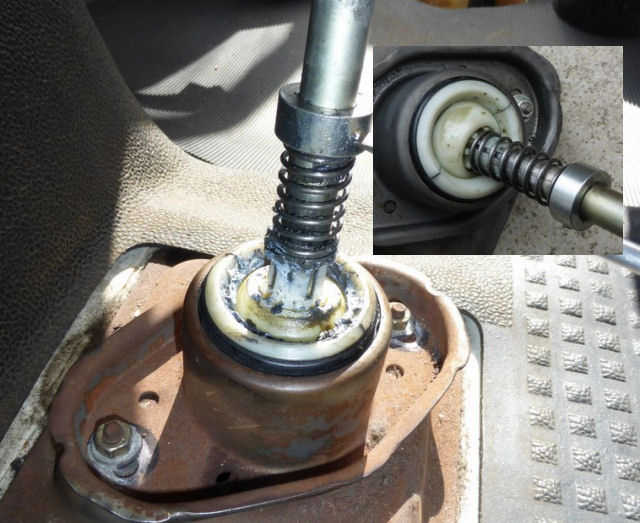
Firstly, inspect the position of the spring at the bottom carefully. The spring should be sitting on the tabs of the plastic bearing part as shown in the main photo below - not over them. If they are broken/damaged, the spring will slide over them, and sit further down (shown in inset), effectively resting on the onion itself. This is wrong and the only permanent solution is to replace the onion. As stated, this will result in the gearstick sitting lower underneath and passing the gate to reverse very easily so you get reverse instead of 1st - usually the first sign that the bearing is in urgent need of replacement.
You may also find that the 'ball' is loose or dry in the socket - again probably an indication that there is extensive wear or if you're really lucky, just needs repacking with fresh grease.
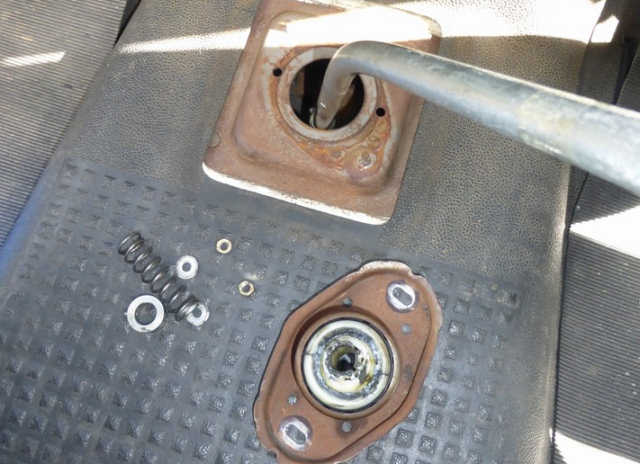
Release the grub screw in the spring retainer ring (thats the aluminium collar above the spring). Once released the gearstick will drop down a little. Now remove the ring and spring.
Next remove the two nuts securing the metal plate to the floor and slide the bearing assembly off the stick.
If you have purchased a ‘gear lever repair kit’ from Brickwerks, at the time of writing they are selling a 12mm bearing with a loose 14mm insert, you need to swap the 12mm insert of the bearing with a 14mm part, The other kit they sell is loose parts so you need to assemble it.
Mine was OK so I regreased and refitted the assembly. To clean and regrease, it has to be unassembled and then reassembled in the same way you would to change over the insert.
Note from Covkid: You may in some instances, need to lightly work the edges of a new nylon ball (where the halves meet) with abrasive paper to prevent the ball from catching in the housing.
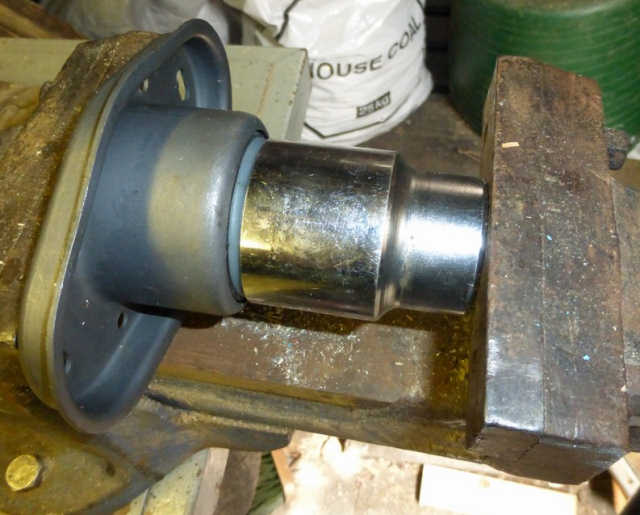
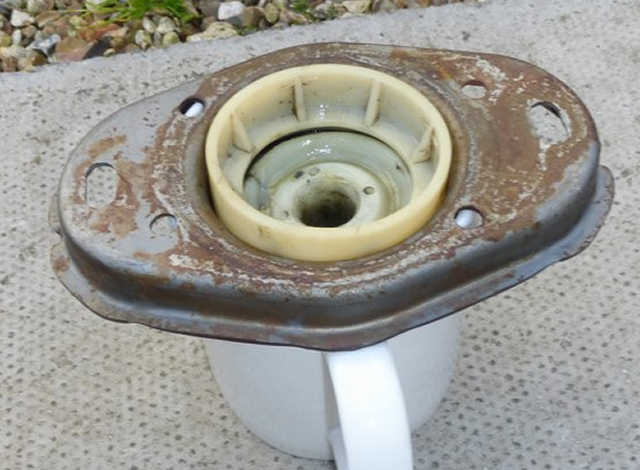
Prise out the white plastic spacer ring from underneath the plate (it comes out easily with a screwdriver). To get the bearing itself out (below), you should ideally press it out with a large socket and a vice. You must be very careful of the plastic part, it has small tabs that hold the reverse selection spring and if you break them you will need to buy another.
Photo: Pressing out the bearing in a vice
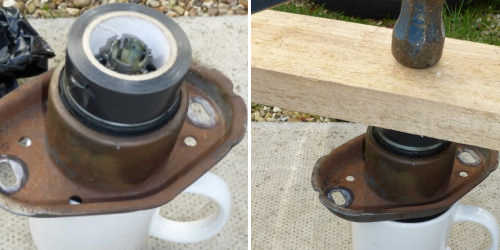
If you don't have a vice, I devised a method (below) that anybody can do, get a reel of PVC electrical insulation tape, strip off the tape until it’s just under 50mm in diameter, then place that over the plastic part to protect it while you press/hammer it out, just make sure the width of the tape means the plastic tabs are protected. A (unwanted not favourite) mug placed below means you can press it right out, the last bit will need to be done with your fingers which is quite easy or strip a second reel of tape down if you can’t.
Reassembly of front bearing
So now you have the bearing out of the housing you need to split it apart in order to get the new one installed.
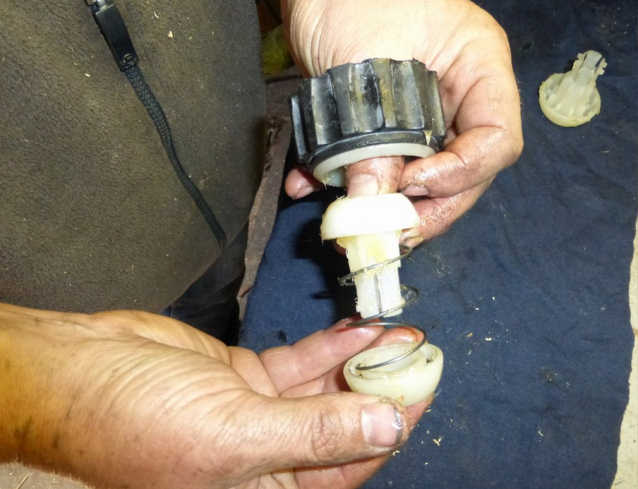
Press with your thumbs and the rubber ring opens and the split ball assembly will come out, this is fairly easy but be careful to do this somewhere confined (like in front of an upturned card board box) as there is a spring inside and you don’t want bits flying around and potentially lost. By now, you'll understand why its often called 'the onion'.
Photo: Pushing out 'onion' bearing
Getting it back is the exact reverse, although if you fit a new one, it will be a much tighter fit!
Liberally grease it especially in the split plastic ring the ball assembly moves in, before putting the ball assembly back.
With the Brickworks kit make sure you have the 14mm part fitted if you have the 14mm gearstick.
Then press back into the housing using the same reel of tape and cup. You can use your foot to press or hammer it back, you may even do it with your fingers perhaps, as it will probably now be greasy.
Photo: Replacing plastic spacer ring
Now clean and grease the gearstick before sliding the assembly back down the gearstick shaft.
Refit the 10mm nuts and tighten in the original position, then slide the spring and ring back over the gearstick.
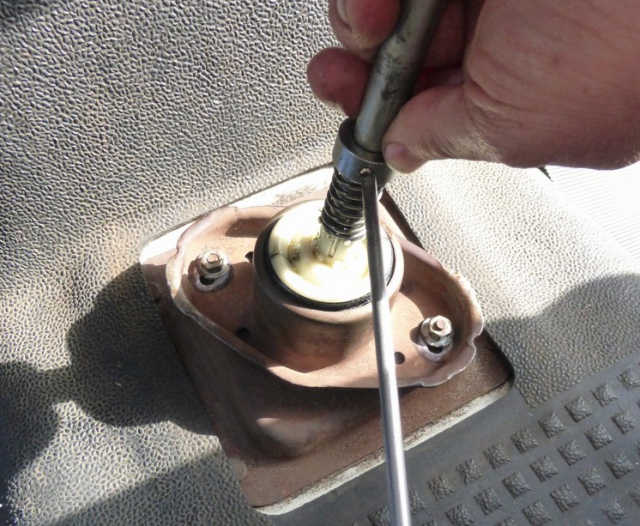
The grubscrew for the ring has a small drilled recess in the shaft to locate it in the correct position. (Below) To tighten the ring you have to lift the gearstick ( remember it fell when you removed it?) push down on the ring against the spring at the same time, it takes strong fingers to hold it there while you get a screwdriver on the grubscrew. I managed it fine but you may find it easier with two people.
Photo: Refitting grubscrew
Replace the gaiter and gearknob but before sliding the gaiter down, check your gear selection.
Note there is a correct way to set the adjustment under the van, (explained in Haynes and I may cover it later) you may need to do that but in my case and that of another van I did recently some small adjustment on these slots and studs made a big difference to getting the gears to select correctly.
Move the plate one way on the studs and 1st and 2nd gears are good 3rd and 4th bad, the other way and 3rd and 4th good 1st and 2nd bad, somewhere you should find the right place for all gears if not you will need to get underneath.
You have to tighten the plate to test it so be methodical, start with keeping the front stud the same and moving the rear side to side, that’s two positions tested note what gears work then move the front stud to the other side and repeat moving the rear side to side, that’s four positions tested note what gears work and then you should be able to find a position that works.
Now on to the middle / rear section: http://wiki.club8090.co.uk/index.php/Gearbox_Clutch_CVs_-_Renovating_4_speed_change_mechanism_Pt2
