All engine faults/repairs/maintenance Replace starter motor
Anon: Starter Motor & Bush replacement - 2.0 litre Air-cooled
Preamble: We are complete van novices, spurred into doing this job ourselves because I was too tight to pay for the mechanic and I thought we should learn something about the van.
Tools required
- M12 thread tap (I bought a whole cheap set for about £3.00 from eBay)
- Screwdriver with a piece of fairly thick cloth – an old t-shirt would do
- Spanners/socket set
- Pair of plastic goggles (for the health of your eyes, rust dust and flakes are serious nasty scratchy scratchy irritants!)
- Axle stands
Beforehand
- A new bush is usually a very good idea, this bush is an oilite(porous bronze) bush and fits in the bellhousing supporting the starter's pinion extension.
- Make sure the new bush is soaking in engine oil overnight. (Maybe have a spare soaking, just in case…!)
How we did it
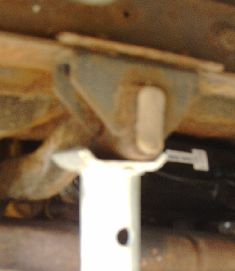
N.B. This is not the recommended position for axle stands. Here the van is resting on the engine carrier. The recommended mounting points are just forward of the rear wheels (on the outside of the rear cross-member)
Jack van up and place on axle stands – one each side. If you are really skinny, or can gain some height by parking on the kerb, you may be able to access the starter motor.
Now disconnect the battery, then crawl underneath and see if you can locate the starter motor. Haynes says to remove the rear wheel on the drivers side, as this makes access easier. I’m sure it does, but as our wheel refused to budge, we did it with the wheel in place! Crawl under the van, behind the drivers seat and look around you will see the starter. Along with bits of rust, grot, mud etc., so safety goggles if you are comfortable with them are useful.
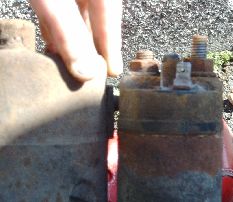
The starter looks something like this: It is two cylinders fixed together with wire connections on the end of the smaller cylinder (solenoid, to give it its proper title).
Look carefully at the connections, and note where each wire goes. When you remove the wires, take the opportunity to wire-brush or emery-paper the connections to ensure good clean contacts in the future. A brass brush is best to avoid scratching off the plating and it then corroding again too quickly (use vaseline or Holts NoCrode on this connection, else it will corrode badly after cleaning - Ed).
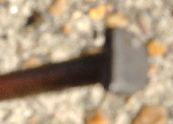
There are a couple of bolts for the starter. The first one was obvious, but the second one had us foxed as the nut undid, but we could not see where the bolt came out…until we pushed it a bit, and I noticed a bolt moving in the engine bay! It’s a bolt with a funny shape head: It will only sit in the hole one way! Once the bolts are out, you can remove the starter motor.
This is the one on the air cooled
The water cooled top starter bolt is called a "cheesehead" in ETKA/ETOS and looks like this (this is the end that is forward of the engine bay) 8mm allen/ hex key
Once the starter is out, If you look into the large hole that it came out of you will see your starter motor bush, a small piece of copper looking tube (oilite bush - Ed!) If you have been having problems with starting the van, your bush is probably very worn, and may even be in pieces. (also see bush removal page) You now need to use the M12 tap to remove whatever is left of the bush. Hubby said that this was fiddly, but he managed it eventually. Our bush came out in one main piece, but with holes in it where it had worn. Next hubby wrapped a cloth around the screwdriver in order to remove any tiny pieces of bush which remained. Some small pieces came out.
Now you have to put the new bush in. Useful here to have a longish bolt with a large washer, so that you can get the bush in nice an straight (the washer stops the bush falling off the bolt.) Once it is properly in place, replace the starter, do up the bolts, re-connect the wiring and give the starter a whirl - if it works, you can then give the van a whirl too!
Hubby has now had the starter off a few times, and can do it fairly rapidly with the assistance of teenage son!
Hope this has helped someone, somewhere. (it will, thanks - Ed)
Another write up by Fairywynds
Fitted my new one this week. Apart from the fact that the motor factors have supplied a FAULTY unit (grrrrrr!!!) which is being replaced Tuesday, again (!) - the jobs pretty straightforward... Mines an early 1900 DG engine, so there may be some slight differences (?):-
1) SAFELY jack up rear of van, using axle stands / ramps / chocks as required. Im sure the job could be done without doing so, but giving yourself more space will be preferable.
2) The starter motor comprises of (a) the motor and (b) the solenoid. You replace both as one, they are joined together.
3) DISCONNECT YOUR BATTERY first!
4) On end of solenoid are a threaded post/bar with two fat wires going to it (one from your alternator and one from your battery. There is also a thinner, push on ‘spade’ type connector going to a fitting on the end of the alternator. This is known as the ‘exciter wire’. Lastly there is a fitted, thick wire going from the rear of solenoid into the main body of the starter motor, though a rubber/plastic grommet. ALL these wires should be checked for security and degradation (breaks, green rusty muck etc) as they all have important roles and any one could give you starting problems. If they are sound and secure, they SHOULD have a coating of terminal grease ie ‘Nocrode’. If you are sure that the wiring is not at fault, and you need to replace the whole unit, then proceed as follows:
5) Pull off exciter wire. Undo the nut holding the two fat wires onto the post (13mm?). Don’t lose the washer/s and nut (pop them back on the post). Ensure wires are tucked out of the way.
6) The starter is bolted to the gearbox ‘bell housing’ by two fittings. One is a nut fitted to a stud which you can easily see at bottom edge of starter. The other is more fiddly, being on the opposite side of the starter. It can be reached from other side of gearbox, and over the top, but take care not to damage your clutch hydraulic cylinder/pipes which you will see there. Using a spanner and or socket set, undo the lower nut. You may find that the stud comes out with it, due to the nut being seized to it. No matter, as long as its removed. You can always renew the stud and nut later. The other bolt on the far side of starter is a long bold with an ‘allen’ type socket head on the starter motor side, and a nut on the bellhousing (just visible from inside the engine bay). You need to insert a suitable allen key/hexagonal wrench into the head of the bolt and use a ring spanner on the nut. it’s a bit fiddly but will come apart. Again, don’t lose these bits!
7) Now the nuts and bolts are off, you can free the starter. It MAY need a tap with a hammer to loosen it. Withdraw the starter, towards the front of the van, and down, past the water pipes (which should be flexible enough to push aside). Take care, as the starter is quite heavy for a small unit, mind your head!
If you need to (and you SHOULD do this) - replace the ‘Oilite’ bush inside the bell housing.
Let me explain. Look at the starter motor you have removed. See the little cog wheel on a spindle? The starter operates when you turn your ignition key. As you turn the key two things happen: firstly, that spindle EXTENDS (you can see this if you take a firm grip of it a pull, its spring loaded so take care). As it extends an inch or so, the little cog engages with teeth on the ‘flywheel’ within the bell housing, and (should) immediately start spinning (using high ampage output from your battery, that we call ‘cranking amps‘), thereby driving the flywheel, and thus the crankshaft and all the bits needed to make the magic happen! As soon as the engine fires up, the flywheel speeds up, you release the key (and it springs back a notch) and the starter spindle retracts again. Remember when you last had the engine running and turned the key the WRONG way, and heard that awful grinding/crunch noise? That’s the little cog trying to reengage with the already spinning flywheel - not happy, lets try not to do that in future!! As the starter spindle engages the little cog with the flywheel and tries to turn the engine over, there is generated a large sideways force, trying to throw the spindle SIDEWAYS, away from the flywheel, In order to stop this, but allow the spindle to spin freely, there is a bush, some call it copper or brass, but strictly speaking its an ‘Oilite’ bush, and it it a tight, push fit into the bell housing.
- removal of the old bush, and refitting the new one is covered in detail in the WIKI ***
The only thing I’d add is: use electrical tape/string etc, whatever it takes, to NOT lose the bush, or your tools, into the bell housing!! IF you do lose the bush and cant retrieve it, it will probably be mashed into pieces by the flywheel teeth and stay at bottom of bell housing until the clutch is next changed, so it ought not cause any problems for you.
9) Fit your new starter motor, ensuring you correctly fit the wires and coat it all in Nocrode or similar (it gets an awful lot of road debris and splashing in that position!)
10) reconnect battery, lower the van back to ground, and away you go.
11) With all these jobs, check security of unit again after a few hundred miles…just in case.
A note from Ghost123uk
Do not test your starter motor off the van !! - the cog end has no bearing inside, the bearing is in the bellhousing, it is that oilite bush that has been mentioned, and should be renewed whilst doing the starter. If you run the starter motor off the van, the insides (commutator etc) will thrash about inside the casing and likely damage the windings, the magnets, or both !
HarryMann: I am not sure the commutator/armature will thrash about John, there has to be a bearing at both ends regardless of the nosecone bush - Ed.
Note from California Dreamin
Ghost123uk warning apples to starter motors without a 'nose cone' used on petrol engines (Air and Water cooled) with manual gearboxes. Diesel engines and vehicles with auto transmission usually have starter motors with nose cones so the armature is supported out of the vehicle.


