Gearbox Clutch CVs CV joints repair
CV Joint Repair
(see further down for CV bolts)
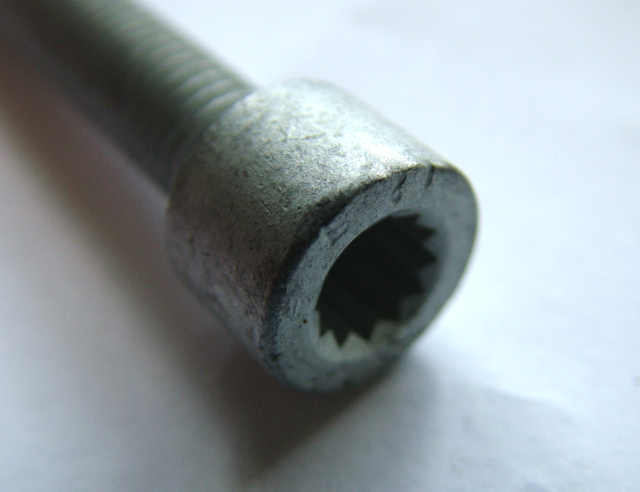
Hacksawbob the CV boot maybe held on with either 8mm 12 point internal spline, aka CV Joint tool aka triple square. OR 6mm hex/allen headed bolts, and maybe a mixture of the two! make sure you use the right tool for the job as these are a pig to remove if rounded common sense says replace them if they look iffy as next time they wont come off so easy and you will know the pain of using mole grips in confined spaces. The 8mm splined but is available from GSF in 3/8 socket
A little cleaning and preparation can save you hours/days/weeks of frustration and scarred (and scared?) knuckles. Get a good torch wd40, air compressor, childs toothbrush etc to give the bolt heads a right good clean. You can get to all of them bar two with the wheel on ground then raise or roll forward to get to other two, A happy helper in the drivers seat putting it into neutral/Hbrake on and off whilst you loosen underneath the raised van can save you a bit of messing about. Crack all the bolts off first then go around again removing them. Another top tip is to take it to a car wash and give the trailing arm a right good clean out before you start as when you come to fit the outers you will get grit and rust etc falling into your nice fresh CV grease. You will find that the CV is very heavy if you are trying to hold it in situ with one hand and fitting the bolts with the other, make up a plat form or get a helper to hold it whilst you get the first bolt in.A hydraulic press is recommended to get the inner CV bearing off the shaft, although with wear it may slide off easily. Certainly to get the new ones on it is definitely required.
Click to see more information on Busgoons
HarryMann: That's all very good stuff Thomas, and great photos too!
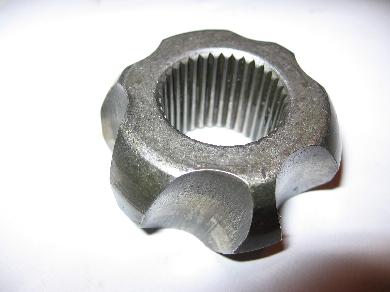
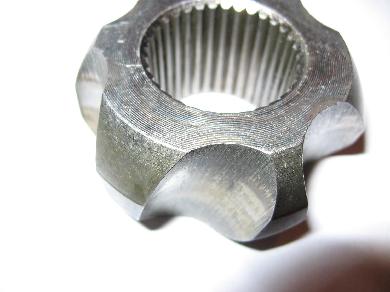
Now, I can't answer the question I'm raising without getting out all me greasy manuals and its late, but apart from aligning the large and small sticky out bits, there is supposed to be a right and a wrong way around - axially.
That is, the faces of the outer and inner races have chamfers on them, different depth chamfers each end and some makes have other markings.
Qu. Which way around do all these bits go, and does it matter?
Bentley (and other US articles) makes a big deal about this, and not only which way they go outer to inner, but then which side faces the shaft when installed... all highly friggin confusing I thought, especially as a new GKN one seemed not to agree, chamferwise, with aforesaid dictums. Having played Rubik's cube with it for quite long enough (pre-greasing up being the best time Idea ), settled for the way that it seemed to offer least resistance and jamming up at large angles. As for putting on the truck, think the circlip goes the least chamfered side of the inner race.
Will dig out the manuals unless soemone knows the 'real way', 'right way' or indeed that it doesn't matter a jot for some makes, that it does for OEM joints, or vice versa... (I'm sure that's enough options Rolling Eyes )
90gms of the black stuff per joint? Just stuffing it inside the boot no good - roughly half from each side and really work into the cage. When they're just starting to clunk a bit, to give them another lease of life, or just 'cos you fancy it, squeeze the filthy boot around to work the grease back into the joint - silence - for a while. Clunking rear CVJs can upset smooth changing in lower gears, and put additional shock loads through the diff too.
A full service is: wash off and degrease, clean off all traces inspect, decide, significant track pitting/ galling a no-no, just wear but smooth tracks - OK if you're a tight-wad Reassemble - 'tis fun, honest - refit, regrease.
HarryMann: Yup, I was led to believe that articulation angle is compromised by assembling the wrong way around.
Grease: ETKA says repair kits include 90g (14" rear) and 120g (16" rear) joints I can get all 90g in, and again, led to believe that it's a good idea to put it all in. GSF do a big pot of 'medium' MOS2 cheap, but reckon they'd give you another sachet if asked nicely. If it was a repair kit, maybe 50g is meant not to service, but to top-up - or meant to have two sachets in - one for each side of joint. As with wheel bearings, perhaps never fill cavity 100% (overheat, melty grease) but that would be as good as impossible with a booted joint. Release trapped air through boot sleeve before crimping up tight, but don't leave boot crushed,
SyncroSam: Clive, Is this the difference in chamfer you are referring to?
Top pic smoother edge, bottom pic sharper edge) - I thought sharp edge was driveshaft end as in goes on shaft first, but i probably wrong
TD: Very interesting and great pictures, but I just throw them away when they knock and buy new ones, they are a cheap item compared to many things and outers last 70K +, inners much longer. They are the dirtiest, foulest things to take apart, even paraffin has a job to clean them. Still, makes a great hobby!
HarryMann: Can't say I disagree, just make sure they go in the metal skip, for recylcing or make-weights for your steel scrap!
Flibbertigibbet: but I would like to point out to the more ignorant amongst us what is sounds like is they need changing....ready -
Like a clucking chicken .....!!!!
CV Bolts
(Covkid)
Bolt Upgrade
After having a spate of CV bolts coming undone, and rather too familiar with pulling away from a junction only to lose all drive, I switched to splined bolts. Some vehicles may already have them fitted, in which case read no further but for those with allen key CV bolts, read on...
CV joints take a lot of abuse and since all the power from the engine is being transmitted through the driveshafts (more so if you're not light on your clutch), its important that everything is tight. CV boot kits do sometimes contain a set of bolts but they are often poor quality.
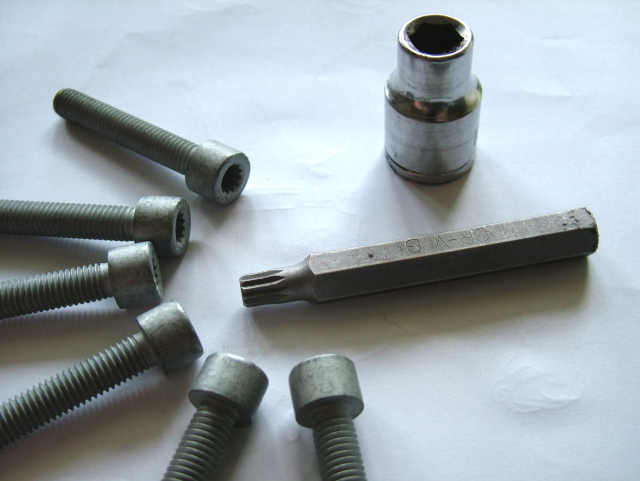
12 spline bolts (M8x48)provide for a more positive tightening sequence and also stop the bolts coming loose as you can get more torque on them. You also don't have the annoyance of trying to get an allen key at just the right angle to push it home. This can be particularly awkward on outside joints where there is limited room. 12 splines mean you're almost guaranteed to get the tool in first time. Perhaps more importantly, the allen key type often don't allow (particularly if worn) enough purchase or access to nip them up properly and they can eventually work their way out until the last couple of bolt snap during pull away and then you're stuck - often in the dark miles from anywhere or more likely, right in the middle of a busy junction in rush hour. This is by far the best way to put an end to these kind of issues.
All CV bolts must be high-tensile (stainless for instance would not be suitable). I managed to buy 24 top quality German ones on Ebay for around £14 (well over £30 from VW) and a splined bit (see below) for under £4 which fits any conventional 10mm hex socket. You must use the correct bit for these bolts - don't use a six-pointed star torx bit, it must be a 12 spline bit or you'll chew up the tool or the bolt.
CV bolts also need the right washers (friction type) as well as the obligatory three plates/tabs for each joint but if your washers are missing and you're struggling to find the right ones, use spring washers or (at a pinch) rough up ordinary washers with a severe file. Thread lock is also a good idea if you can get all threads into which the bolts go, clean from the outset.
Removal
Like allen key bolts, if you have to remove them for any reason, clean any oil/grit/mud from the head recess carefully, to ensure the spline bit goes in fully, otherwise you run the risk of chewing them out during removal. A few seconds spent doing that can save hours of problems later. If you do encounter a completely stubborn bolt with a chewed head, I found the best way to get them started is to use a cold chisel and knock them round enough (anticlockwise) to break the bolt's grip and then get mole grips on them.


