I wanted a T25 ever since I borrowed my cousin for weekend, but funds are very short!
I had noticed a panel van that had been up for sale, locally, for as long as I could remember so decided to have a look. I dragged my ole chap (Was with VW as a technician when the T25 was released) and my brother (now works in my local VW as a panel beater) to have a look and they gave me the thumbs up.


I parted with my £650.00 for the van above.
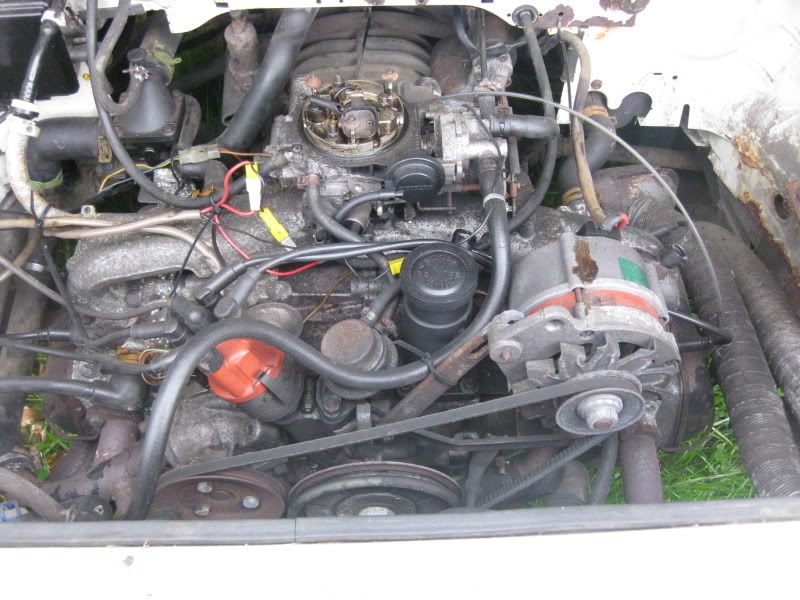
The best thing about the van was the engine, it was a VW refurb unit and had very few miles on it.
I say was as I sold it the day I brought the van.
As I said money is very tight, but luckily for me my cousin decided to ignore ALL flashing lights on his van whilst travelling down the motorway and had completely cooked his engine and needed another one. Good news for me £500.00 traded hands so my work could start.
Well after fitting this lump to his van of course!
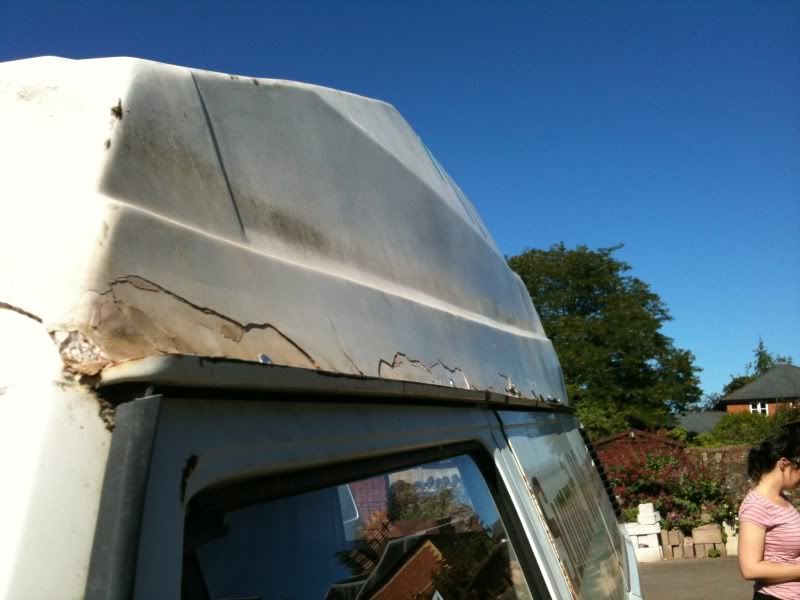
At first glance of the van there looked like a lot of nasty rusted areas
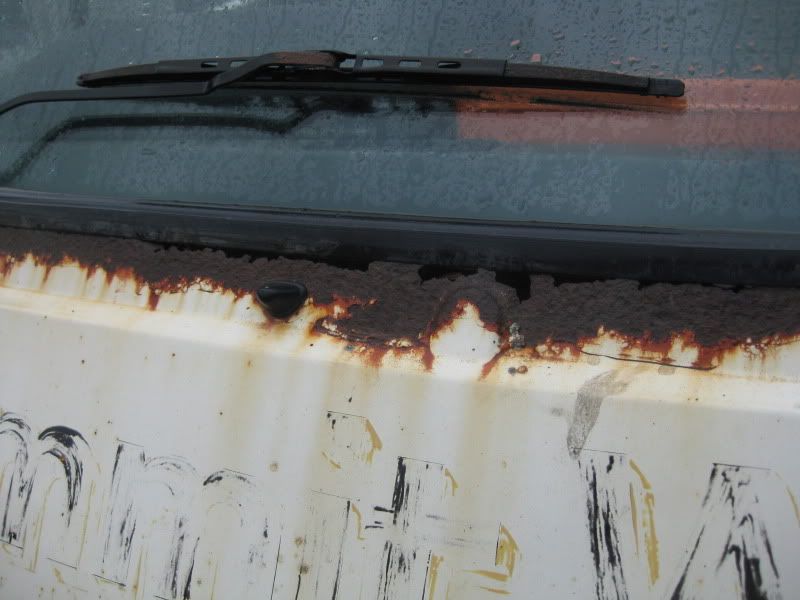
Under the windscreen was possibly the worst spot

Front step
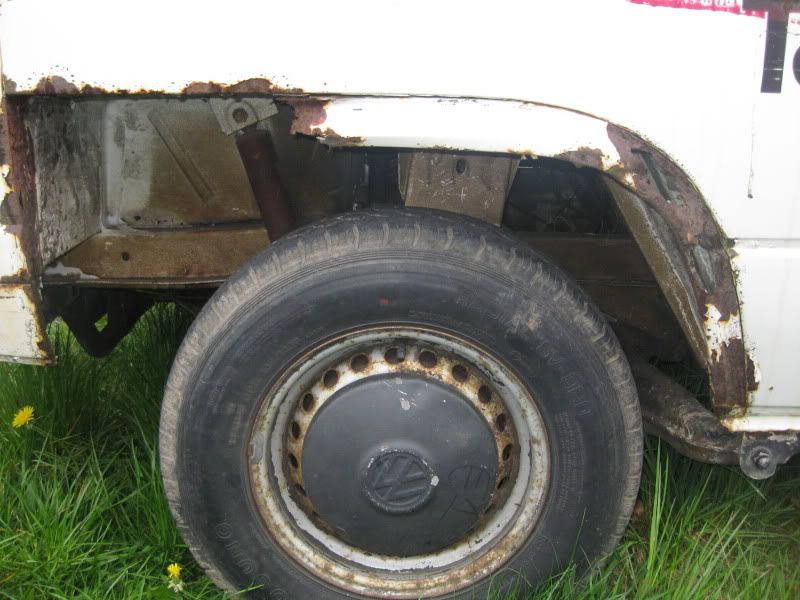
Rear Arch
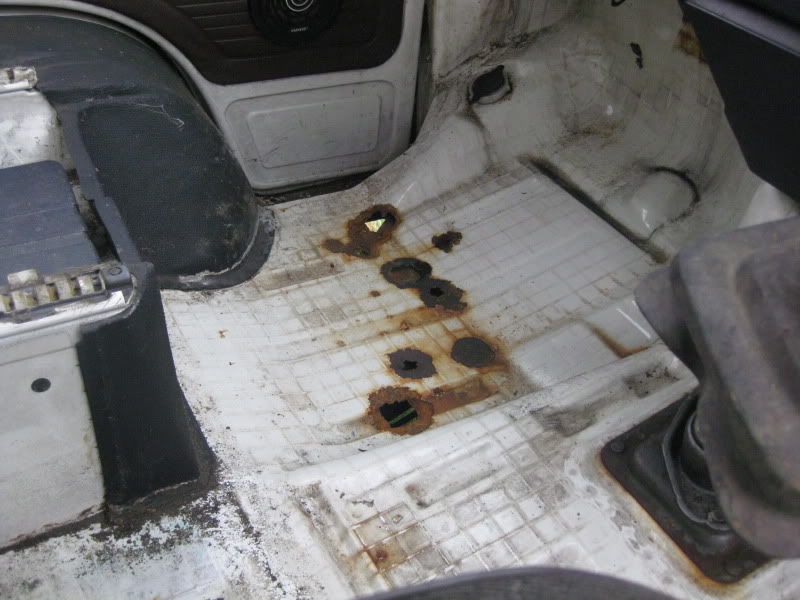
Passenger footwell plus a few little patches here and there.
So I ordered replacement panels, new rear arches, front steps (drivers small amount of rust but thought might as well be done whilst im there), replacement lower front panel. I have started to fit these. Both rear arches have been welded in just need grinding back and filling. And the passenger front step has been welded, again just needs grinding and filling.


The passenger footwell, as below, has been cut out. Now this hole look massive and I still think that my brother went a bit over board but who am I to argue
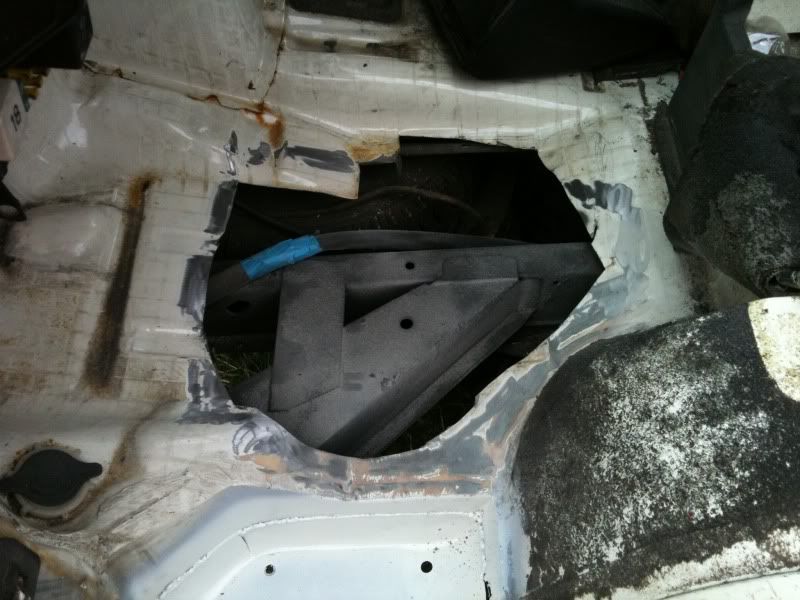
Started to fill this in but I have since ran out of gas and weather.
So welding has stopped, but the project continues.
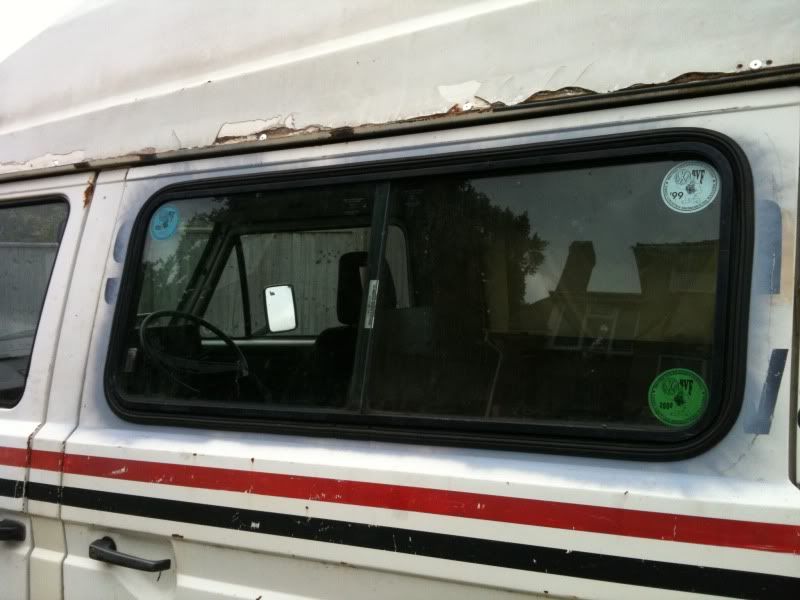
Windows were sourced for £40.00 with seals and fitted along with the high top (£8.50 ebay)

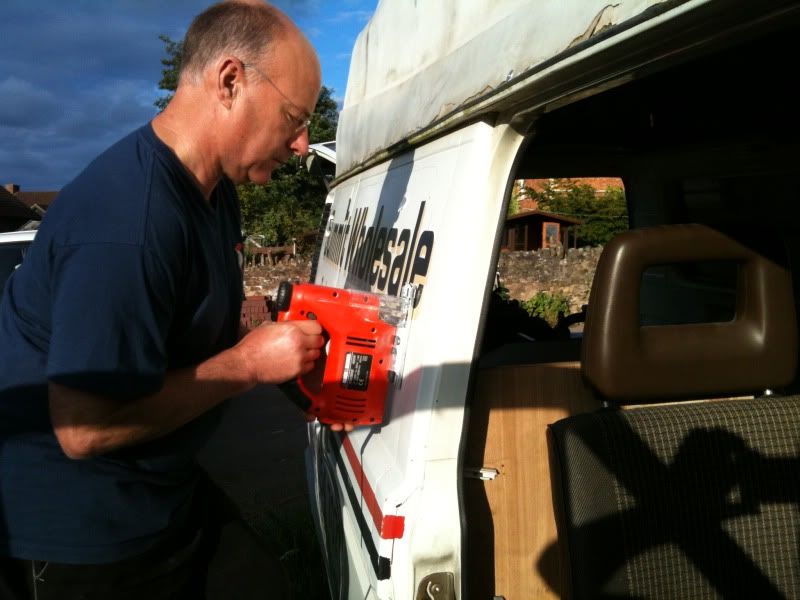
Pops working away

Tiger sealed roof vent
Riveted and tiger sealed on roof
I now needed an engine, I deliberated about going diesel as the engine was already out and Dad had given me a low mileage lump out of a Passat. I thought this was too much work at this stage as IF I got a motor in and running I can continue my welding at my factory, indoors and in the warm. So I sold the engine for £250.00
In return I bought a DG lump for £20.00. Apparently knackered. I got dad involved and found that one of the Valve guides had broken down and the valve was wedging itself against the piston.
See photo below for the damage to the piston
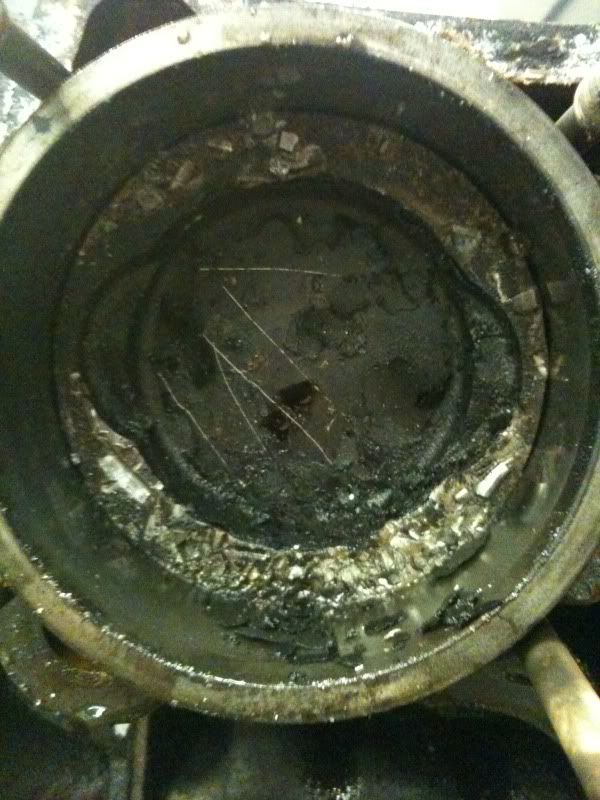
So new pistons and liners etc have been fitted. I also recycled a new head from my cousins knackered engine (which was the only thing that was any good).
That's now up to date with where my project is. I'm in the process of finishing off the engine as until this is I cant do a lot without out it being at the factory. This should be fitted this weekend so should be motoring on ready for spring.
Money is very tight for this but at present I'm £420.00 up from where I started, I just want to share that it IS possible to do a resto job properly and on a budget, well with the help of family anyway
Will try and keep this up to date from now on
Cheers
Ant