After repairing the left rear jacking point, I had a poke around inside the cills with my boroscope, and could see corrosion around the right side one as well. Nothing showing from outside, except an old MOT patch, but it's obvious this one needs doing as well.
Based on my previous experience, I thought Icould do a bit better this time, plus I've now got a Dremel type tool to get into awkward places.
First cut the outer body panel.......
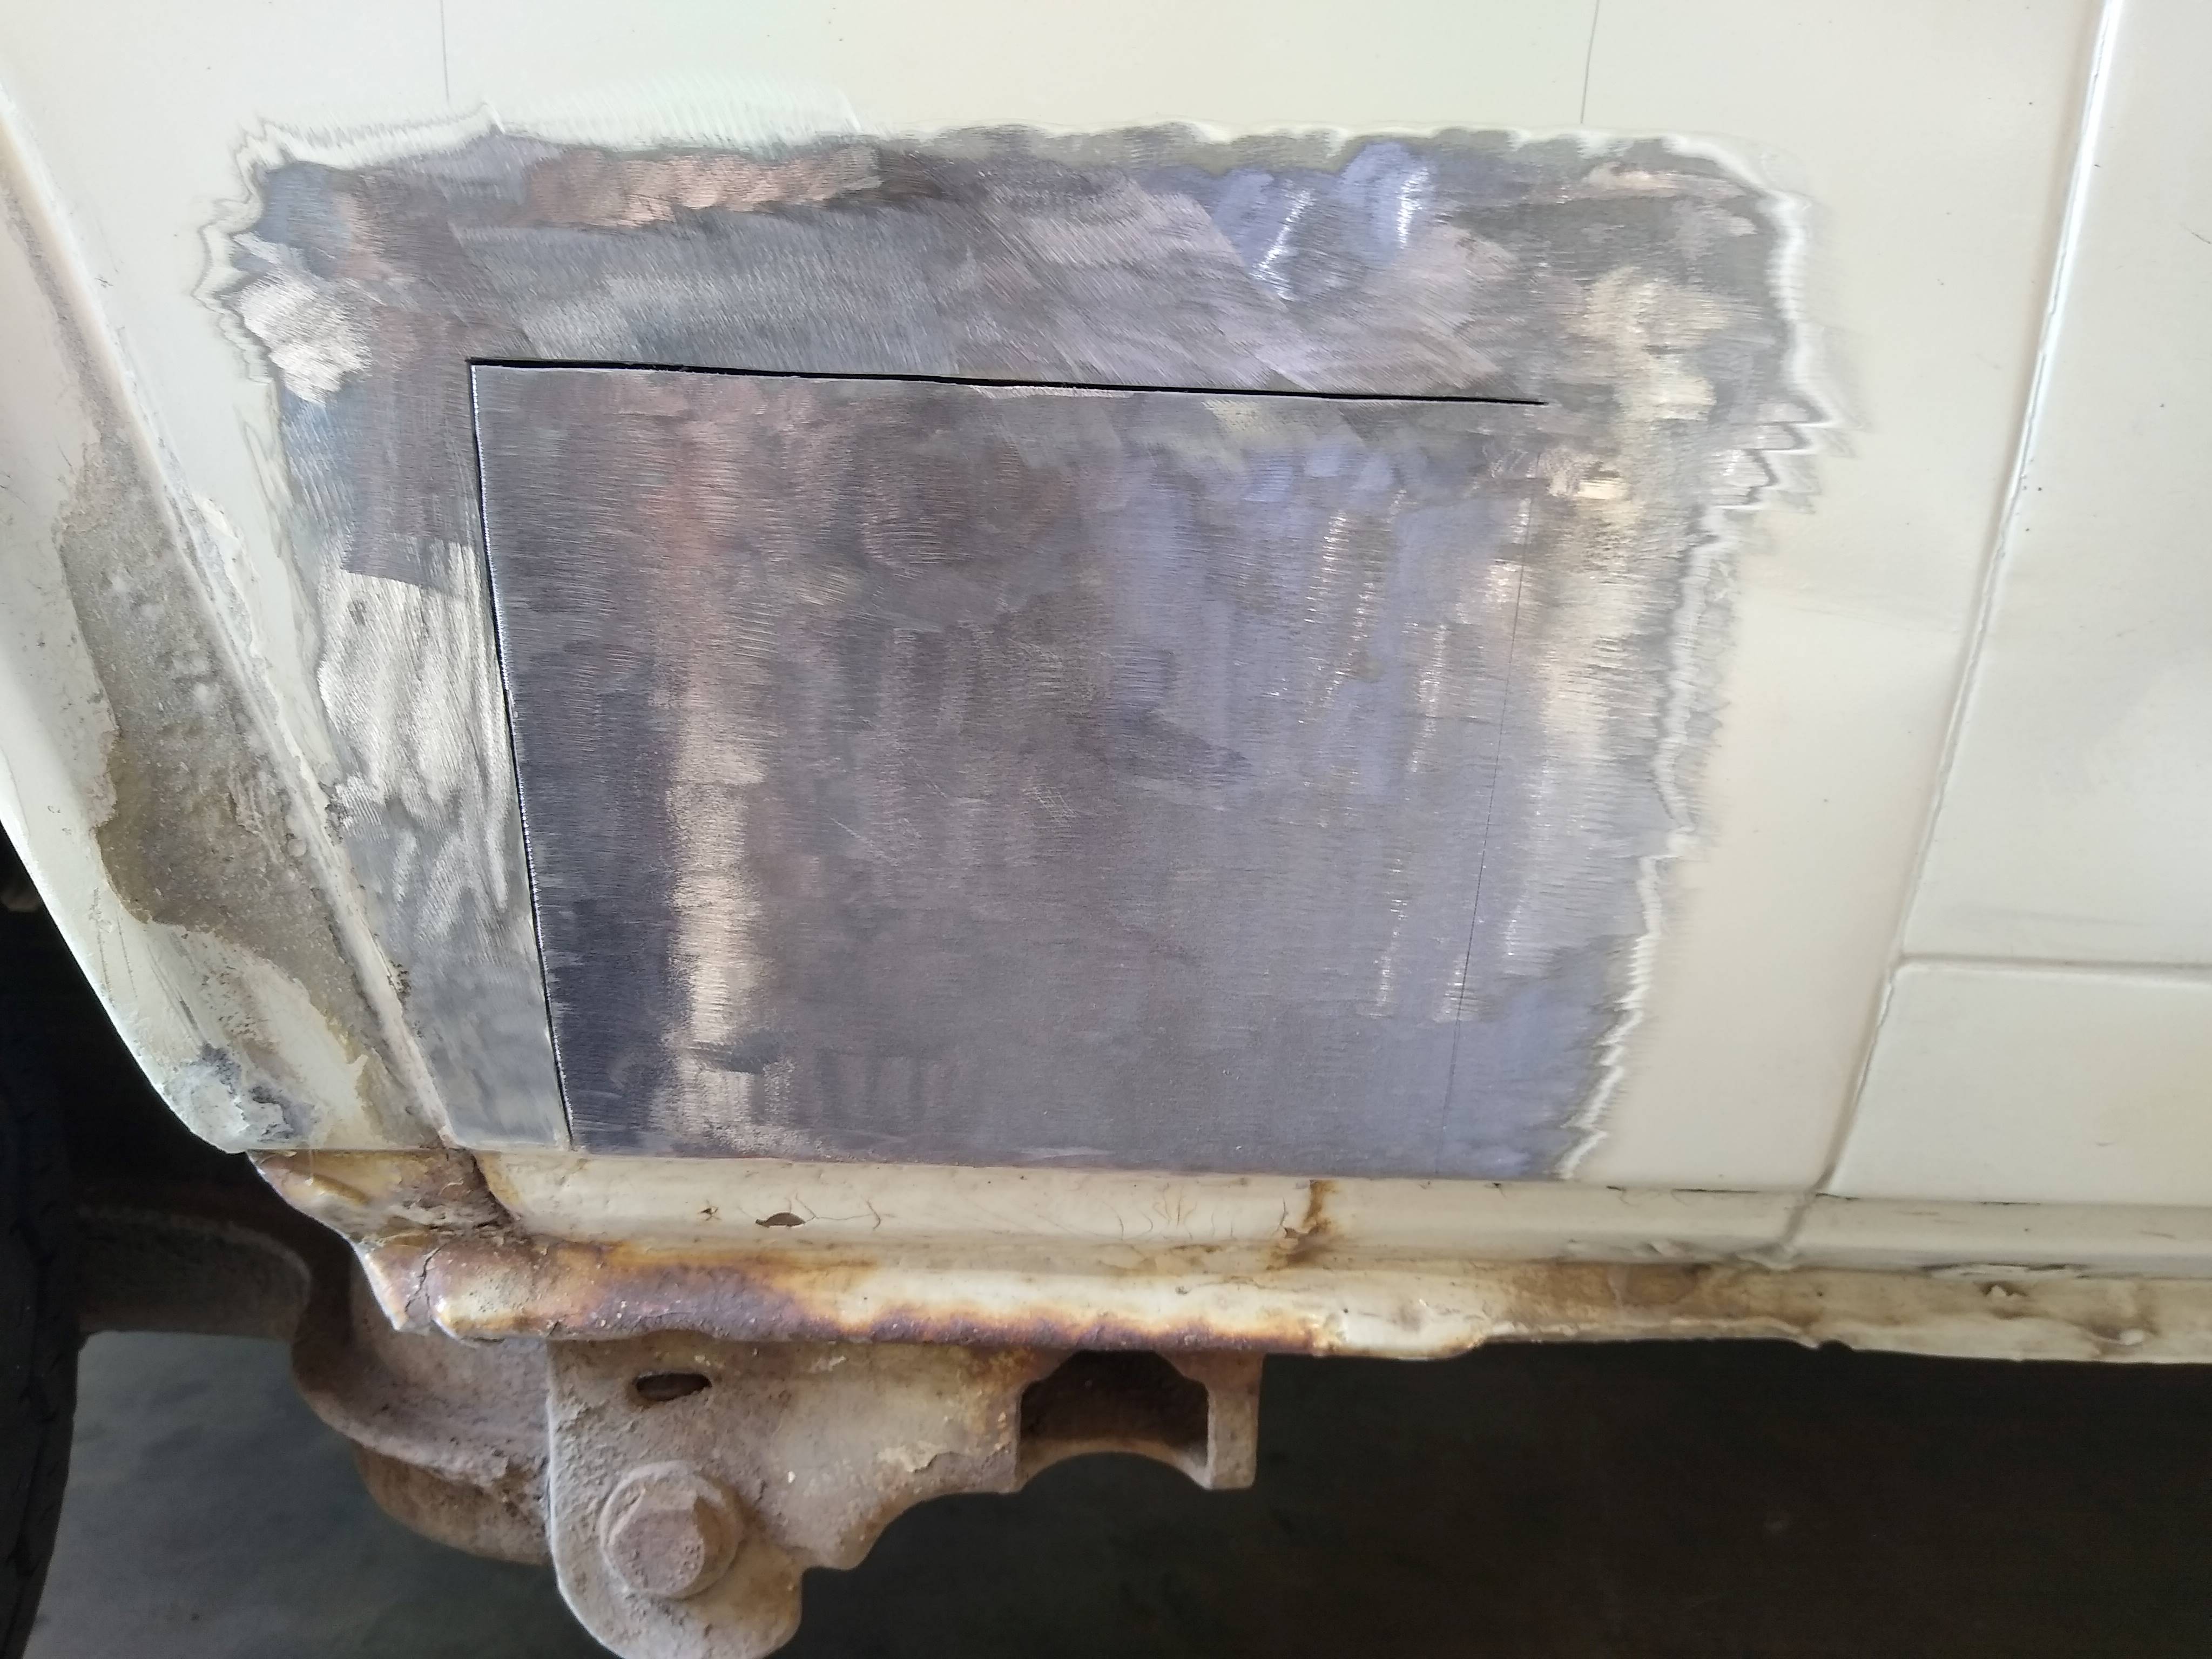
I used a 0.5mm slitting disc on the rotary tool as I wanted to weld the outer panel back in the hole later. A 0.5mm gap is perfect for edge to edge welding.
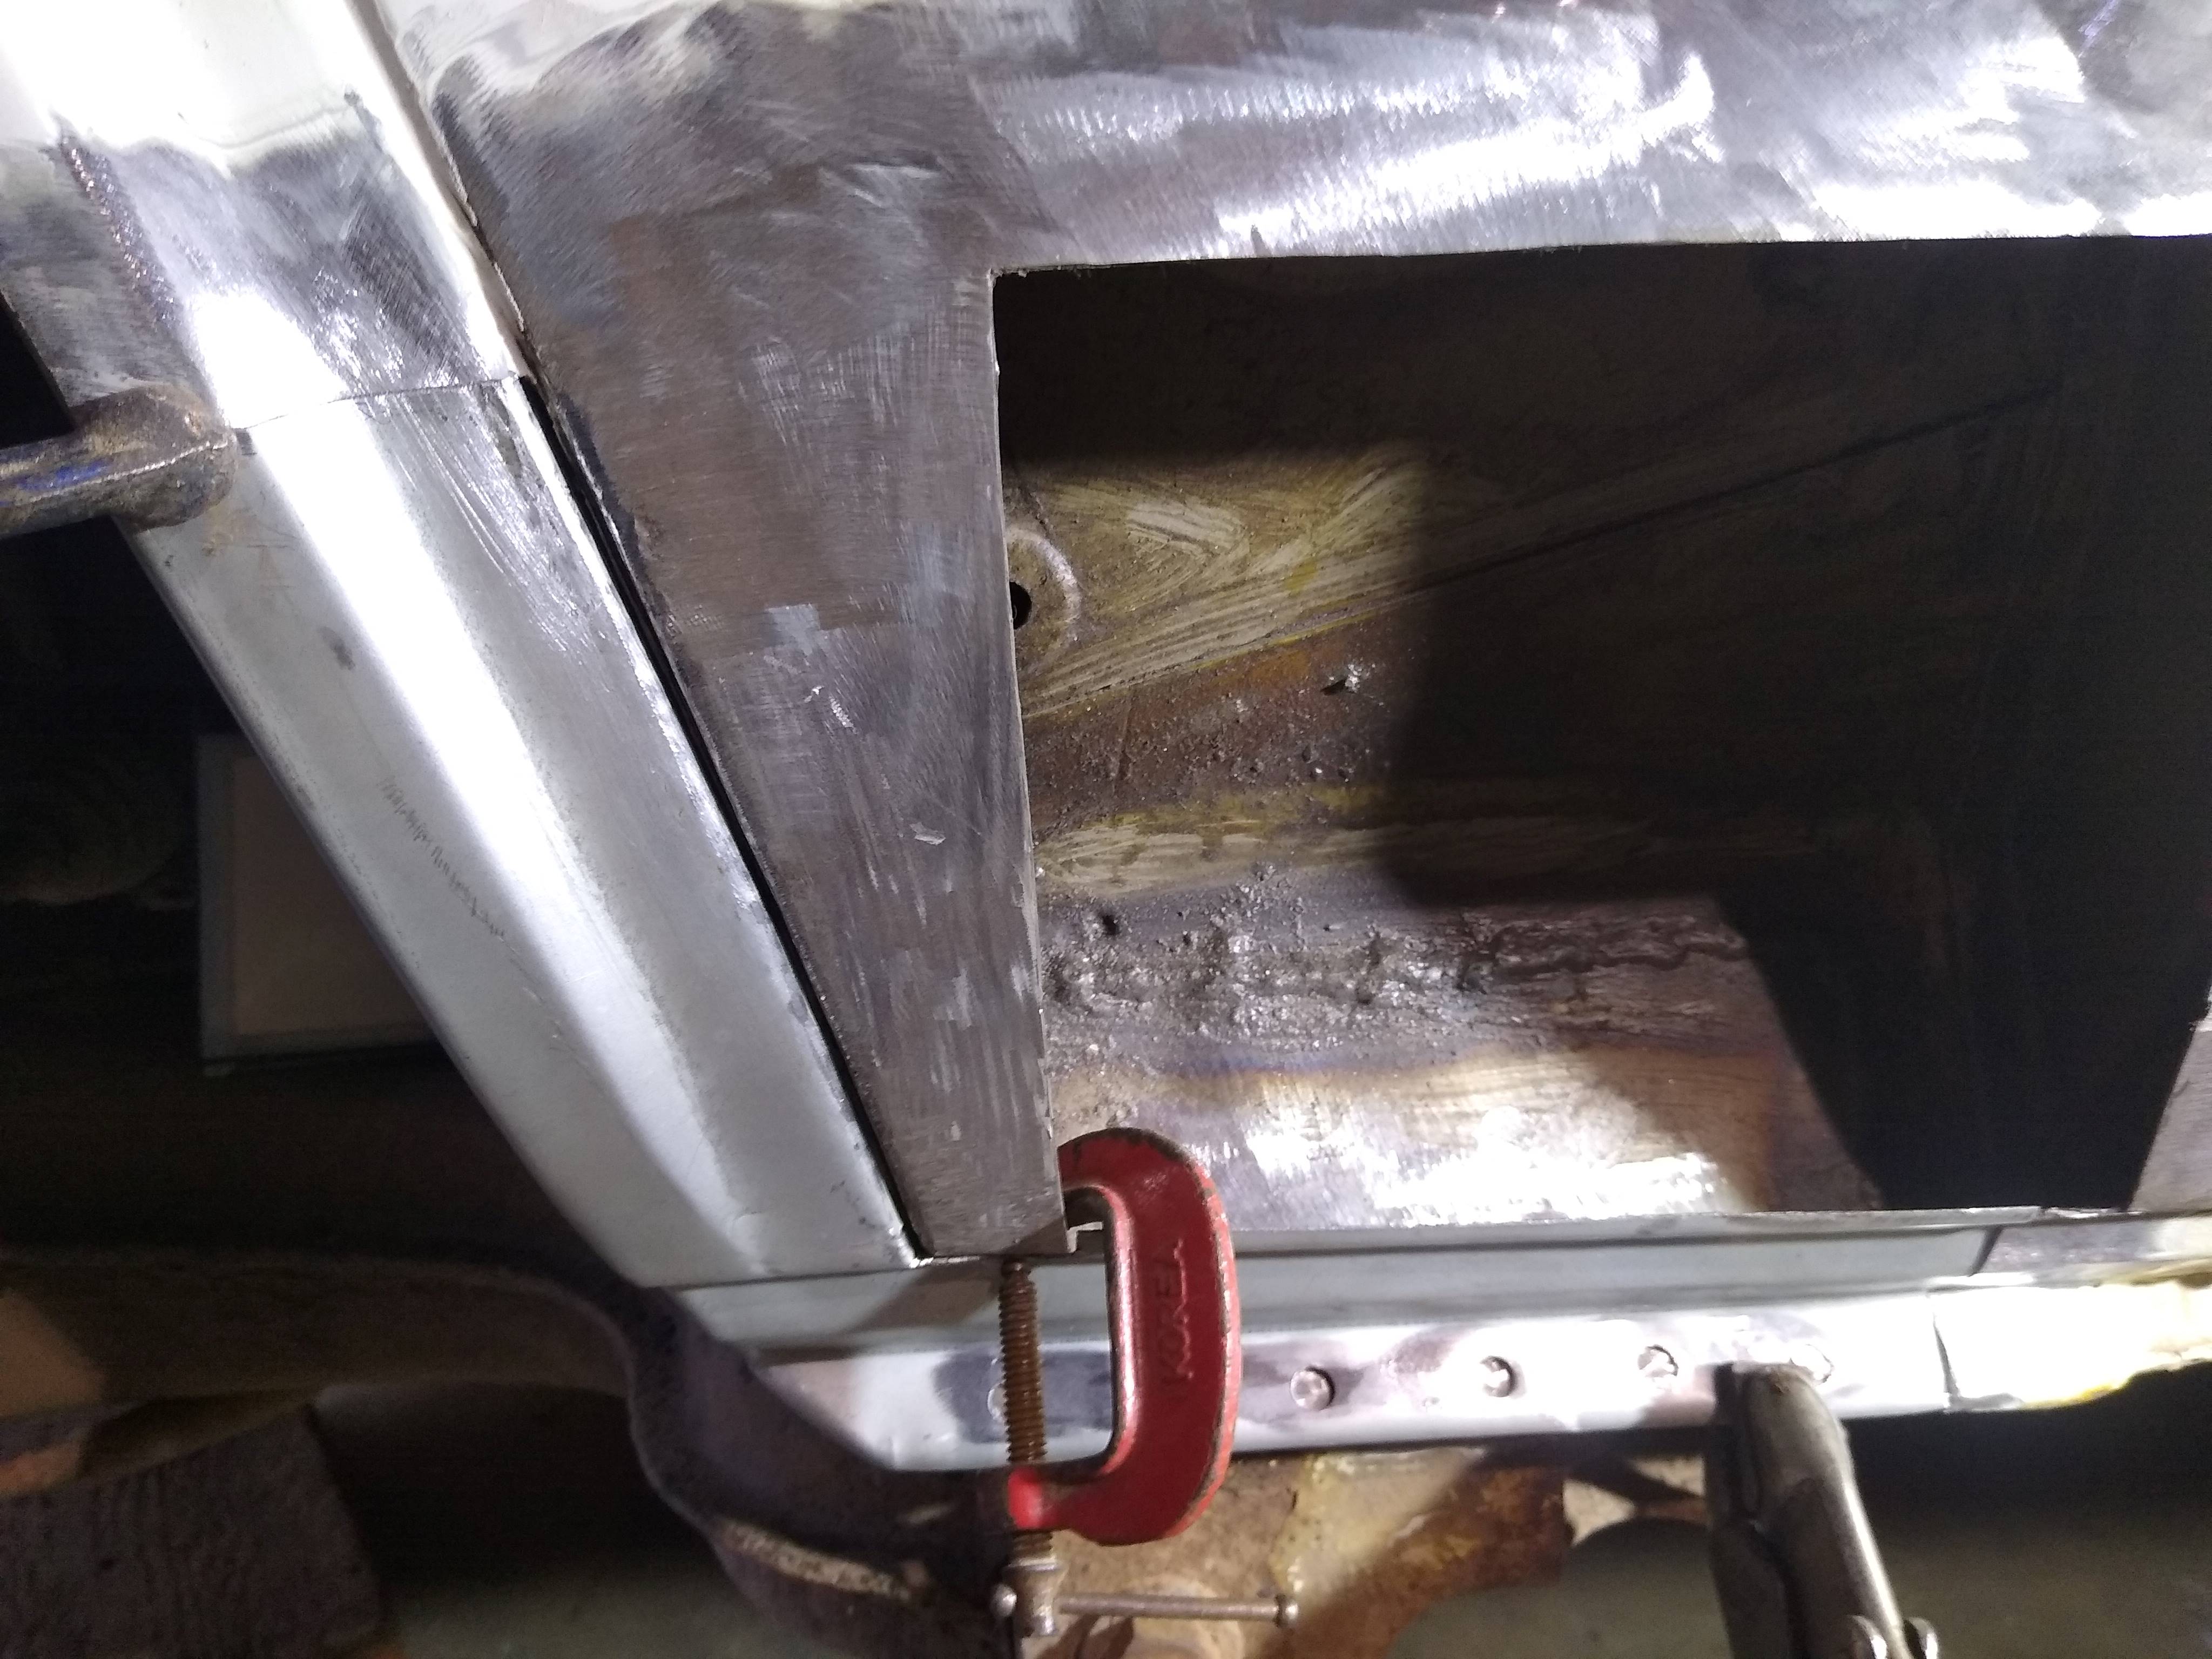
Inside I found corrosion at the bottom edge of the inner panel........
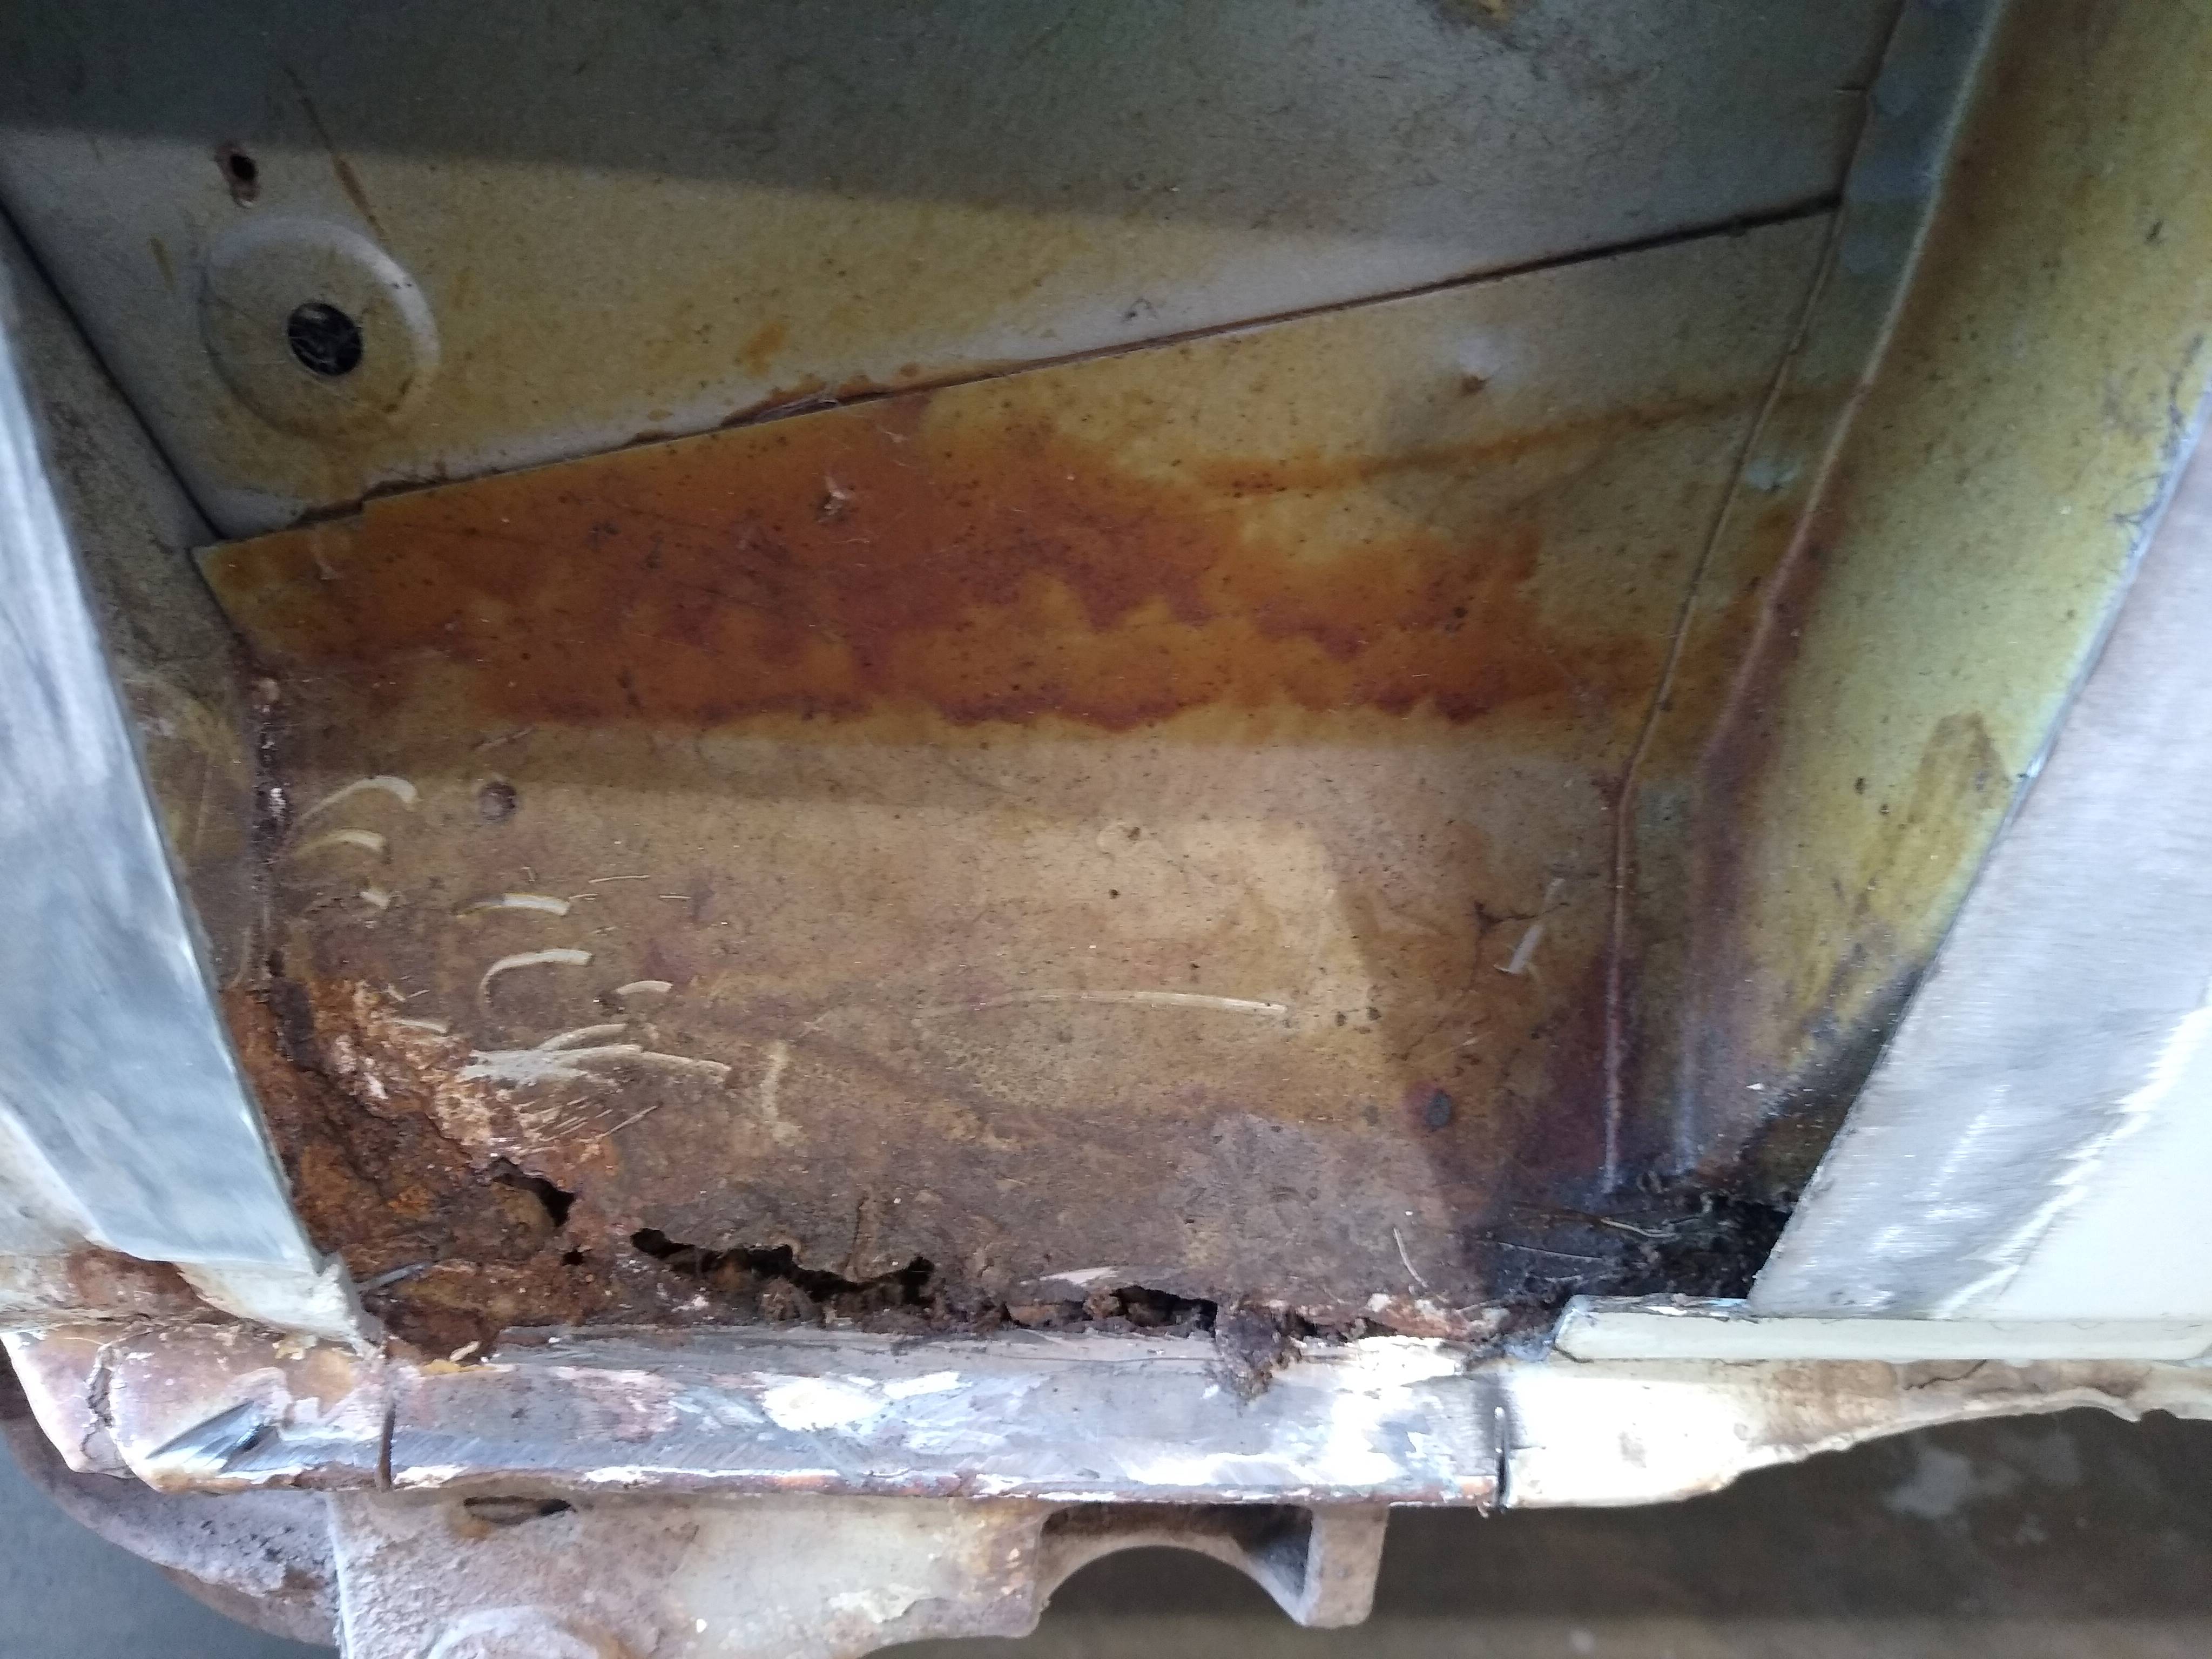
This was infact worse than the other side, and would need replacing right down to the bottom edge.
Next cut through the inner panel revealing.......
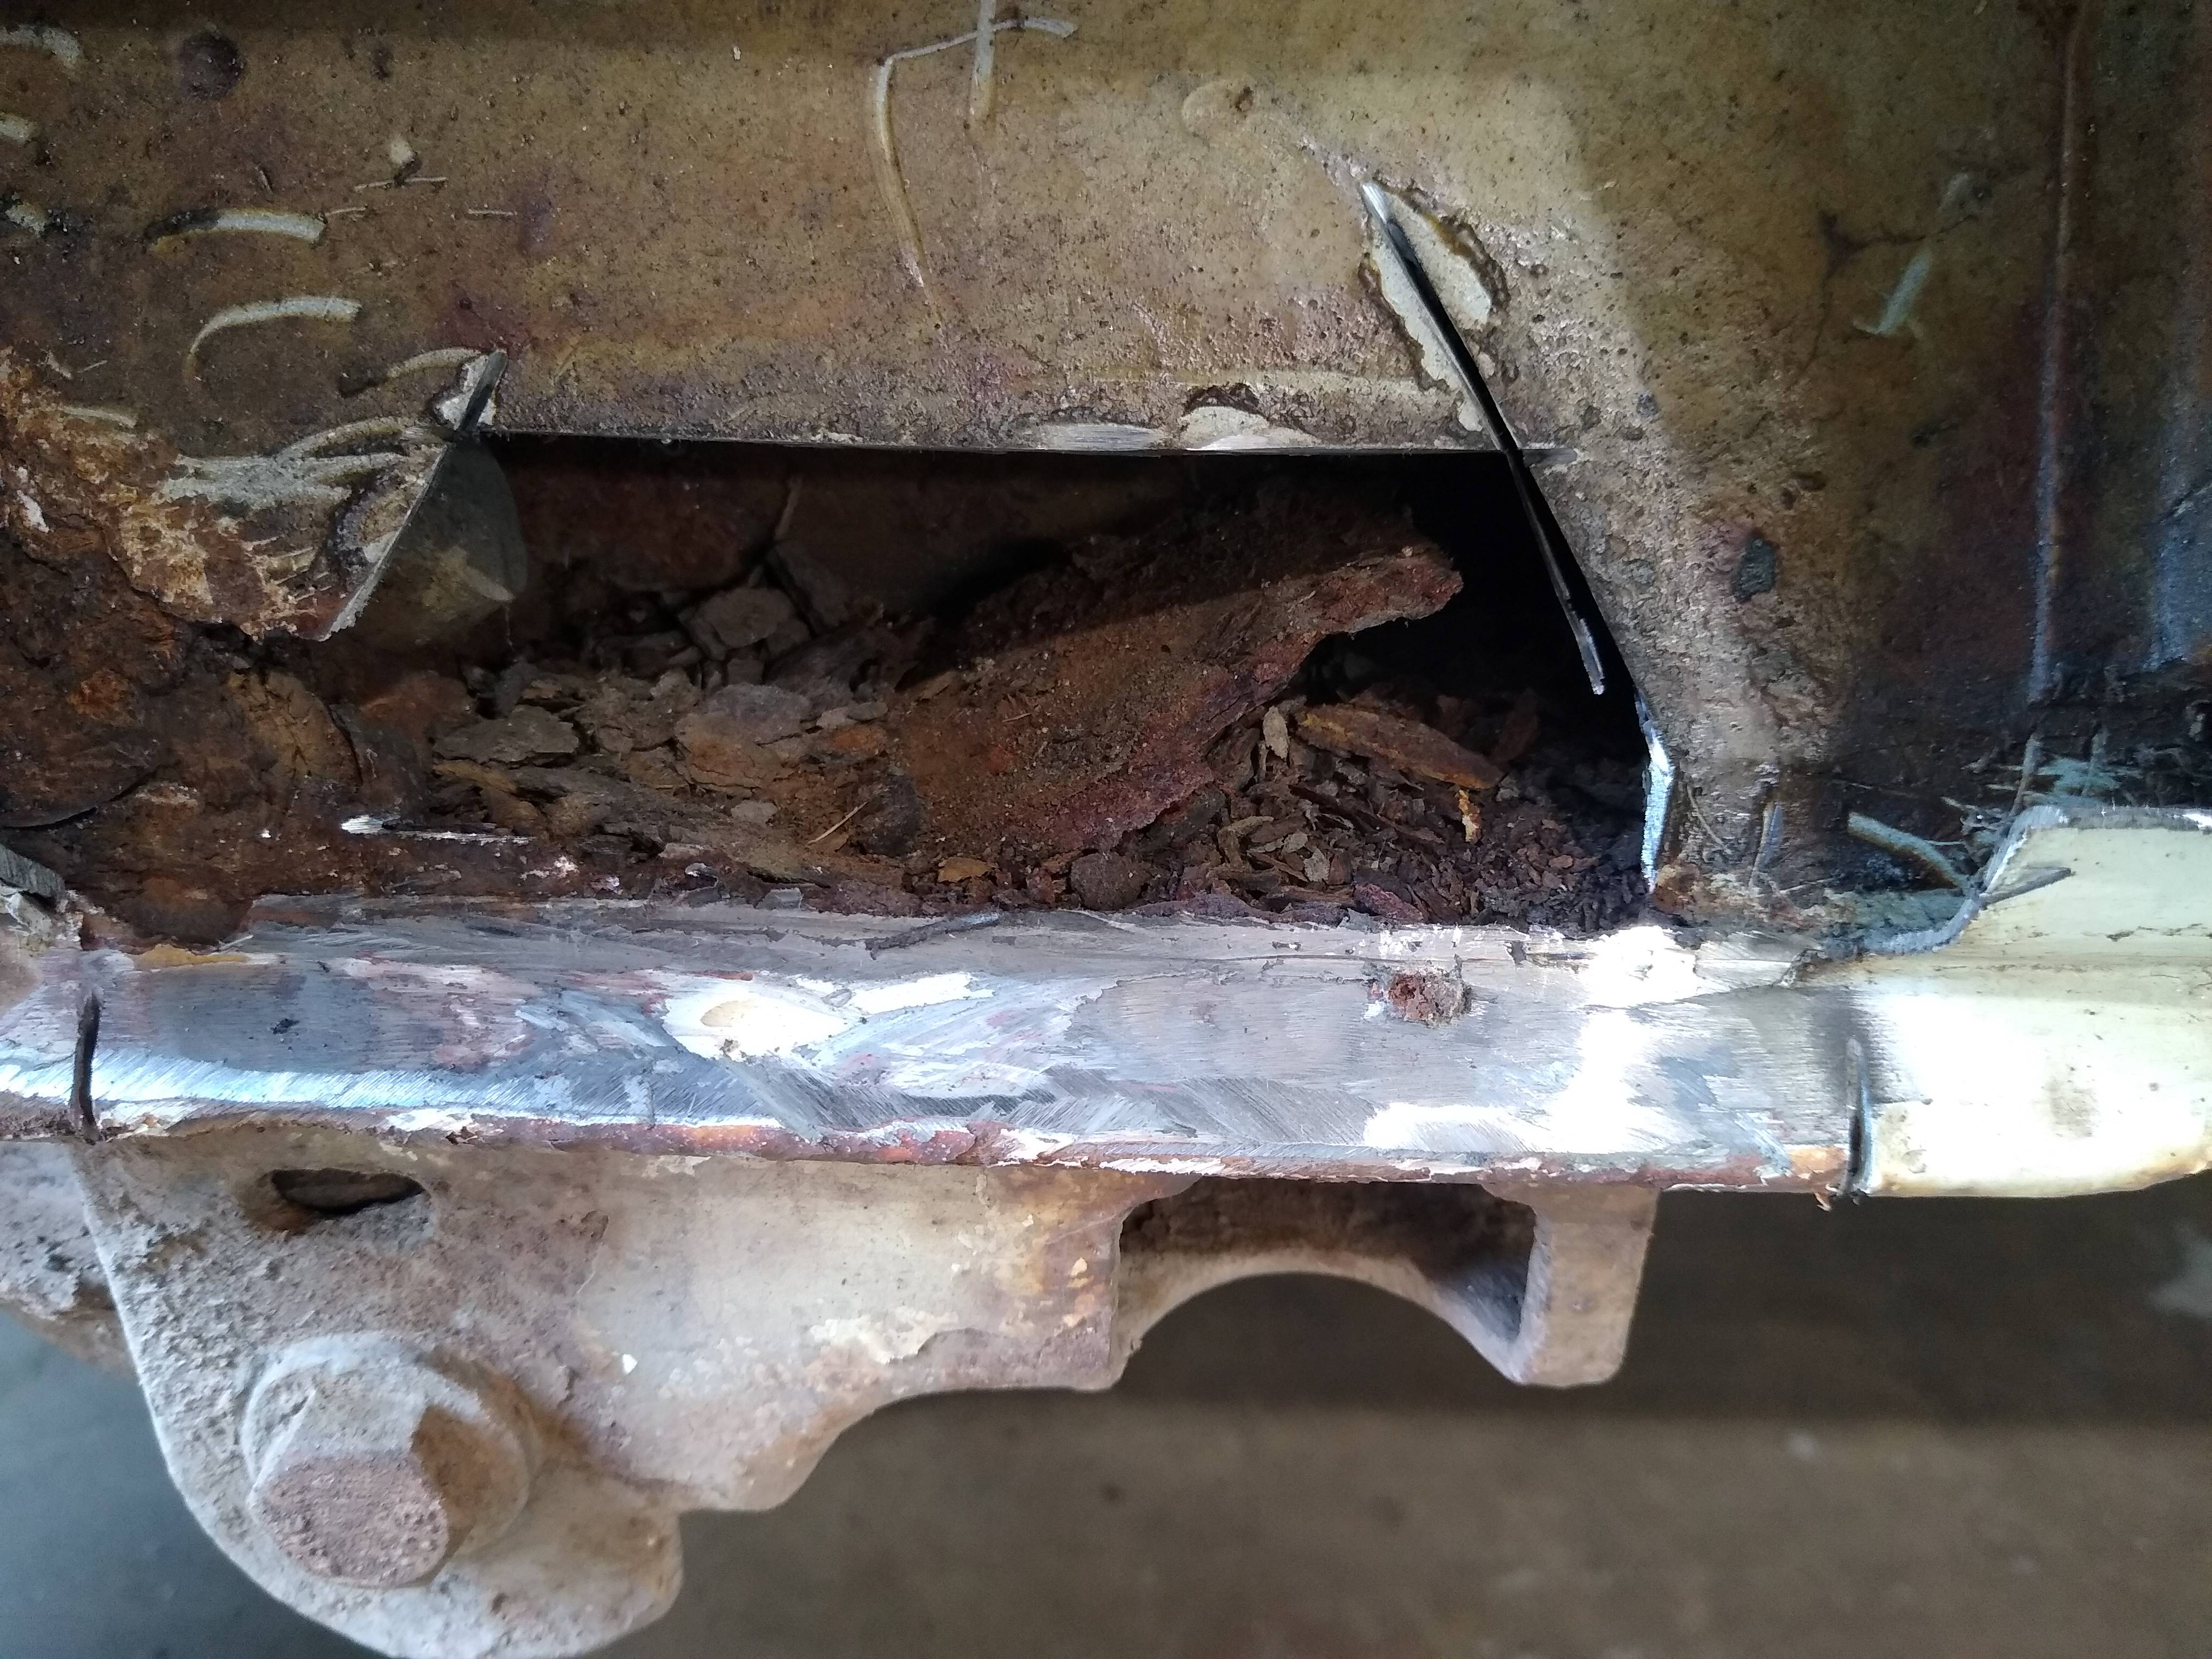
The corrosion between the thick chassis section and the jacking point has erupted into a mountain of rust.
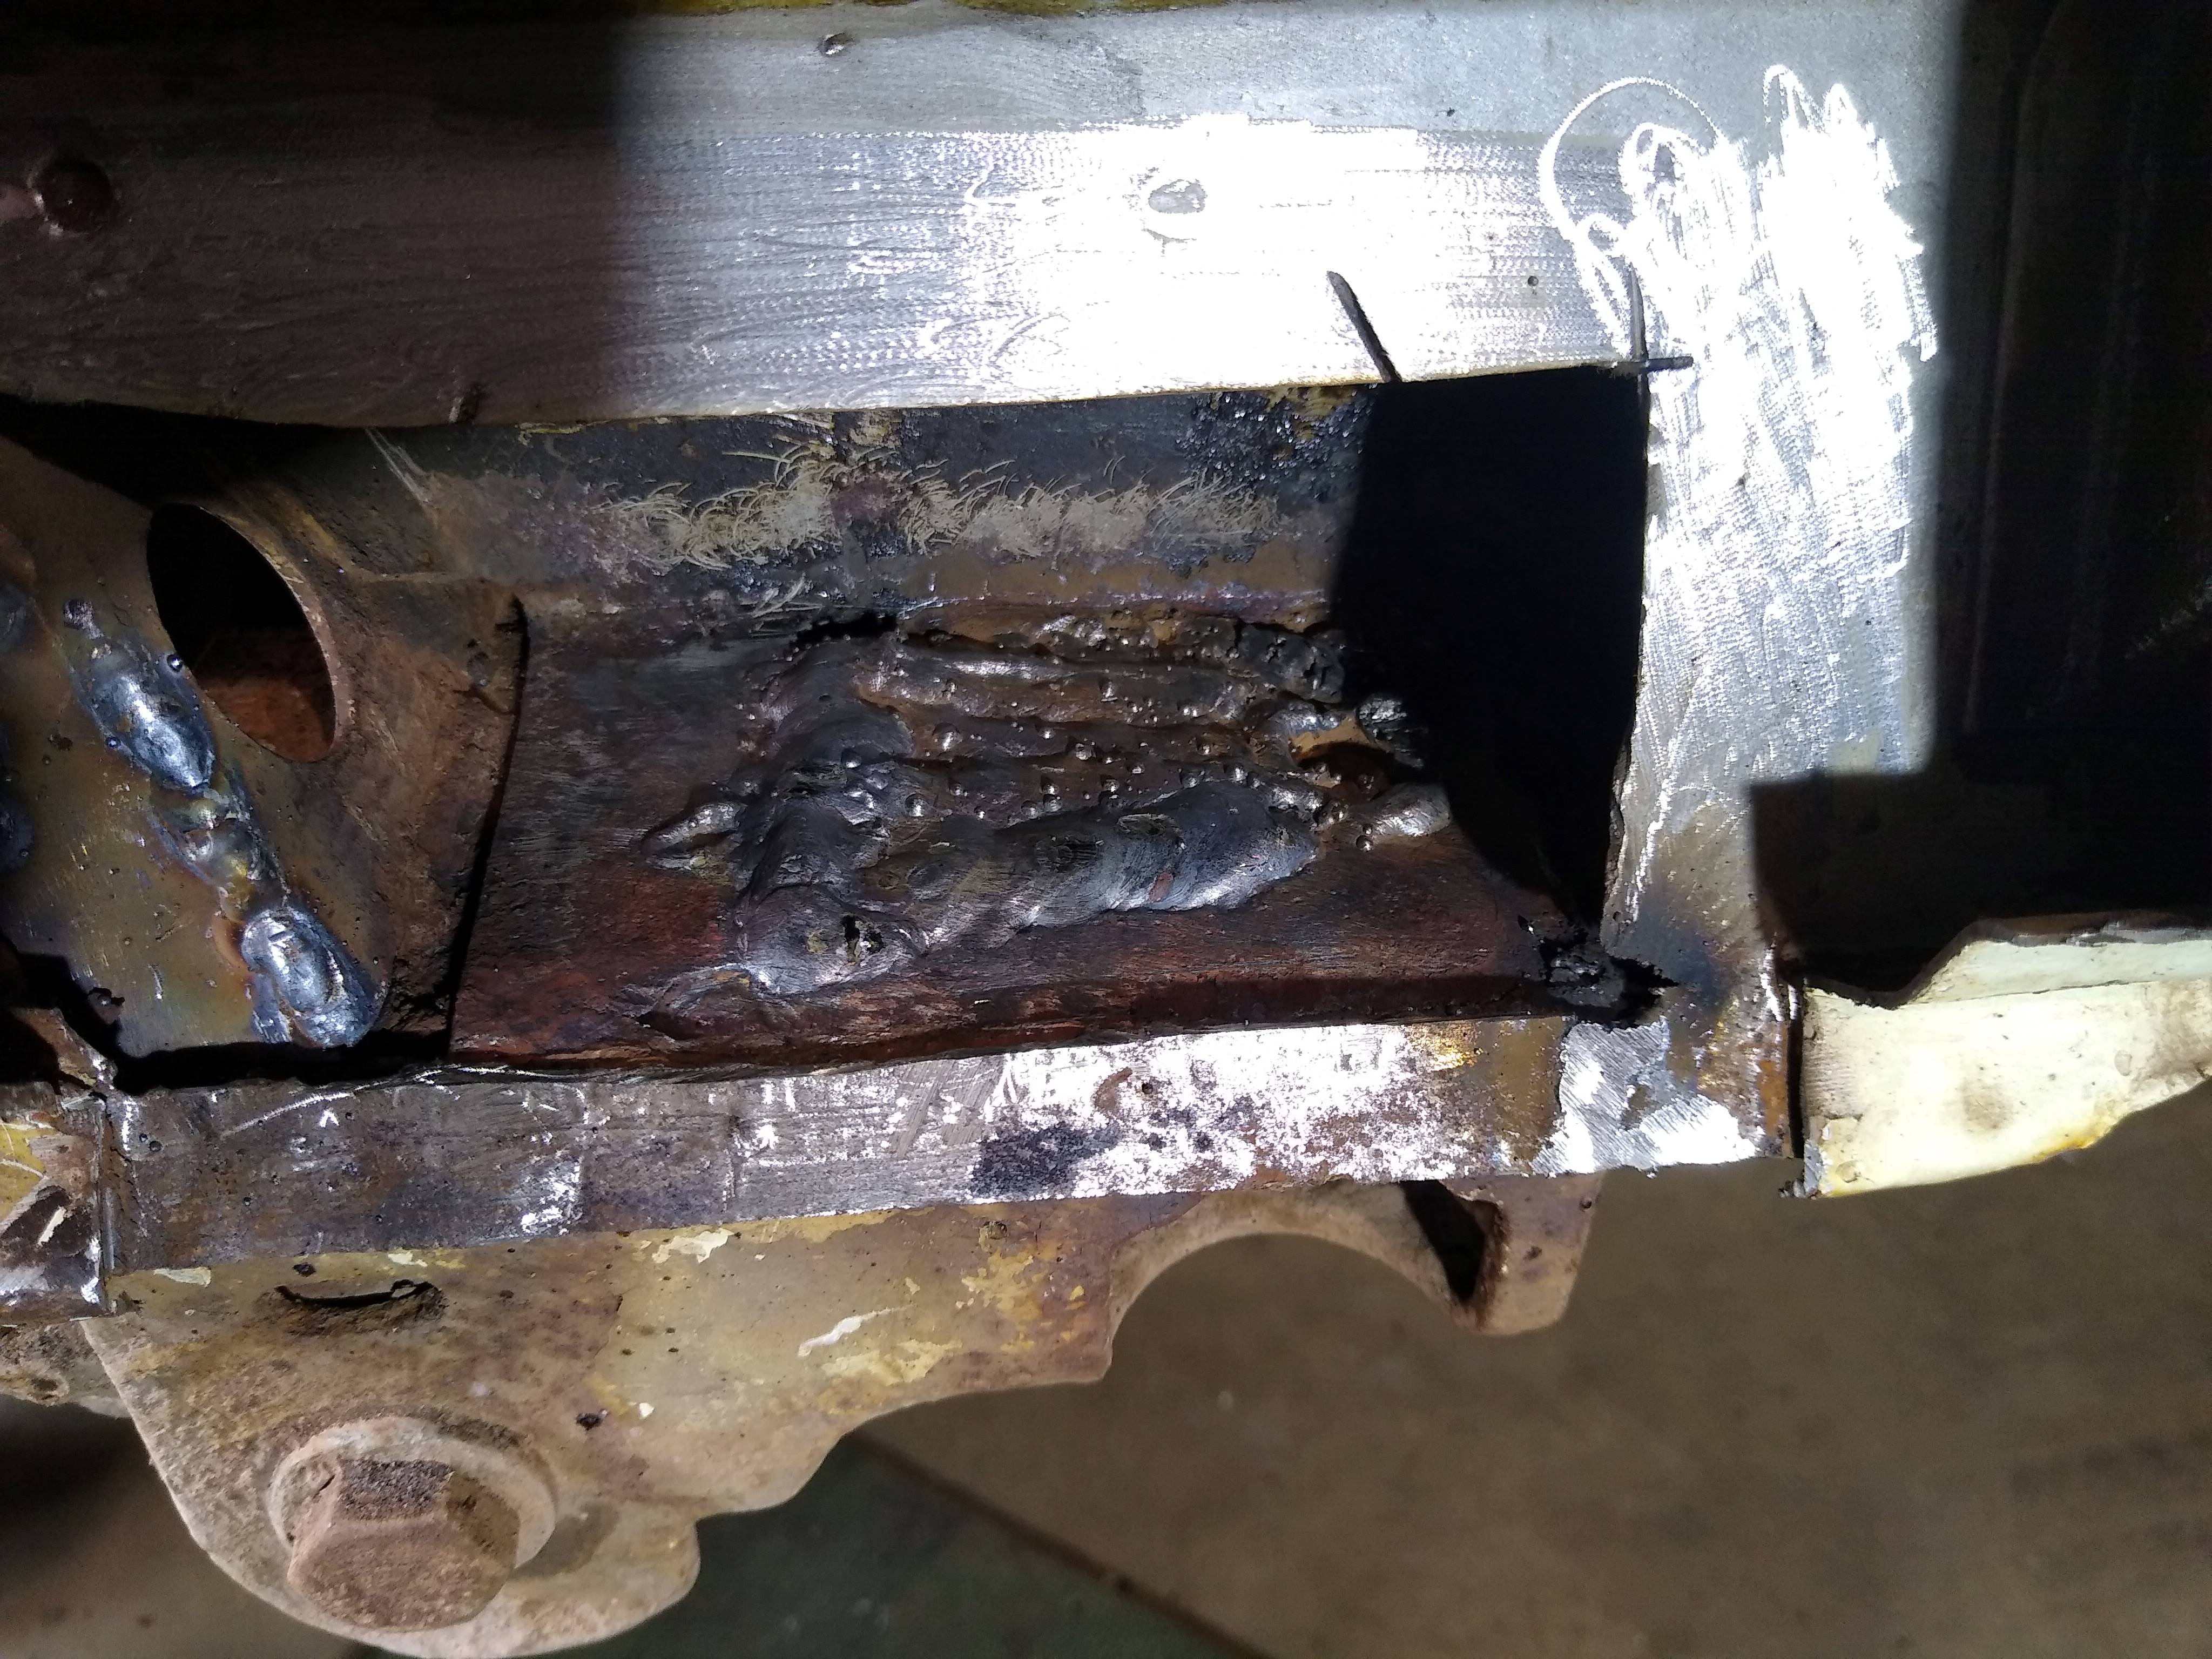
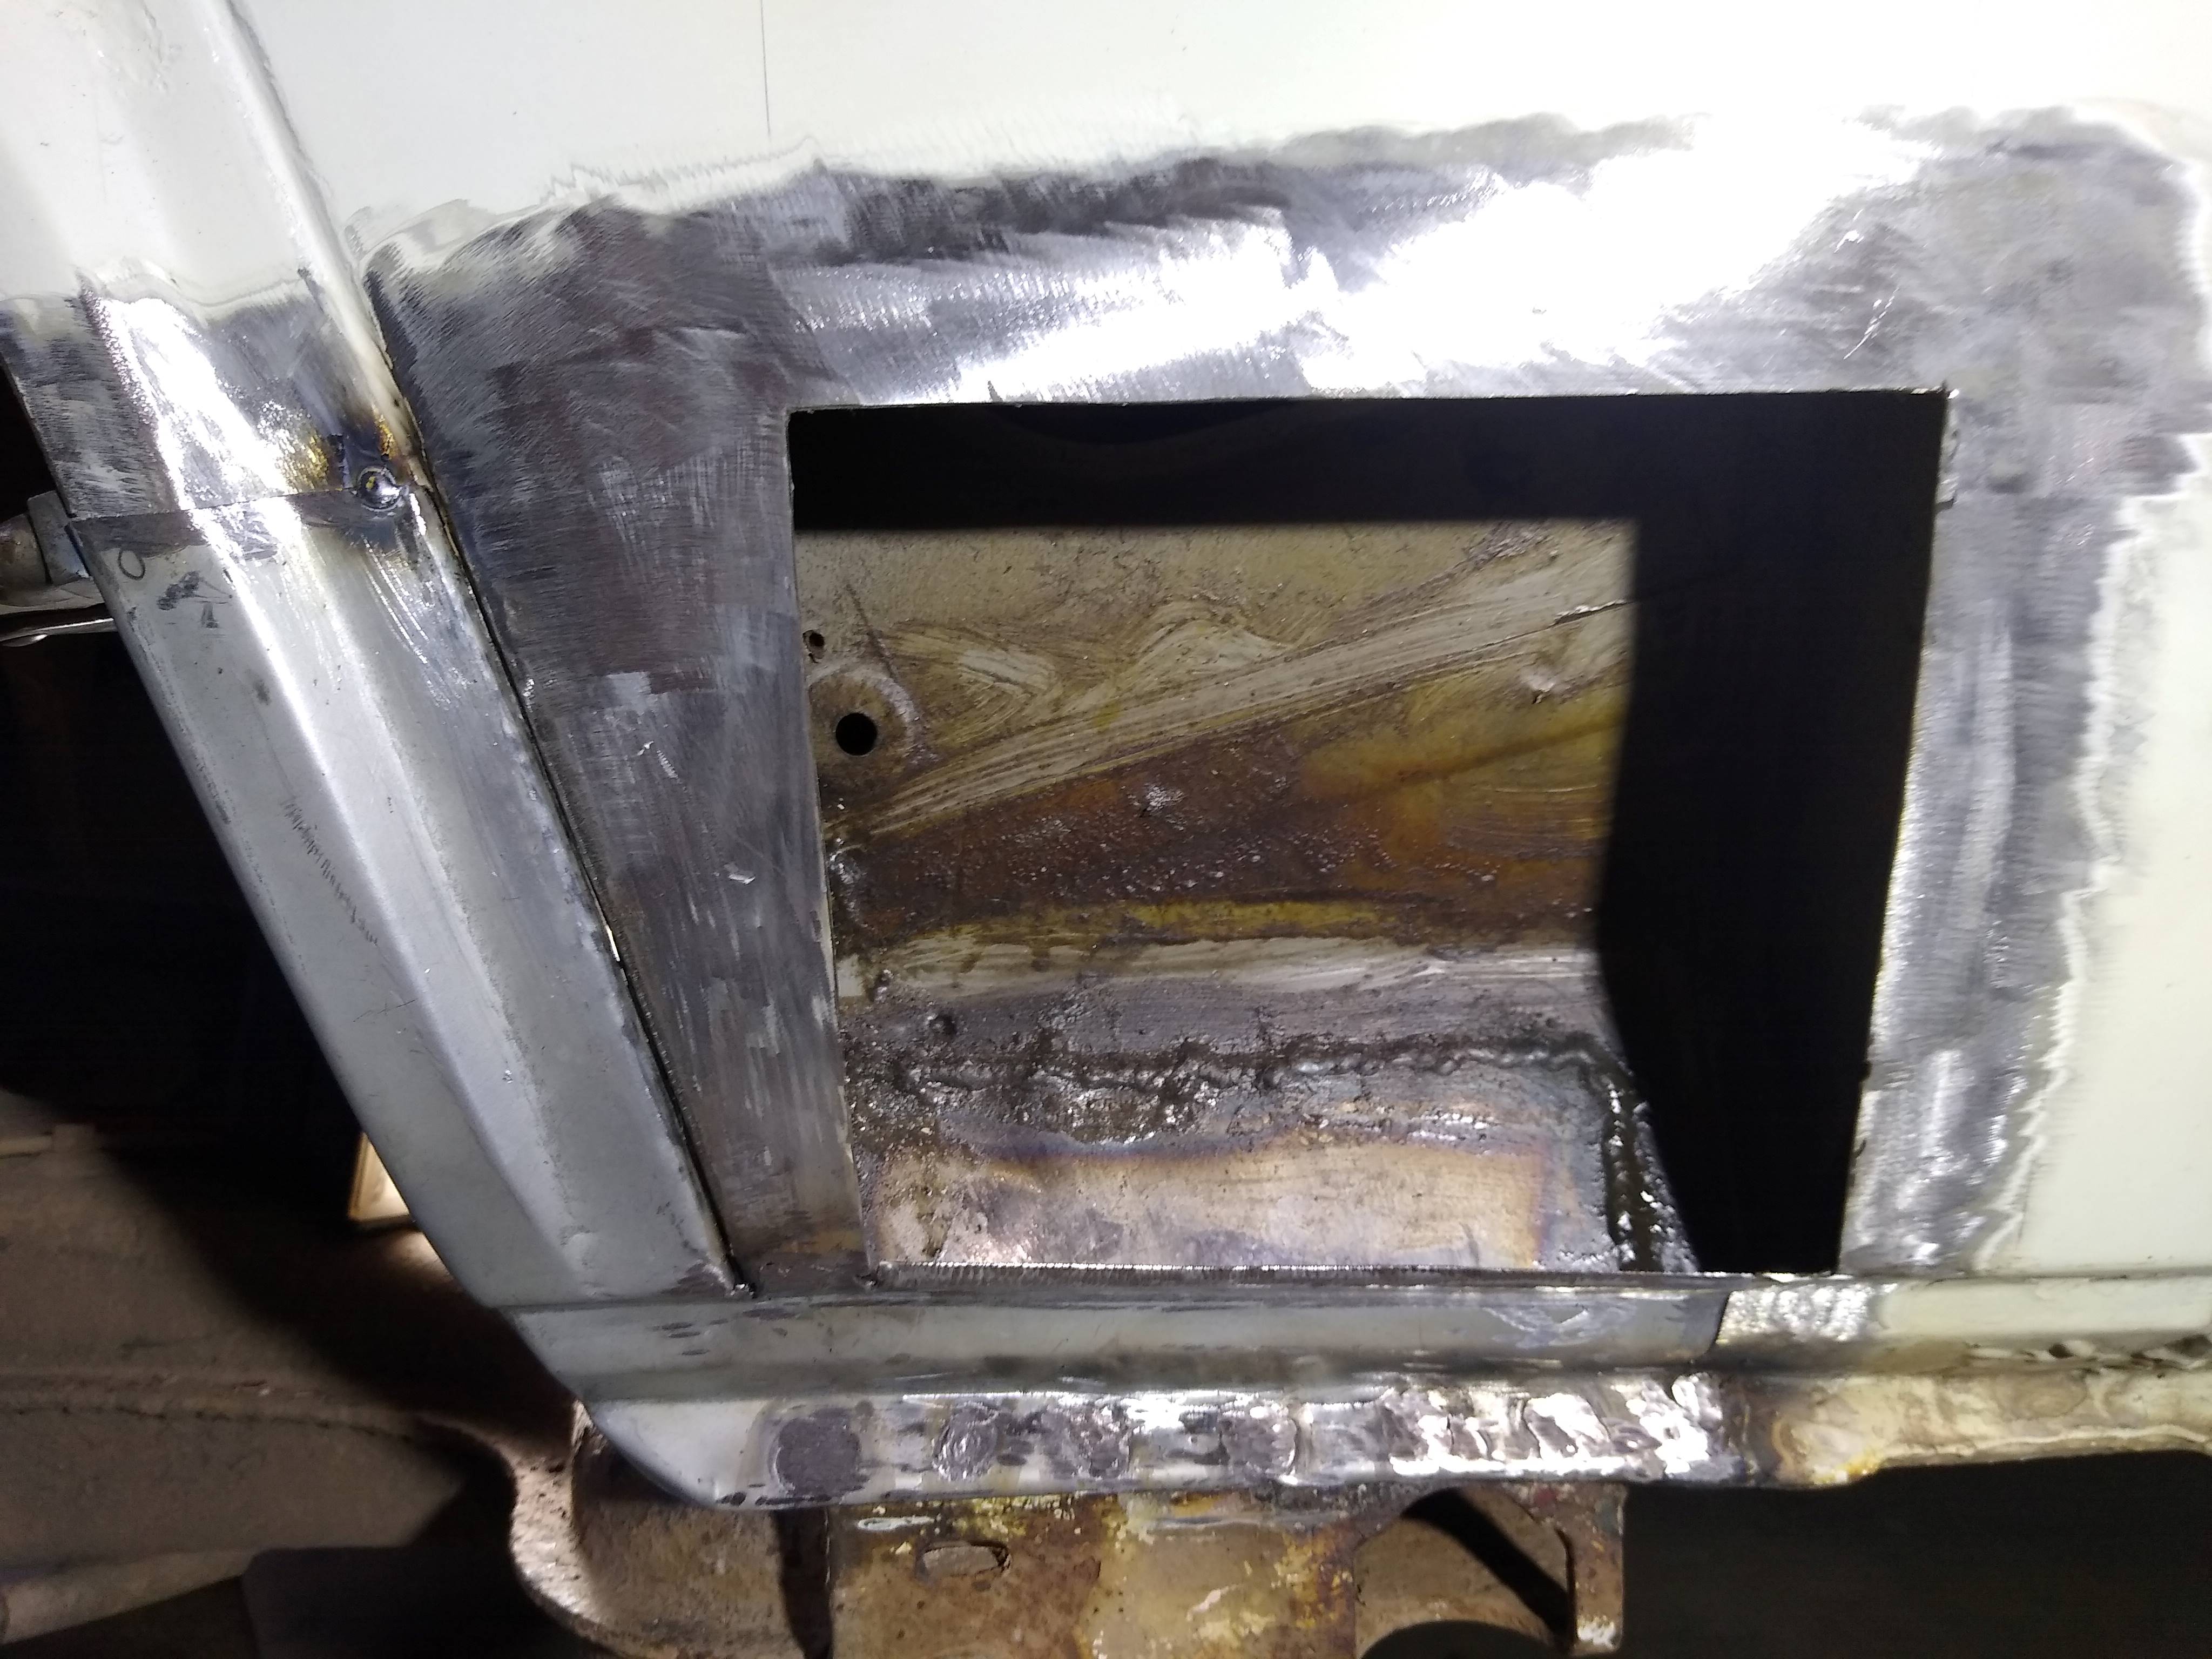
After cleaning this lot up with the rotary tool it looked like this.....

There is also a hole in the wheel arch section, so I've bought a repair panel which I'm going to cut up. The inner cill section will have to go right down to the bottom edge, so that has been cleaned up too. The inner arch has a couple of smallholes which I'll patch from this side to make it easier.
A bit of welding........
FIRE PRECAUTIONS, then welding. The rust holes in the inner arch have been made good leaving the access holes. The top of the jacking point has been built up with weld right to the edges, to full thickness plus a bit. The whole lot was then doused in waxoil, while still warm giving me a problem with welding from now on. I keep an old CO2 fire extinguisher with the horn taken off, so I can fill voids with CO2 before and after welding.
I forgot to take the next pic, which should have shown the inner cill patch welded in place.
The next stage.......
The inner cill patch has been welded in and waxoiled. The repair piece has been cut up and bent to replicate the original join between the body panel and wheel arch, and extends along the bottom edge, where it has been drilled for puddle welding. If I had just fitted the over panel over everything, then water from the wheel arch could get in behind and spoil all this work.
Next stage.........
The wheel arch piece has been tacked at the front, and welded to the inner arch at the back. The bottom edge has been puddle welded to the new inner cill patch. I now have an original looking panel join.
All welded up........
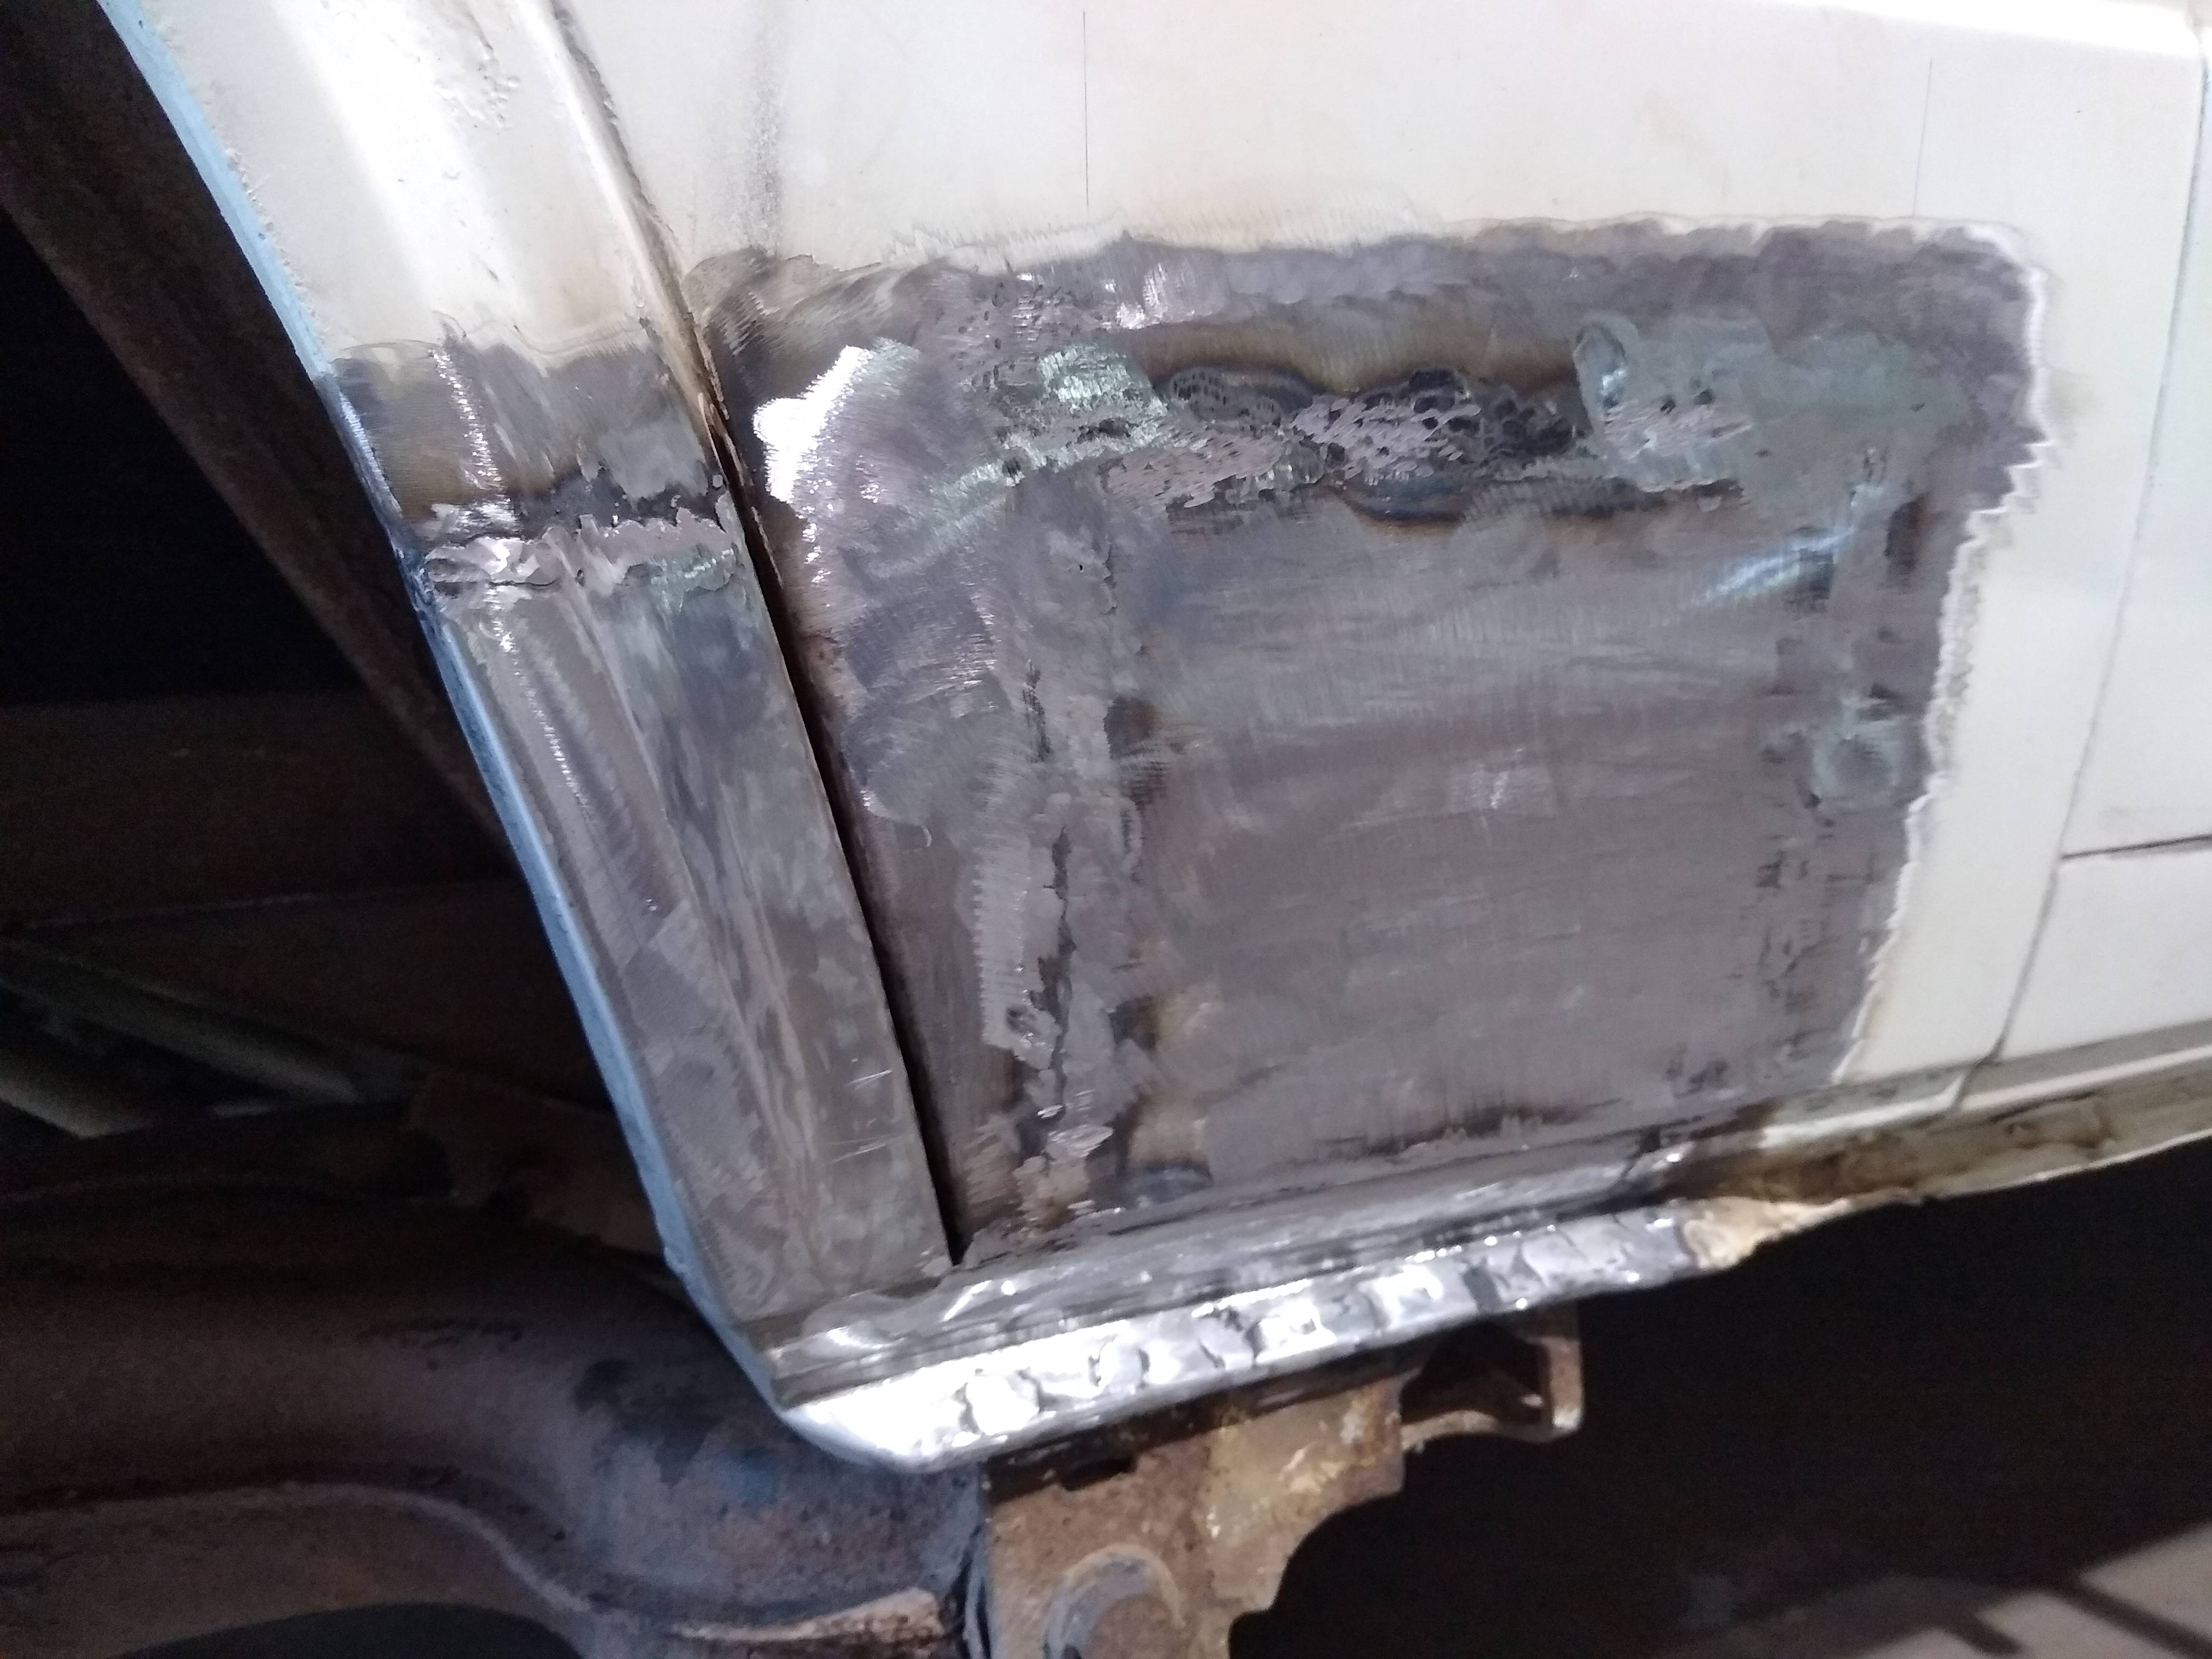
I had a bit of distortion to the outer skin, so had to knock back a couple of high spots.
A skim of filler and paint.........
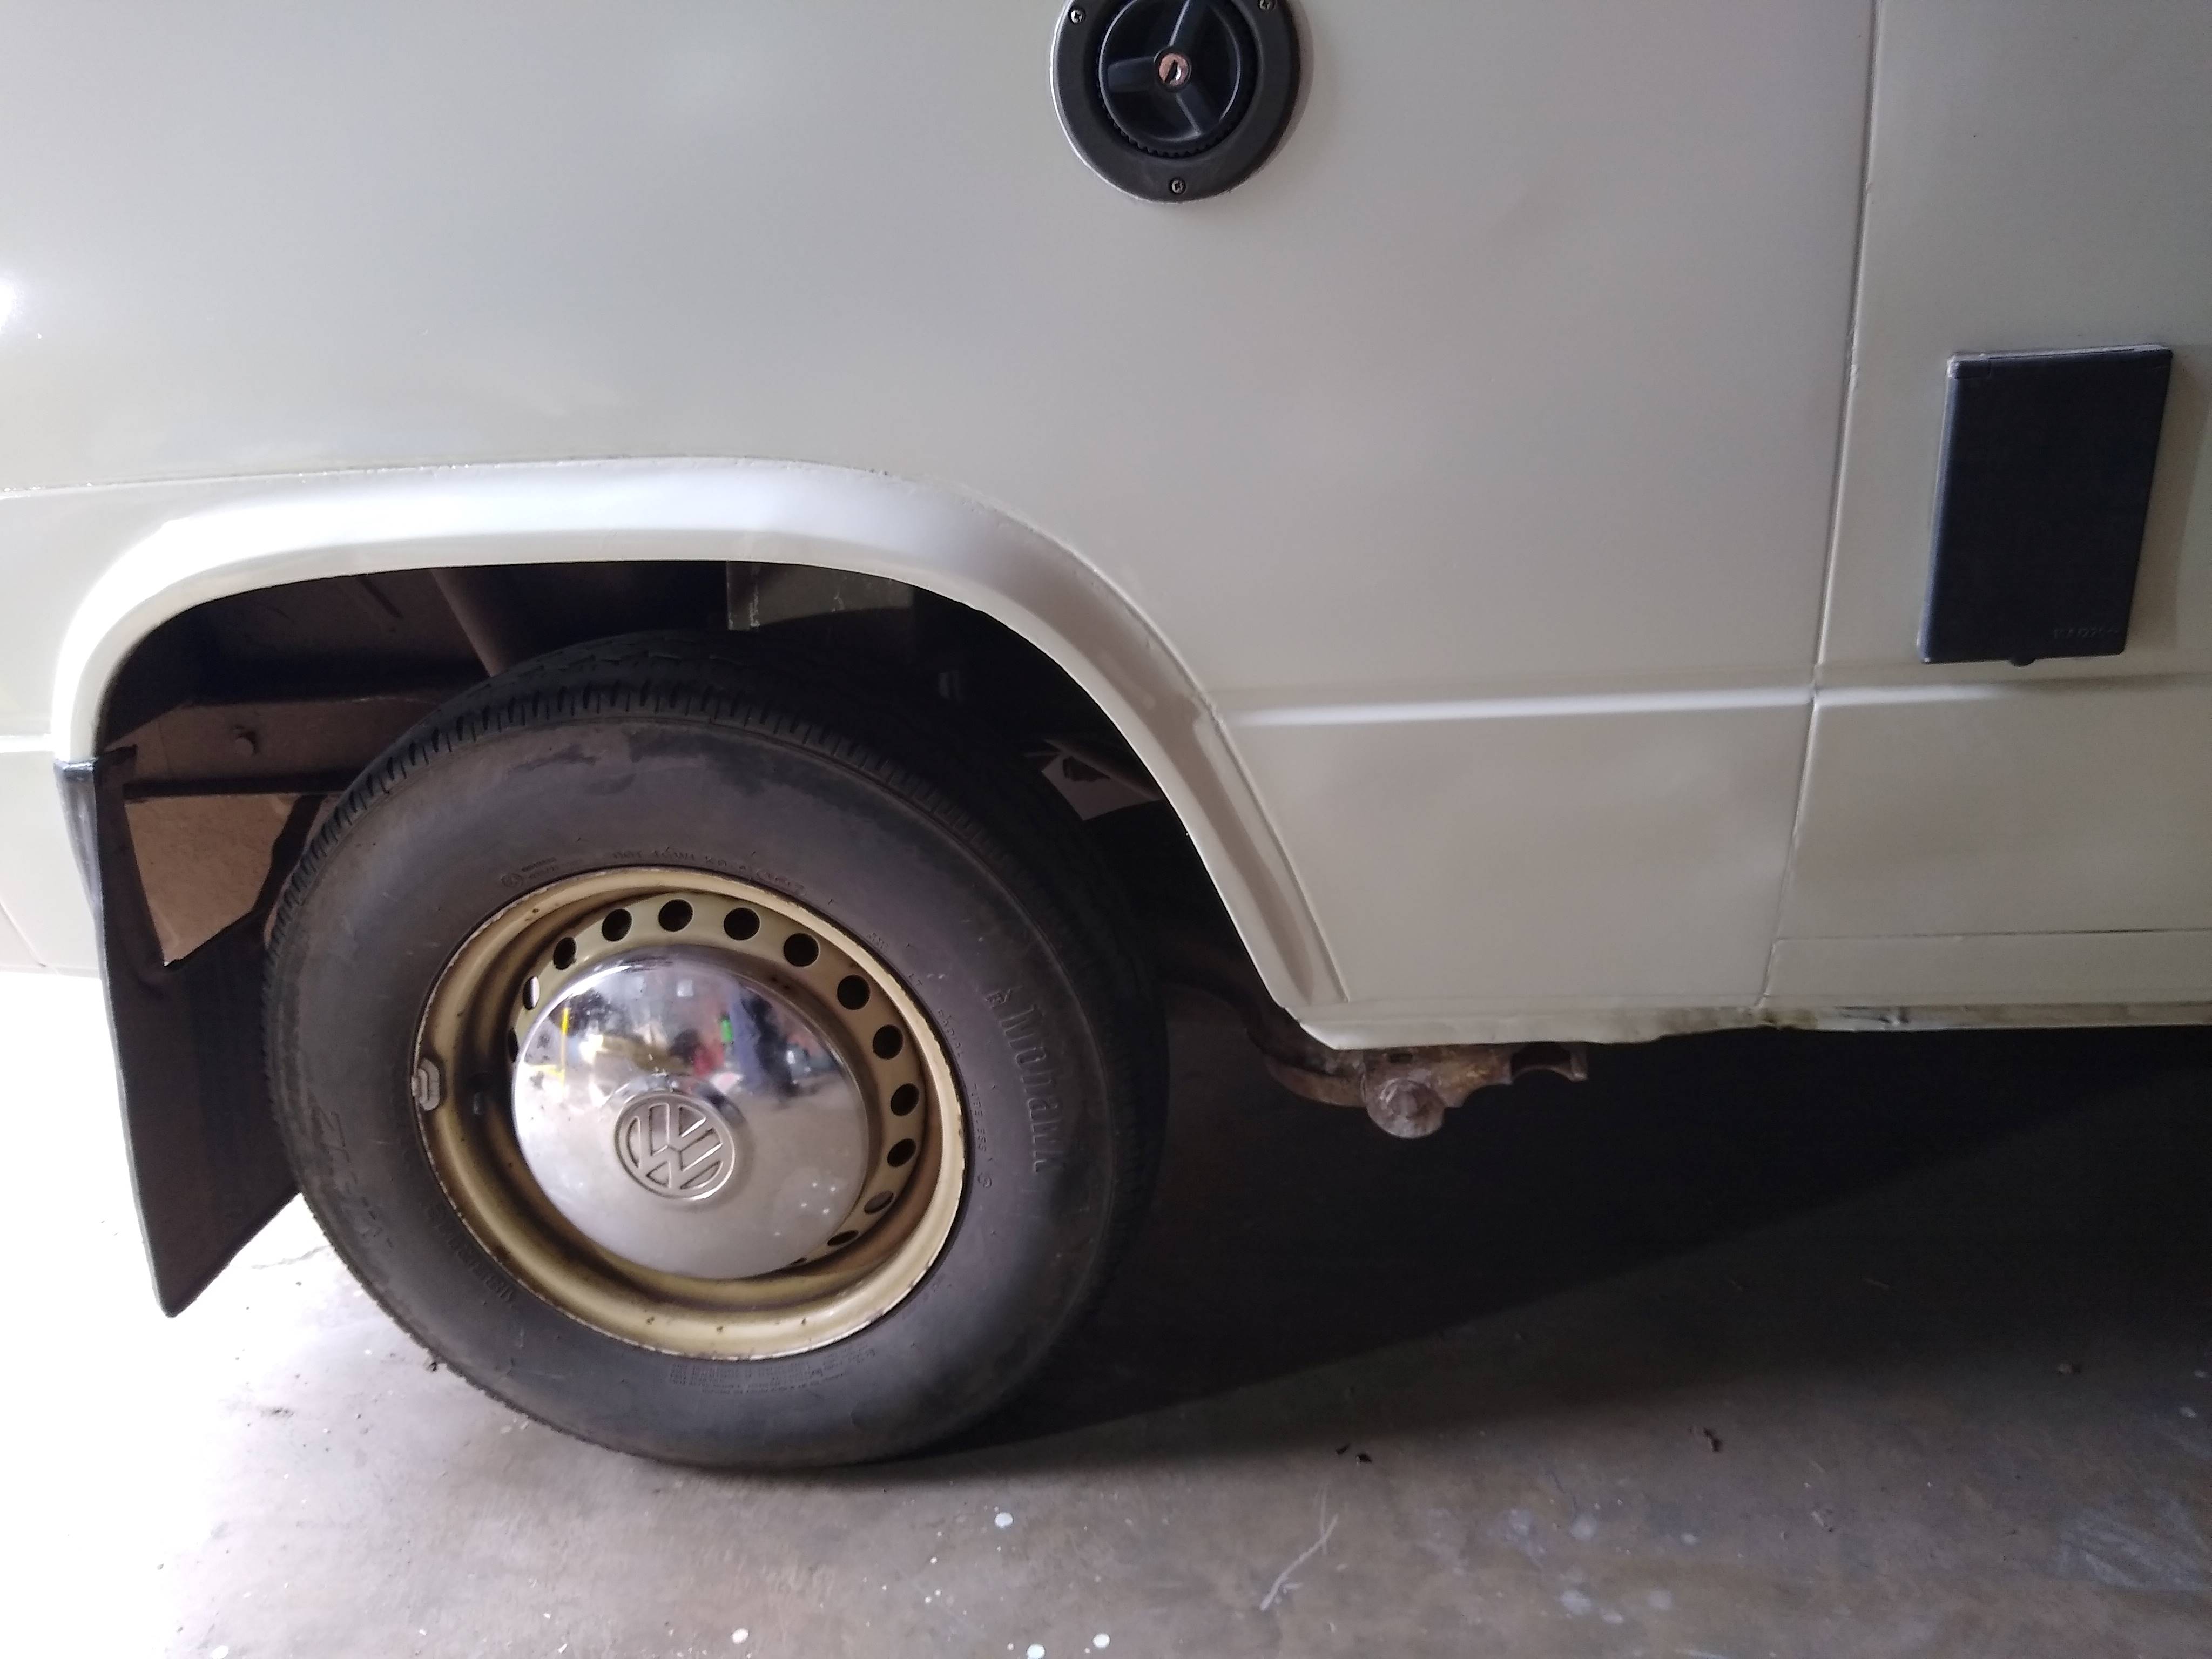
Because I used the original outer skin, complete with original slight dent, the dent is still there. My aim was to get a full strength repair, water proof to the wheel arch and looking original. I don't care about slight panel damage. I've also raked out the whole of the wheel arch to panel join, primed, filled with Tigerseal and painted over.
Since this photo, I've done some improvements to the long wheel arch seam, which is sound, but looking a bit ragged in this pic.
There wasn't much sign of corrosion damage from the outside, but this repair really needed doing. I can thoroughly recommend getting a cheap boroscope and looking inside this area. There will probably be more going on inside than you imagine.


