I put this write up on Brickyard, but it might be useful for you guys too.
The ISRI front seats in my Club Joker have been looking very tired. They are covered in the "Adagio" fabric that wears quite badly and seems to be totally unobtainable. The final straw came when my 2 and 3 year old boys decided that the smallish tears in the seat bases would be a good place to start hiding Matchbox cars, totally destroying the covers in the process!
So I've decided that it was time to bite the bullet and recover them. I thought I'd stick up some pictures to let people know how I did it. Note that everything I've done has been guesswork, but it seems to be tuning out OK so far.
I found some fabric on ebay that looked "right". Not the same as the original, but it looks like Westfalia might have used it. For those interested in such things it was a "chenille" fabric. I brought 3m length, and I think it's about 1.4m wide. That's enough to do 2x front seats, with a bit spare for "cock" ups. I also brought some wadding, which is like a loose fleecy backing that pads out the fabric a bit and gives a smooth finish.
I also brought a set of heavy duty "leather" sewing machine needles and a double needle to do the pattern on the seat. You also need to get a staple gun, some thick upholstery thread, and obtain permission to use a sewing machine.
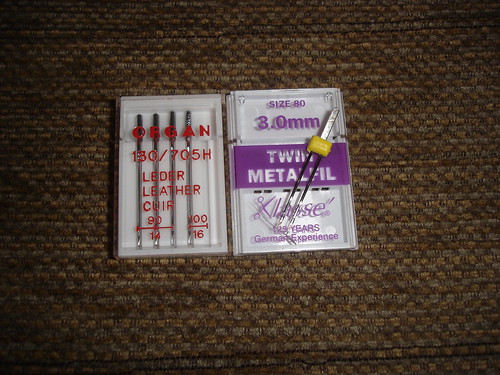
DSC02838 by
First, I took the passenger seat apart using the excellent instructions by Tee3 on this thread: http://www.brick-yard.co.uk/forum/isri-seats-the-rebirth_topic29232.html" onclick="window.open(this.href);return false;
Then I unpicked the fabric front off the seats using a buttonhole tool (ask the missus). I ironed them flat and then traced around them onto pattern making paper. You can get this from places like Hobbycraft. I used the lined stuff to make it easier to line things up. The old seats had a thin foam backing, which disintegrated everywhere, much to my wife's delight . Remember to add a bit around the edge to allow for the seam.
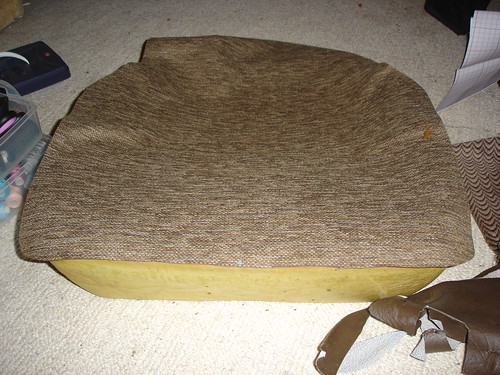
[url=http://www.flickr.com/photos/57884190@N07/6797700857/]

DSC02747 by ClubJoker84, on Flickr
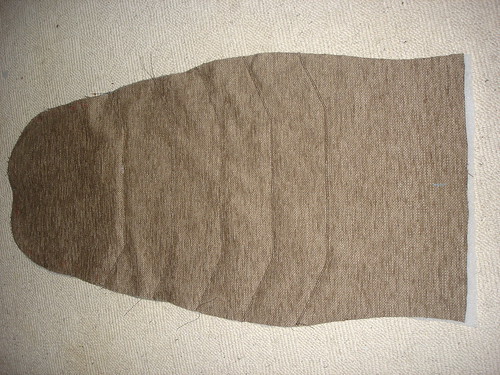
This bit was tricky to get right! I found that the best way to do it was to keep folding it in half to make sure it was symmetrical. It took several goes! Anyway, once this was done, I cut it out of the fabric:
DSC02746 by ClubJoker84, on Flickr
This is where I went a bit wrong and did things in the wrong order, but I've put them in the right order for this thread!
I copied the pattern off the seats onto a piece of tracing paper and then onto the pattern I had made (taking time to ensure everything was symmetrical). The neat version was then transferred back onto tracing paper, which was pinned onto the fabric. The idea is to make a sandwich with tracing / greaseproof paper on the bottom, then wadding, then the seat fabric and finally the tracing paper with the pattern on on the top. The paper on the bottom is to stop the wadding catching on the sewing machine foot. You sew through it and then simply rip it off afterwards - thanks to my Mum for this tip!
You will need to do a practice bit before you start sewing the real thing! Here's mine showing the layers.
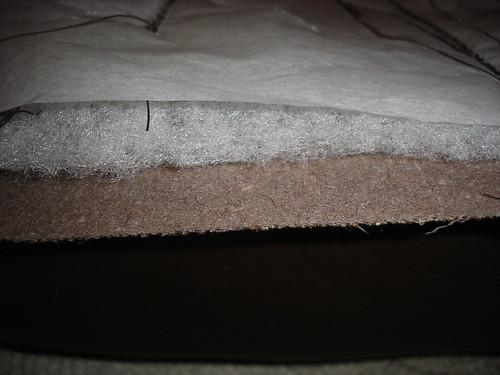
DSC02839 by ClubJoker84, on Flickr
Once you've had a good practice and got all the sewing machine settings right (just play with it until it looks right, you will probably need to take advise from whoever you are borrowing the machine from!), then pin up the various layers on the actual new seat covers and set on the pattern.
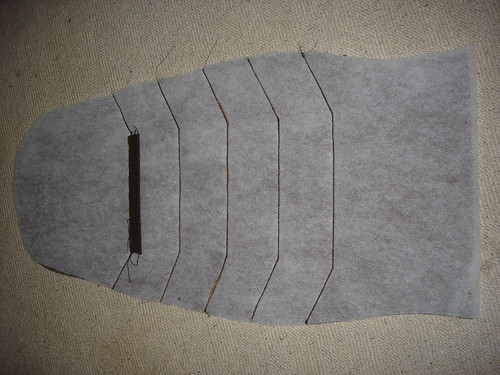
DSC02830 by ClubJoker84, on Flickr
Most difficult bit with this is getting the loop of fabric that tensions the fabric under the headrest sewn in the right place. Pin in carefully in the right place to line up with the hole in the seat back and go slow with the machine. You can see it in the above picture towards the top of the seat. Here’s what it looks like from the front:
DSC02829 by ClubJoker84, on Flickr
Quite subtle, but it makes all the difference in the flesh. Do this for the seat back and base.
The foam on my seat bases had sagged, so I cut a new piece to build them up with. This was cut to a shape that seemed right using a very sharp, straight-edged kitchen knife. I then glued it in place using Copydex:
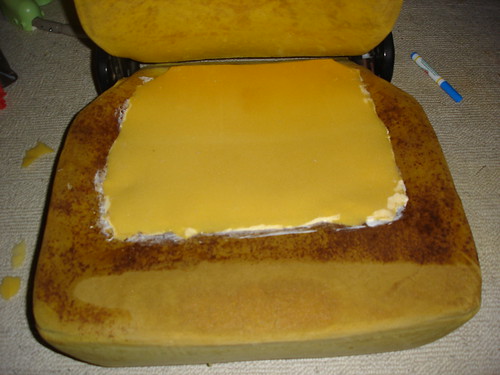
DSC02832 by ClubJoker84, on Flickr
Next step was to hand stitch the covers together. The idea is only to tack them together so that you can sew them on the machine once you are happy everything is in the right place. I was re-using the brown vinyl, so I just put this back on the seats inside out and sewed through the original holes. I used a bright red thread so that I could pick it back out easily once it was machine sewed. This is bloody tedious and takes longer than you think! To help you line it all up, the original vinyl seems to have a little notch cut into it that marks the middle. Here's the back being tack stitched and a close up of the stiches. No need for anything fancy, it only has to hold together whilst you sew it properly on a machine.
DSC02780 by ClubJoker84, on Flickr
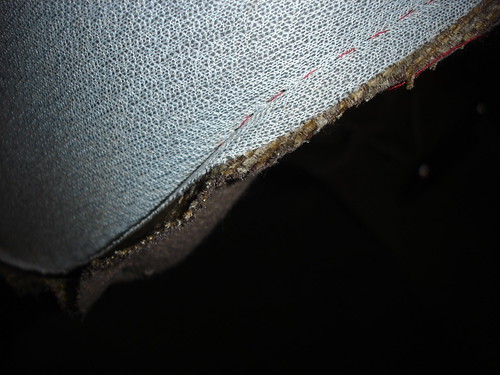
DSC02778 by ClubJoker84, on Flickr
Once your happy that it seems to fit ok, carefully sew the pieces together on the machine. Again, do this inside out. Take it slow. Use the leather needle and I used a zigzag type stitch which seemed to spread the pressure on the vinyl a bit, which should stop it splitting. I went for a fairly wide stitch so that the holes wouldn't be too close (again to stop it splitting). I won't go into details on the sewing, as I'm sure that you will all have someone in your life that can advise you on this
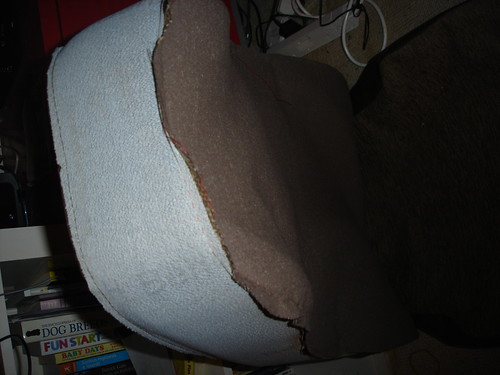
When it's done, turn it the right way out and slip it back on the seat. Try pulling it into shape. If it looks ok, then feel smug and move onto the back or base of the seat. If not, you will just have to unpick it and try to rectify. Mine seemed to come out ok. Here's a picture of the trial fitting (note not pulled tight yet):
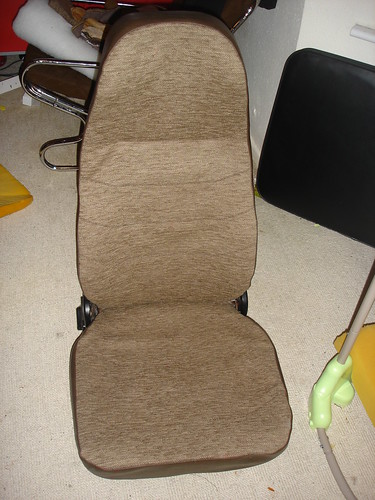
DSC02836 by ClubJoker84, on Flickr
That's as far as I've got with it. Hoping to get the first one on properly over the next few days and then move onto the other seat.
To give you an idea, I think it's taken me 2 weeks to get this far. That's probably about a couple of hours on most nights. Most time consuming bit so far has been in all the measuring and pattern making. My seats were badly torn which made this harder. If you know what you are doing with a sewing machine the whole thing will be quicker - I don't! I also had a few days break waiting for needles to arrive. I got most of the bits from Hobbycraft.
I'll stick so more pictures up when I get done. Pretty pleased so far and it should massively improve the van interior once done.
Ben

