Page 3 of 6

Re: Time to tidy my van.

Posted: 06 Jan 2015, 12:47
by Woodyyellow
Well, not a lot to up date, this is mainly a bump to stop the details being "auto pruned" by the system.
Poor weather and other commitments have somewhat slowed the work down. Some work has been possible, both front doors are hanging in my small workshop and are being painted. A dehumidifier keeps the place dry and allows the paint to dry.

Image

Image

Both front grills have now been repainted.

Image

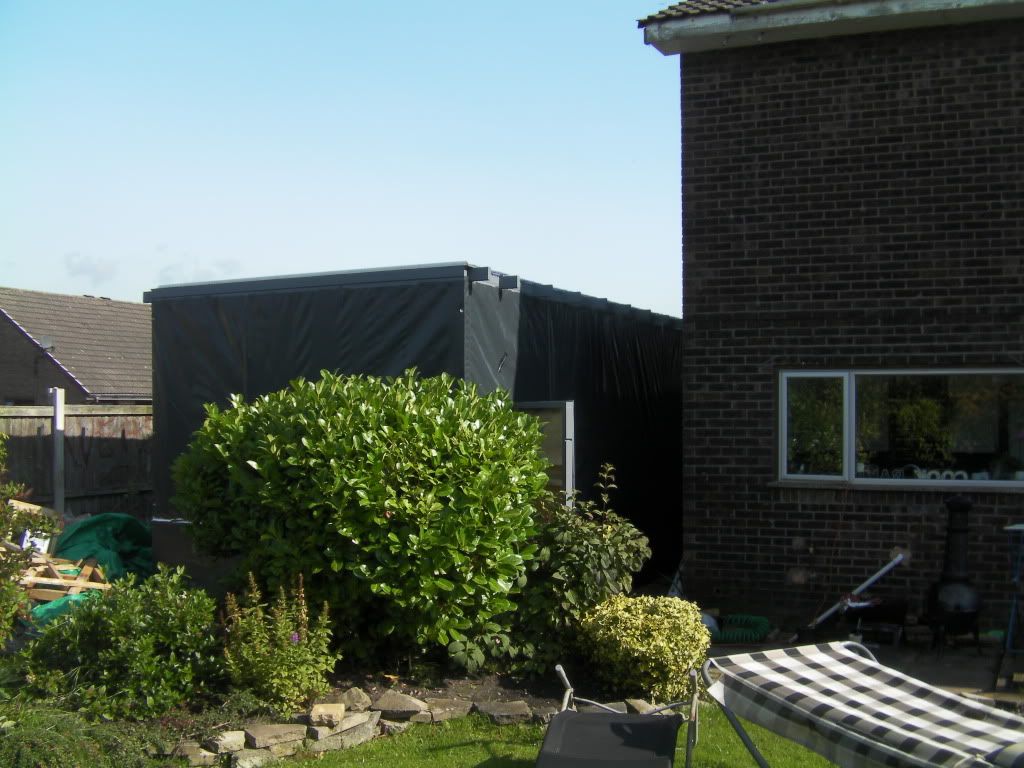
This is something I'm now working on, a poly tunnel cover for the van so that I can work on it during the winter and into the spring. Only got as far as a mockup so far, anyone else done this? Thinking of setting short lengths of scaffold into the ground at 4' centres, then using 50mm blue water pipe for the hoops, covering with a tarp.

Image

Happy new year to one and all, may your camper dreams come true!

Re: Time to tidy my van.

Posted: 06 Jan 2015, 16:58
by Dazco
You're doing a great job there . Be careful with the poly tunnel if it's an exposed site , would be a shame to damage what you have done so far .

Re: Time to tidy my van.

Posted: 06 Jan 2015, 22:43
by 300CE
Great job, keep up the good work! :ok

Re: Time to tidy my van.

Posted: 07 Jan 2015, 09:40
by Jonnyb416
Here's a picture something I built to cover my van whilst working on it. All I will say is don't under estimate the wind factor. I tried several other methods that failed due to wind and rain. Good luck. Jon.
Image

Re: Time to tidy my van.

Posted: 07 Jan 2015, 10:47
by what2do
Jonnyb416 wrote:Here's a picture something I built to cover my van whilst working on it. All I will say is don't under estimate the wind factor. I tried several other methods that failed due to wind and rain. Good luck. Jon.
Image


Are you trying to tell us you built a brick house to work on your van whilst you live in a temporary shelter at the side? A bit extravagant for a van isn't it????

Re: Time to tidy my van.

Posted: 15 Mar 2015, 20:22
by Tobias13
Hi Woody,

I am about to insulate my hi top and was wondering how you will finish yours, can lining carpet be applied direct to the insulation?

Cheers

Re: Time to tidy my van.

Posted: 16 Mar 2015, 13:51
by Woodyyellow
Hi Tobias13
The original lining was applied to thin plywood that was then screwed to blocks that were bonded to the glass fibre roof. 
Image
That lining has now deteriorated badly so will be stripped out and replaced with stretch carpet from megavan mats.

Re: Time to tidy my van.

Posted: 16 Mar 2015, 23:42
by Tobias13
Ok thanks a lot for that!! :ok

I don't have bonded blocks so will have to slick directly to insulation, let see if it works :?:

Re: Time to tidy my van.

Posted: 28 Oct 2015, 21:49
by Woodyyellow
So, it’s about time I updated this thread of mine! A lot has happened during this year, my wife has been quite ill over the last 12 months and up till mid September we have spent on average two days a week in Derriford Hospital, Plymouth, for tests, consultations and treatments. I’m pleased to say that she is now on the mend.
However, I digress, on with the update.
My last post was at the start of the year, since then I have managed to work slowly on the van, it now has 6 coats of paint, I was finding that the yellow didn’t like covering anything dark, I wished now that I should have undercoated my repair areas but I got there in the end.
So we all like pictures
A fine day painting the van and doors
Image
Rubbing down again! I have lost track of the days spent on this task
Image
The hi-top with 3 coats of white
Image
The small windows added
Image
A big day, fitting the windscreen! Watched Jed’s video and then in it went in 10 minutes
Image
Image
Then fitted the doors
Image
Followed by the other windows
Image
Image
Image
Image
Image
Image
So as you see, some progress has been made, much much more still to do!

:D

Re: Time to tidy my van.

Posted: 28 Oct 2015, 23:30
by boatbuilder
Lookin good!

Re: Time to tidy my van.

Posted: 29 Oct 2015, 19:12
by Ruralman
Love it :grin:

Re: Time to tidy my van.

Posted: 26 Mar 2016, 17:48
by Woodyyellow
So............ at long last some time spent on the van. During the winter we have had a few named storms rattle through with no damage here in South Devon but three weeks ago a big "storm with no name" came through took out a number of local trees, destroyed my chicken run and ripped the cover of the van! It's been protecting the van now since I started work on it all that time ago and kept it bone dry as it had no windows fitted.
So I needed to do some essential work, first off was to fit the "new to me" opening quarter lights and all new door window rubbers.

Image

Image

Quite some time ago I had bought a two door set of door rubber seals from Camper Van Culture, and they fitted very easily.

Image

That only left the sliding window in the sliding door to do. Do you think I could find the necessary felt channel for the sliding glass? I searched the Internet for suppliers, received a few samples and was about to give up when I came across "Hadlow Marine Services" who specialise in boat window restoration. "Bingo" they had "flock coated window strip" in just the right size to fit.
Not that easy to fit, it kept slipping out of alignment but the use of an old school science ruler worked well.

Image

With that window finished and installed that's quite a milestone for me, all windows re-fitted and a waterproof van at last!

Image

Another job to do was weld up the vent and exhaust port for the original fridge! We decided that the old fridge took up too much space for what it was and we can make better space use now it's gone. It will be for sale later with some other not needed parts! I cut a piece of steel to the correct size and put "home a made joggle" around the sides.
I've found that if you bend steel sheet through 90 degrees then carefully bend it out almost flat again, because the original bend work hardened the steel it won't fully flatten out but with some carful use of a hammer you can make a pretty good joggled edge.

Image

This patch was held in place with magnets whilst it was welded into place.

Image

Image

A small amount of filler and some paint and the jobs a good one. Two less hole in the van to allow water in!

Next on the list was to fit some 'anti drumming' to the interior panels. I've used flash band, though I know some on here have said it will always smell of bitumen :rofl but I've used this before with no smell! We will see, I can always take it out! I used a small roller that worked well to firm it down.

Image

I managed to do all the panels around the van apart from the under dash area. Need to buy a new roll for that.
Now this is where I am at the moment

Image

With better weather now expected, lighter evenings and no cover to remove every time I want to look at the van, I'm hoping for better progress this year!
:D

Re: Time to tidy my van.

Posted: 28 Mar 2016, 12:43
by Ant-t
Your van looks really good, well done with the project :D

Re: Time to tidy my van.

Posted: 06 Apr 2016, 20:02
by Woodyyellow
Today, between hail storms, managed to install an internal handle to open the tailgate. I should say that this is not my idea, seen it before, especially on "The Samba".
Two extra steel arms welded to the rear lock

Image

Image

A steel plate shaped to fit the rear door and handle added

Image

All installed with Bowden cable linking the two

Image

Very pleased, works as expected. Have a handle to fit to pull the door closed but will add that after the trim panel installed.

Re: Time to tidy my van.

Posted: 23 Apr 2016, 19:53
by Woodyyellow
Today I completed the overhaul of the pedal box, very pleased with the appearance.

Elongated pivot on the clutch pedal welded and re drilled, new clevis pin fitted.

Image

New brake master cylinder, new clutch master cylinder, and BMW e30 servo fitted. All ready to reinstall now.

Image

Of course the question now is should I refit it following the suggestion of “Silverbullet” and fit spacers to lower the pedal?