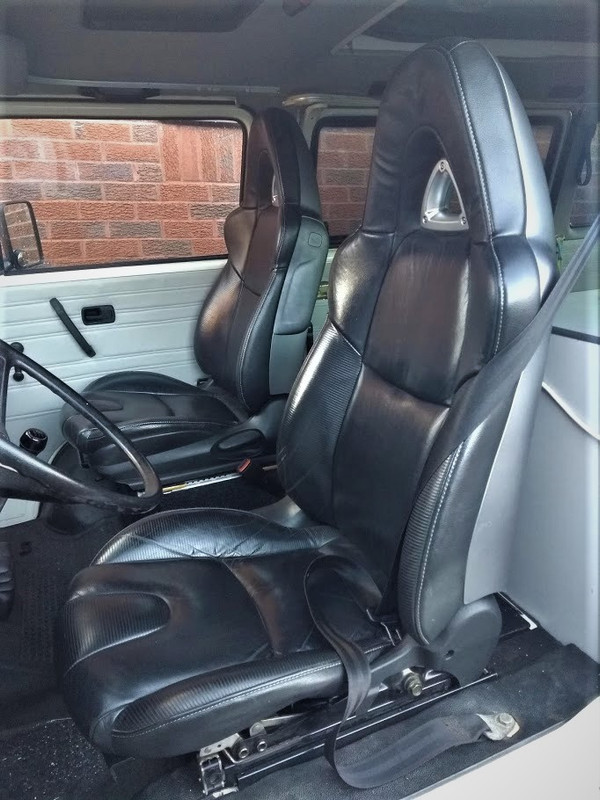
How to fit RX8 seats into a Volkswagen T25 campervan!
Step one-
Take the seats out the RX8, which is actually very easy and straight forward, just a few bolts and electrical clips and you’re done. Make sure you disconnect the battery for this as you are disconnecting the airbags with the clips here and you don’t want them to accidentally go off!

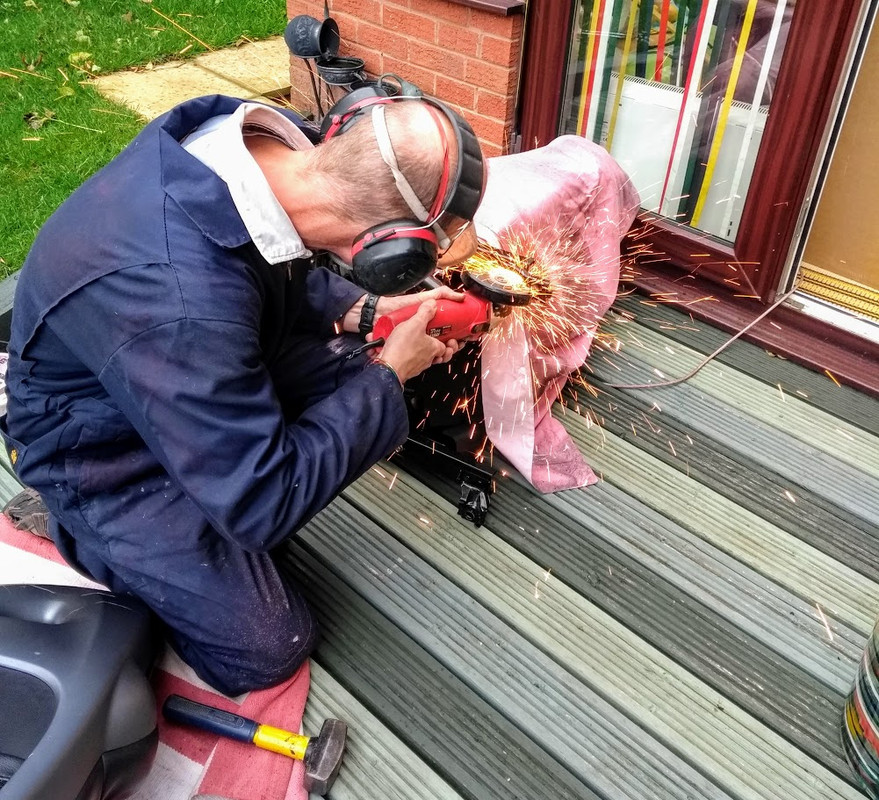
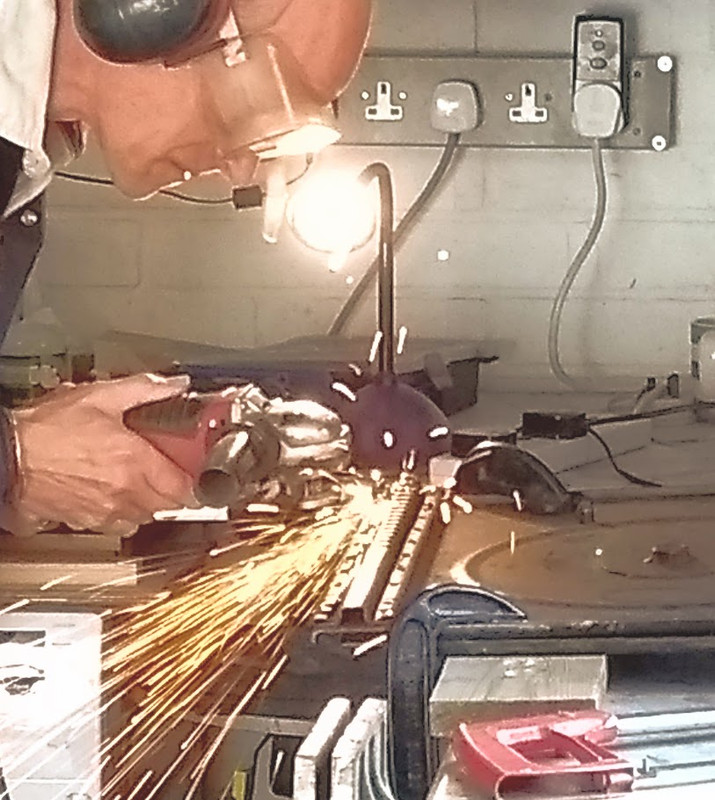
Then you’ll need to grind the old brackets and fixings off the bottom of the seat rails. This is bit time consuming, and it might take you a few grinding disks…
Step two-
Our Mazda had the uprated driver seat (electric with lumbar support) and the standard passenger seat. The standard seat is significantly lighter so we decided we could fit this onto the original swivel base from our T25 (this made things a lot more complicated but also makes the finished van soooo much better!) So, for the passenger seat you then need to grind off the old rails from swivel base, and for the driver seat you need to grid them from the van to leave flat surfaces for the new seats to be attach too.
Make sure you cover up the interior of the van really well to prevent any sparks causing damage.

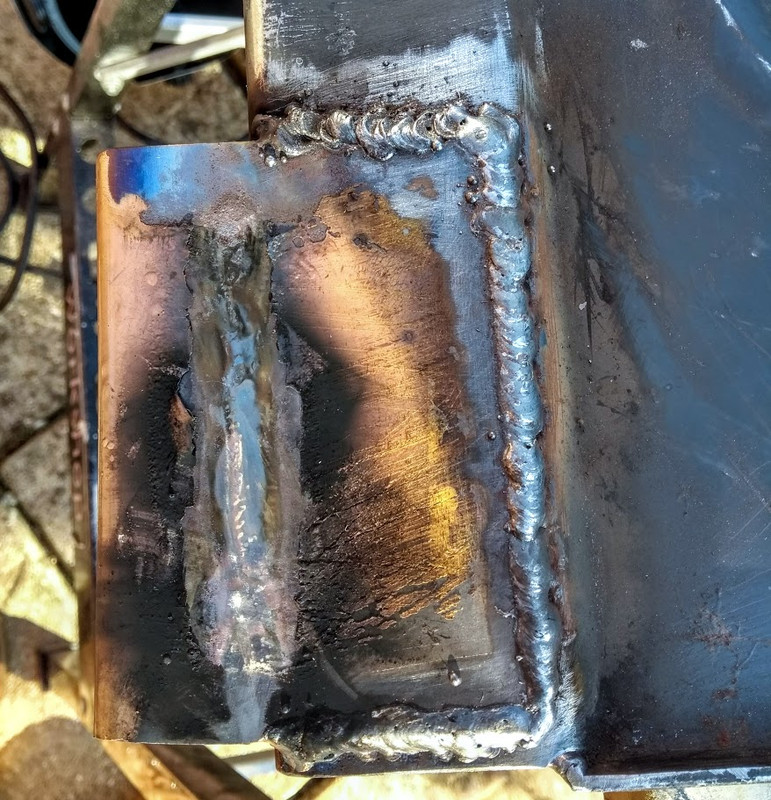
Step three-
The Mazda rails are slightly further apart than the original VW ones, this is fine for attaching them straight on to the van, but the original seats fit really tightly onto the swivel base and leave little room spare. So, for the passenger seat, after a lot of discussion and a lot of ideas, we decided the best thing to do would be to weld two plates on to one side of the swivel base to make it slightly wider. This is what I suggest you do as well (or of course you could use one long plate if you prefer).
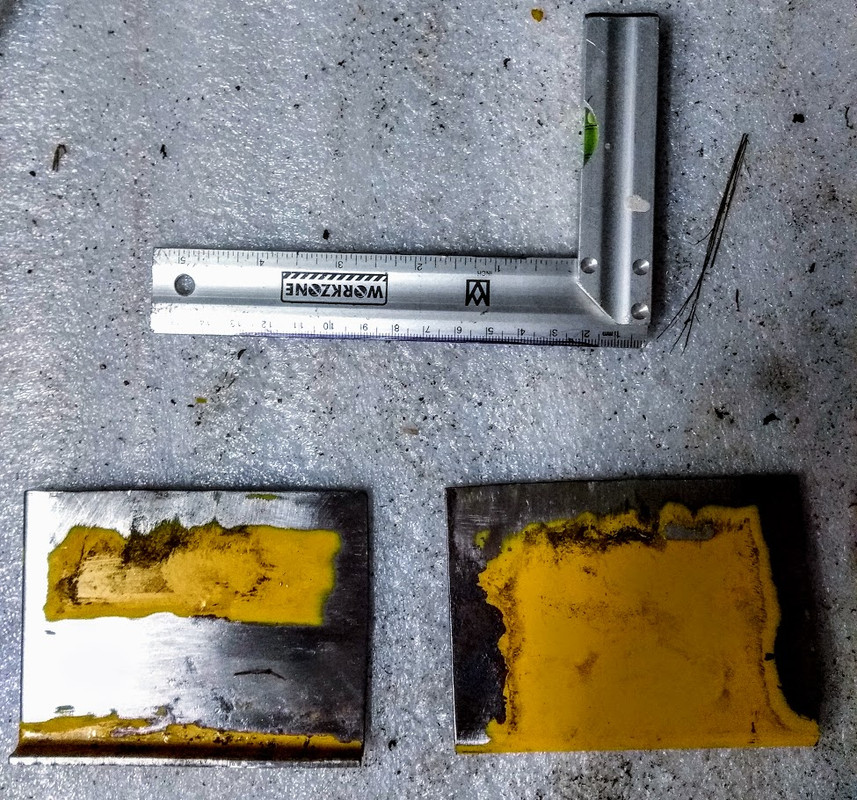
Make sure you have really solid sections of stainless steel to weld on, at least the thickness of the original plate. I also made the far side of mine curve up just like the original seat metal does for extra strength and to prevent any sharp edges.
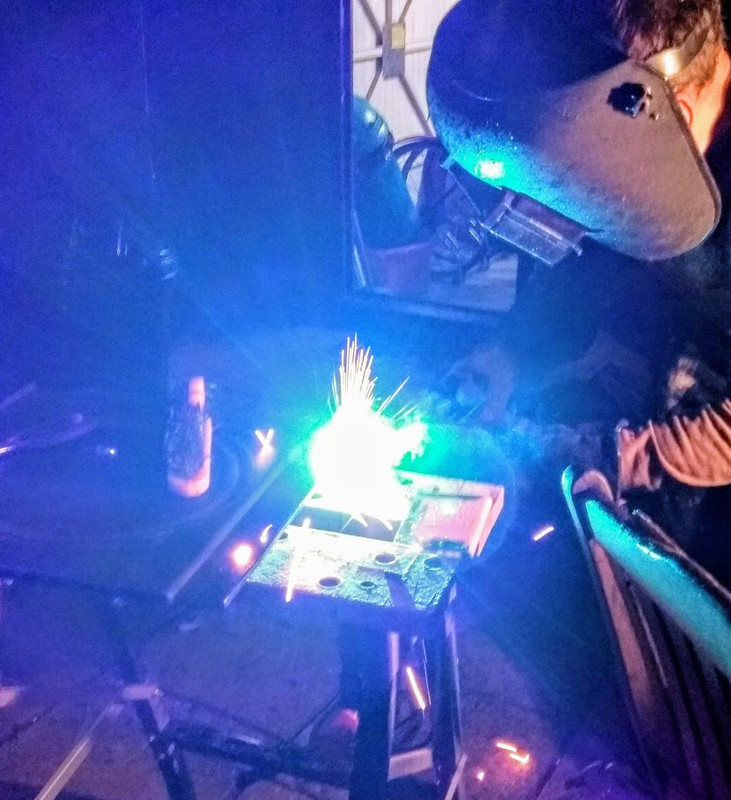
Also, it should go without saying, make sure you are confident in your welding skills here as this needs to be very strong.

Step four-
Mark out and drill holes into the swivel base where there are already holes in the seat runners. In order for the bolts to be able to go through solid metal and not be too close to the edge (leading to a possible week spot) you’ll need to mount the whole seat slightly to the left so that one rail sits solidly on the original base, and one rail on the new wielded strips. This movement makes minimal difference to the space inside the van in real terms, and is not significant enough to create any undue sideways movement or pressure on the swivel seat mountmount
Step five-
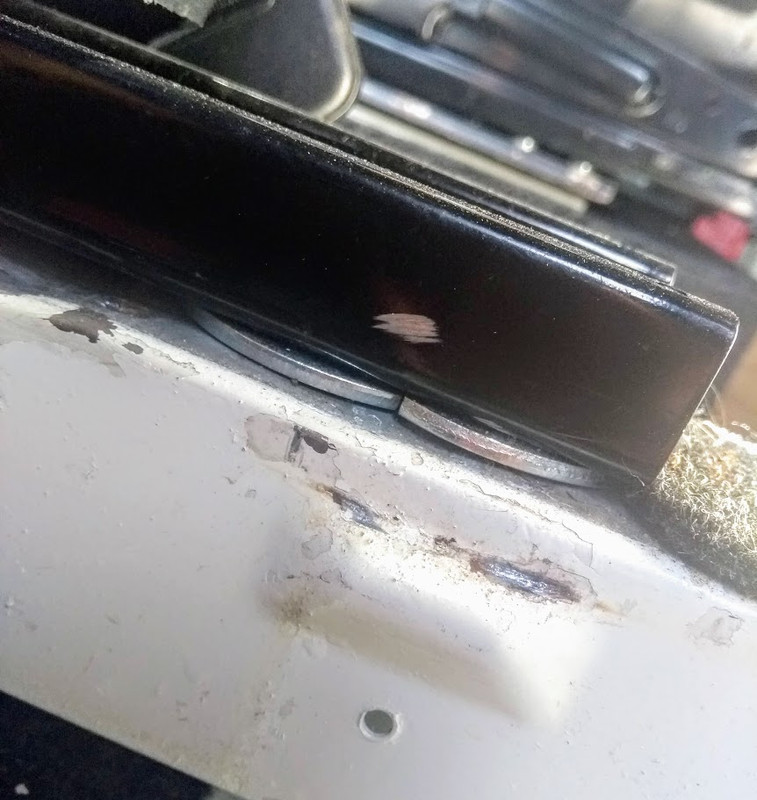
Bolt the seat on using good quality stainless steel bolts. We went for a large one on each of the 4 corners, and another 2 smaller ones in two secondary holes in the front as there was the space to get them in (so we added them for extra strength). Whiles you are doing this make sure you check the bolts heads are low enough for the seat to move forward and backwards without failing them. We also used washers where the fit wasn’t absolutely perfect for the second set of bolts to make sure they were really tight.

Where you welded the metal plates to the left hand side it might now be slightly raised up from the original base, if so add some good quality washers between the rails and the base on the right hand side to make sure the seat is 100% level and as solid as it can get.

The bottom of the seat on ours was just a bit too close for the bolt on the swivel mechanism to clear it with ease, but the metal on the bottom of the seat is fairly pliable and can be pushed in to create a big enough gap with no difficulty. This makes no difference to the way the seat feels to sit in.
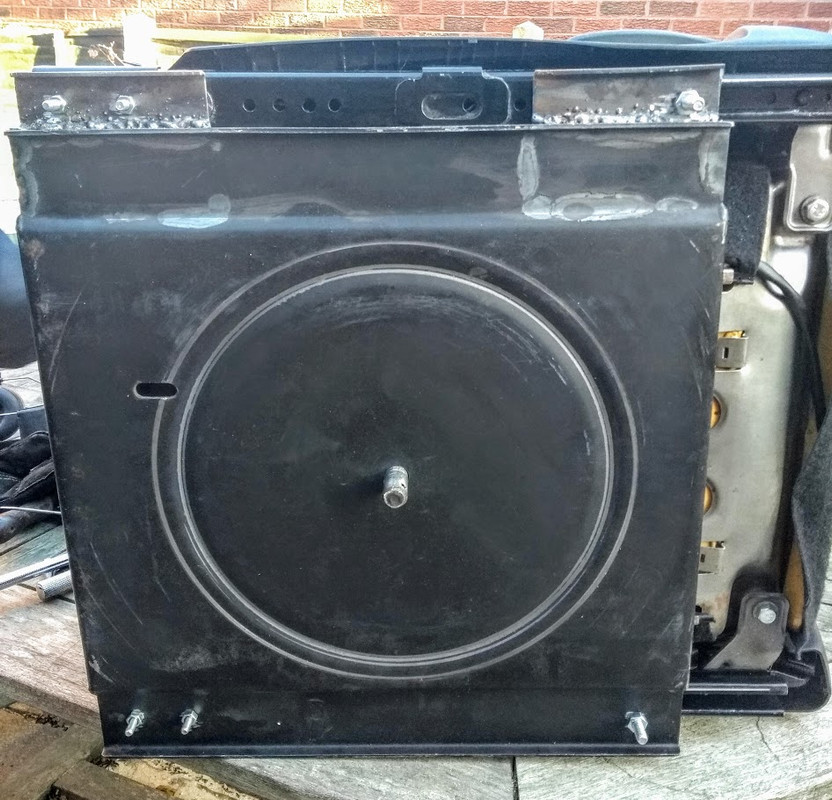
Step Six-
A nice easy one! Just bolt the swivel base (with seat attached) back on to the van. I took the base apart first and gave it a good service and added a lot of new grease as well.

If you’re like me and sit quite far back when driving, you’ll have to move the seat forward a bit before you swivel it round so the back doesn’t hit the door, but apart from that it works just like the old seat, perfect!

Step seven –
Now, move on to the electric driver’s seat. This seat is much heavier and more cumbersome to move around, so this is definitely a two-man job. This time there might not be any viable holes in the original rails to use for bolting it on, so you may need to drill some new holes in places where the metal is strong and you can access more easily.
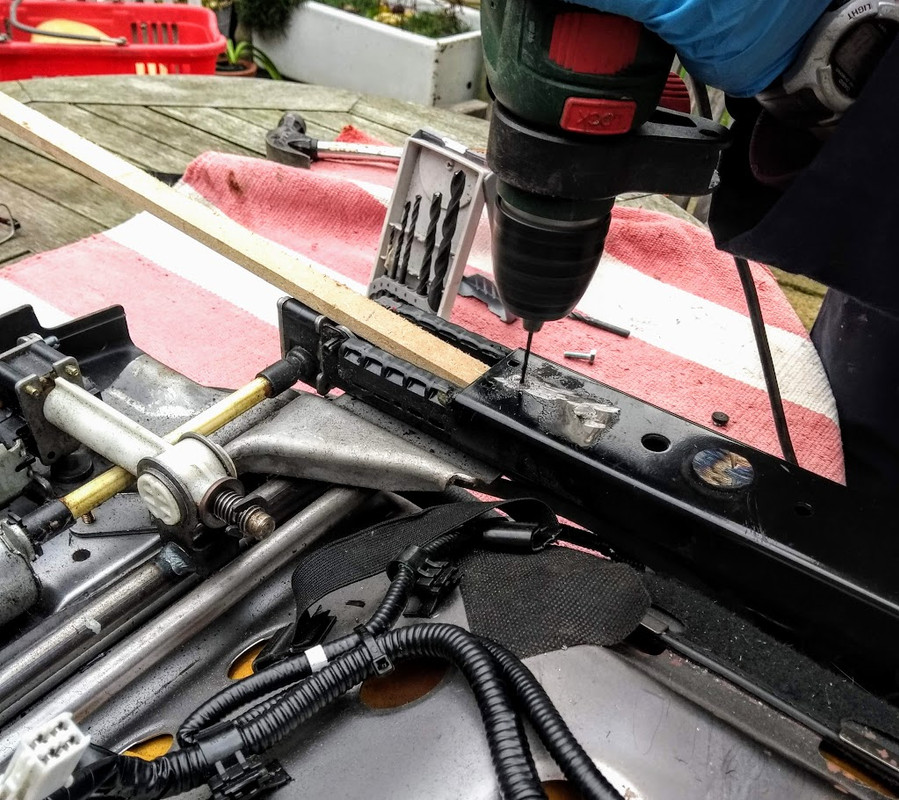
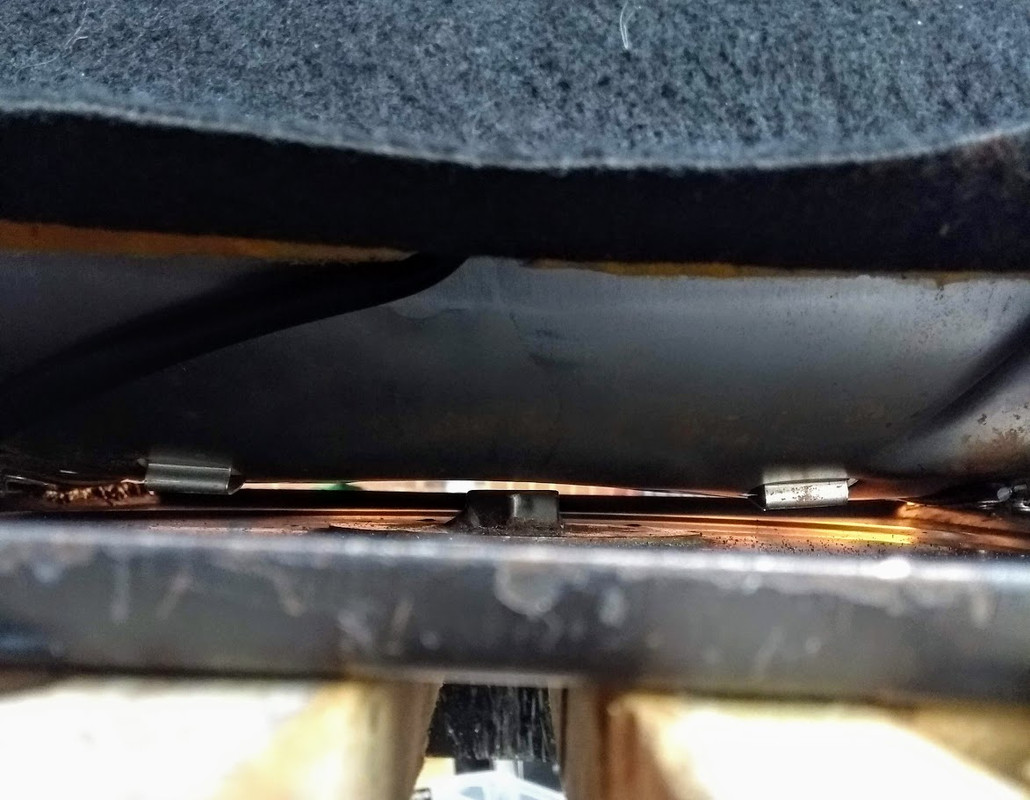
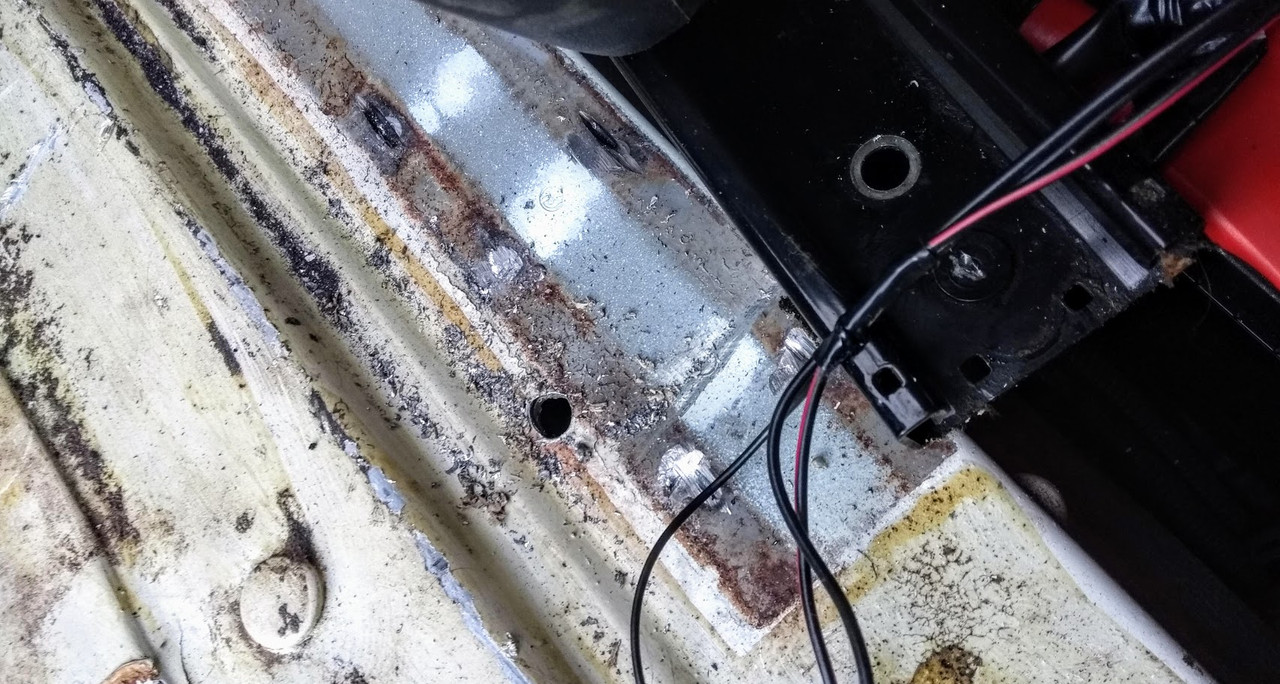
Then drill holes into the van floor to match the ones in the rails. My LPG gas cap is right next to this door, so we were very careful to check and check again where the holes would come out underneath and covered everything over to prevent spark damage as always.
Step eight –
Although the seat is bigger than the original, if positioned correctly it should just about fit in the original spot on flat metal. The only issue I could see was a little dip down at the front on the side nearest the door in the floor moulding, from where the seat rails were shorter before. We decided to spot weld on a small plate in place here just so we could add one more hole for an extra bolt at the front (making it 2 at the front, one at the rear) to again make sure the seat was really secure.

Step nine–
Bolt on the seat. To do this you’ll need to add large (we used 10mm) washers between the rails and the van, as there will be a few very slightly raises rivet ends on the under side of the seat rails that you have to keep in place when flattering these off (they hold some of the electric movement parts in place.) This makes sure the seat is perfectly flat and the weight of the chair is spread out evenly. Where there were 2 bolts close together, we cut off one side of the washer so that they fitted together nice and snug with no gaps or over hang.
Threading the nuts onto the bolts, especially with washers on the underside as well, is tricky. You have to reach right in behind the wheel on the side nearest the door, and on the side in the centre of the van you’ll need to reach up and under the metal part of the space underneath the seat. Basically, little hands (like mine) and a lot of patients helps. I eventually found out using blue tack to help keep the nut and washer in the right order on my fingers as I reached under the seat was a good trick.

To move the electric seat backwards and forwards during the fitting prosses you’ll need to hot-wired the seat up to a spare battery. After fitting the seat to the van, you can wire it in however you wish (we attached the electrical wiring for the seat’s movement up to its own fuse and into the leisure battery). We did not touch the airbags. Some people try to remove them to save weight, but in a 3.5T van I didn’t see the point of risking ruining my seats and possibly hurting myself. I zip tied the plastic clips where the power originally went into the airbags to the inside bottom of the seats, out of the way, and have done the same with the electrical plug for the heated seat elements as well. Maybe one day I will connect those ones up and have heated seats as well, but that’s a project for another day!
Step ten –
Enjoy!!!
Ok this seems like a lot of work, and I guess it was. But we had the original (all be it reupholstered) 30-year-old seats in the van and after a few hours stuck on the M25 on our way to a festival my bum and legs were numb and my back did not feel good…we just happened to be scrapping the Mazda RX8 and so a bright idea at that festival turned into this! We have since driven to Norway, Poland and Hungary, to name just a few places, and have spent many, many hours in those seats - neither me or my partner has had any complaints! The adjustable seating positions on the driver’s side are a god send when spending many hours on the road, and apart from the comfort side of thing, I think they look great!

Let me know if you want the PDF I have of theses instructions (it has a few more pics on it) and feel free to ask me any questions you have!
I might upload a few more 'how to' things as well if people are interested, so let me know what you think!

